
notice
This is documentation for Rasa X/Enterprise Documentation v1.0.x, which is no longer actively maintained.
For up-to-date documentation, see the latest version (1.4.x).
Fix Problems
Conversation-Driven Development means making incremental updates to your assistant, fixing problems as you find them in real conversations. Some problems can be fixed directly in Rasa X, while others that are more disruptive or require action code changes should be fixed outside of Rasa X. In both cases, changes should be integrated into your deployed assistant automatically through CI/CD.
Finding Relevant Conversations
The best way to find problems and successes in conversations is to review and tag them regularly, and then use the tags to filter conversations for those that require attention.
Filtering by Tag
While reviewing conversations, you create tags to keep track of what happened in conversations, and flag specific messages to pinpoint problems. You can filter conversations on these tags to help you find successful and unsuccessful conversations.
For example, you might have an NLU
problem tag, general successful and unsuccessful tags, or a
possible new skill tag for conversations where users ask for something you
haven’t built into the assistant yet. You’ll find out which tags are most
useful for you as you go along, or you might find you need to add new tags to
better identify problems and successes later.
Filtering by Other Indicators
Filtering by manually added tags is an accurate way to identify successes and failures, but you can also use other (less labor intensive) indicators to find conversations which are likely to be (un)successful.
For example:
You can filter conversations by those containing a fallback action, which can often highlight conversations with a misunderstood user message to annotate.
If you have some kind of feedback skill built into your bot, you can filter on positive or negative user feedback to identify potential successes and failures. User feedback can also be a good use for automated tagging, such as is done in Sara the demo bot.
You might find that other filters specific to your assistant are good indicators for success or failure; however, any indicators of this kind will be imperfect, so it’s important not to rely solely on one set filter to identify problems.
Making Changes in Rasa X
Once you’ve identified a problem in your assistant, you need to decide what kind of fix will take care of the problem. Sometimes fixing a problem means annotating NLU data or adding a few stories in Rasa X, and sometimes it means changing your action server code or making a more disruptive change, like merging two intents, outside of Rasa X.
Correcting NLU Predictions
The simplest kind of problem you’ll find is an NLU intent prediction that was either wrong or made with low confidence, or an incorrect or missing entity prediction. In this case, the fix is simply to annotate the message with the correct intent and/or entity in Rasa X and save it to your training data.
From there, you can push your changes to your remote Git repository via the Integrated Version Control feature and run automated tests before redeploying an updated model.
Adding Stories
For problems involving a simple action misprediction, a straightforward fix is to correct the story in Interactive Learning, and add the corrected story to your to your training data. To correct a story, select the last successful prediction in the conversation, then click Copy to interactive learning in the right hand annotation pane.
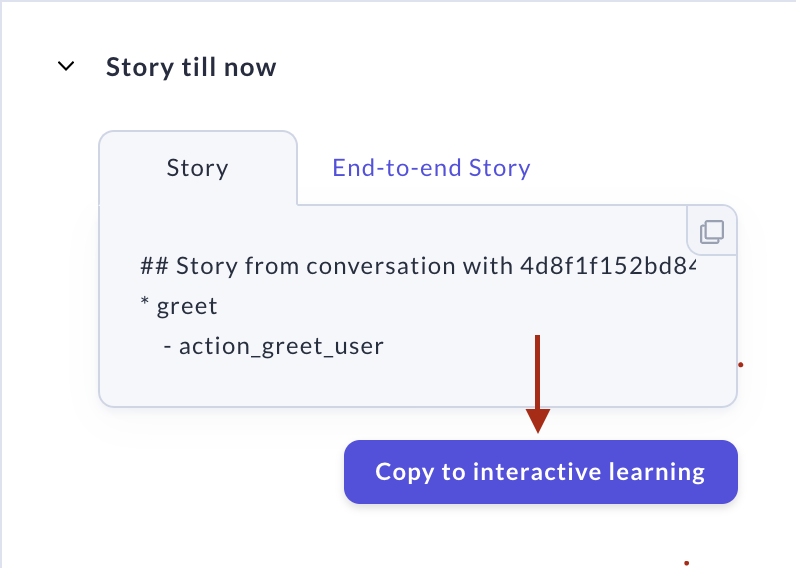
This will take you directly to the Interactive Learning screen with “strict mode” enabled, so that you can correct every prediction the assistant makes. You can also correct preceding conversation turns by hovering over any user or bot message and selecting Correct this. Once corrected, you can save the corrected story and/or save the test story as a test conversation.
note
Keep in mind that depending on your domain and stories, both the intent and entities of a user message can influence the prediction of the next action, so make sure both the intent and entities of the preceding user message are correct before correcting the predicted action(s).
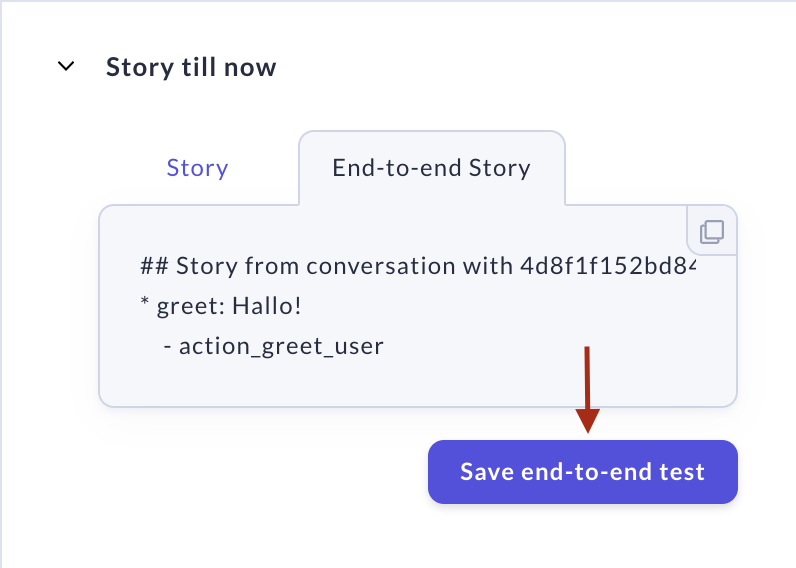
Saving Stories as Tests
Having a large and representative set of test stories is the best way to ensure any updates you make to solve one problem don’t inadvertently cause new problems. Successful conversations or conversations you correct in Interactive Learning can be saved directly as test stories and used to test your model as part of your CI/CD pipeline.
To save a conversation as a test, select Test story and Save test story on the right hand side bar. If you’re saving directly from the conversations screen, select the last message you want to include in the test story before saving it.
Updating Responses
In the case that the problem is an ambiguous or unhelpful bot response, you can update the response text in Rasa X by going to the Responses screen. If a response is being sent directly by a custom action, you’ll need to update your custom action code outside of Rasa X to fix the problem.
Making Changes Outside of Rasa X
Making Disruptive Changes
Sometimes, a fix for a problem you identify in a conversation will be more disruptive than just adding a story or NLU annotation. As a rule of thumb, if a fix requires systematically updating all stories containing a certain action or intent, it’ll probably be easiest to do in a code editor outside of Rasa X.
For example, if you notice that two intents are frequently confused and have very similar training data, you may want to merge the two intents and change your stories to diverge based on entities instead of intents. In this case, it is easiest to make the changes outside of Rasa X and run some manual tests before merging the changes in via CI/CD.
Other disruptive fixes include:
renaming an intent or entity
adding a new featurized slot which changes the logic of existing stories
adding a new custom action, or fixing one
removing all annotations and mentions of an entity
adding a custom NLU component
After you make these changes, you will want to push your updates to the Git repo connected to your Rasa X instance, and let a continuous integration (CI) server ensure that everything works as expected. Once merged, your fixes will be available in Rasa X as well.
Changing Custom Action Code
Some problems will require changes to your action server. You might notice, for example, that actions are mispredicted because a slot that should have been set by a preceding custom action aren’t present in a conversation. Or, you might see that the actions are predicted correctly, but they don’t seem to be doing the right thing or returning the right response to the user. In these cases, you need to update your action server.
Your action server is a separate service, and is not influenced by Rasa X. Therefore, changes to your action server will always need to be done outside of Rasa X.
Steps To Update Your Action Server
Make changes to your action code in a local code editor and test your changes locally.
Commit and push your changes to your Git repository.
Build a new action server container and push it to the container registry you are using.
Deploy your new action server by updating the action server tag on your Rasa X server.
Depending on your method of installing Rasa X, either re-deploy or update your Rasa X instance to register the new action server container.
Steps 3-5 can be automated via CI/CD.
Committing Changes
Using Integrated Version Control
Changes to your NLU data, stories, responses, domain and config can be incorporated into your Rasa X instance via Integrated Version Control. These include changes made inside and outside of Rasa X.
Integrating Rasa X with Git via Integrated Version Control enables your team to use the full power of the Git ecosystem:
Apply a review process for any changes to your model
Automatically run continuous integration tests to see results of changes and ensure your model’s accuracy
Minimize the time from change to production with continuous deployment
Once you have connected your assistant’s repository to your Rasa X server, Rasa X will automatically pull data from your remote repository and reflect those updates in Rasa X. At this initial stage, Rasa X will have the latest data from your remote repository on the Git server. Rasa X will indicate that you are up to date with the latest changes with a green state in the side bar.

When you make a change to your assistant in Rasa X, the side bar state will transition to an orange state. This means that you have changes that can be pushed to the remote repository when you are ready. During this time, Rasa X won’t fetch new changes from the remote repository to avoid overwriting your changes.
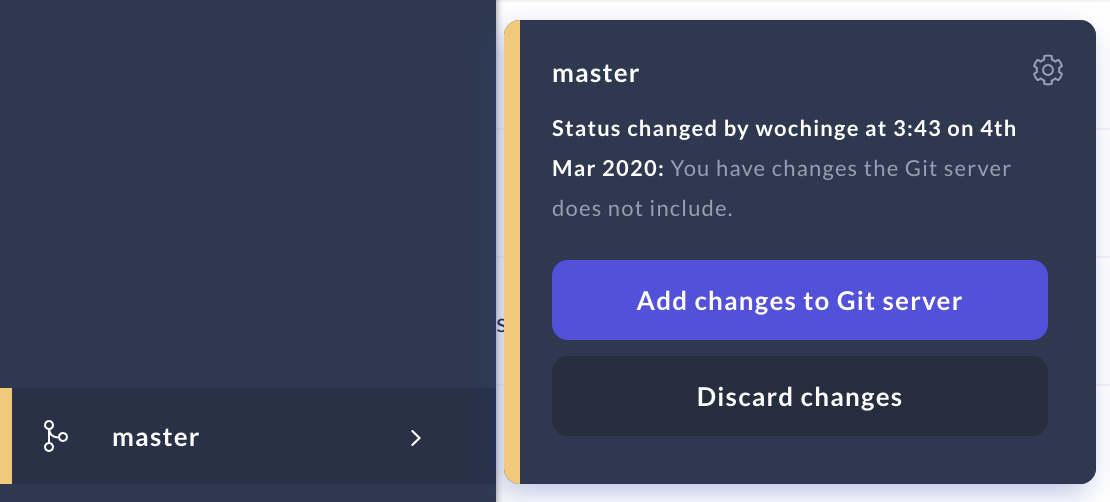
When you are finished making changes and are ready to add them to your Git server, you can commit and push them by clicking on the Git icon in the sidebar. If your remote branch has not changed while you were annotating, you can choose between
pushing changes directly to the remote branch
pushing them to a new branch
If new changes were added to the remote branch while you were annotating, you will only be able to push your changes to a new branch to avoid potential merge conflicts. Rasa X will notify you that there have been changes to the remote branch with a red state on the side bar.
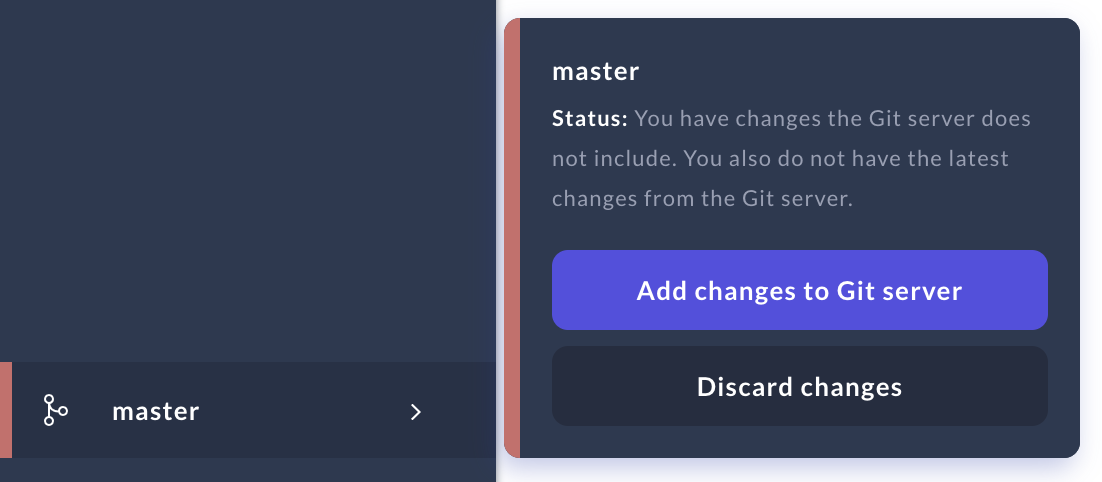
When you are ready, click on the side bar icon and follow its instructions. Once your changes are pushed, Rasa X will return to being in sync with your remote branch and will pull in the latest changes from your remote as they become available.
note
If you pushed your changes to a new branch, these changes won’t be reflected in Rasa X until you have merged them into the target branch.
You can of course also discard your changes. Rasa X will then be reset to the latest state of your remote branch.
Using CI/CD
Setting up a CI/CD pipeline in addition to Integrated Version Control enables you to automate:
Testing changes before merging them into your production/main branch
Training and deploying a new model
Updating your action server image
If you haven’t set up a CI/CD pipeline yet, your first action server change is a good time to do so. It’s easy to lose track of which updates on your branch have actually been deployed to your running action server, since it isn’t updated via Integrated Version Control.
By including unit tests for your action code in your CI/CD pipeline, you can be sure that changes to your action server are always tested before being deployed.
Set up CI/CD