How to Edit System Flows
In an ideal conversation, known as the "happy path," the assistant asks for information, and the user provides the correct response, allowing the conversation to flow smoothly. But in reality, conversations don’t always follow that perfect path. This is where system flows, come in.
It's important to note that there is a naming difference in Studio vs the rest of Rasa for this feature.
What is called a System Flow in Studio is called a Pattern in Rasa.
To see a complete list of what patterns are included in Rasa and detailed specs take a look at the reference.
A Short Intro to System Flows
System flows are pre-built flows available out of the box, designed to handle conversations that go off track. For example, they help when:
- The assistant asks for information (like an amount of money), but the user responds with something else.
- The user interrupts the current flow and changes the topic.
- The user changes their mind about something they said earlier.
If you're interested into diving more into detail about system flows and how they work, you can read more in the Learn section on Conversation Patterns.
System Flows in Studio
To find system flows, navigate to the System Flows tab of the Flows page.
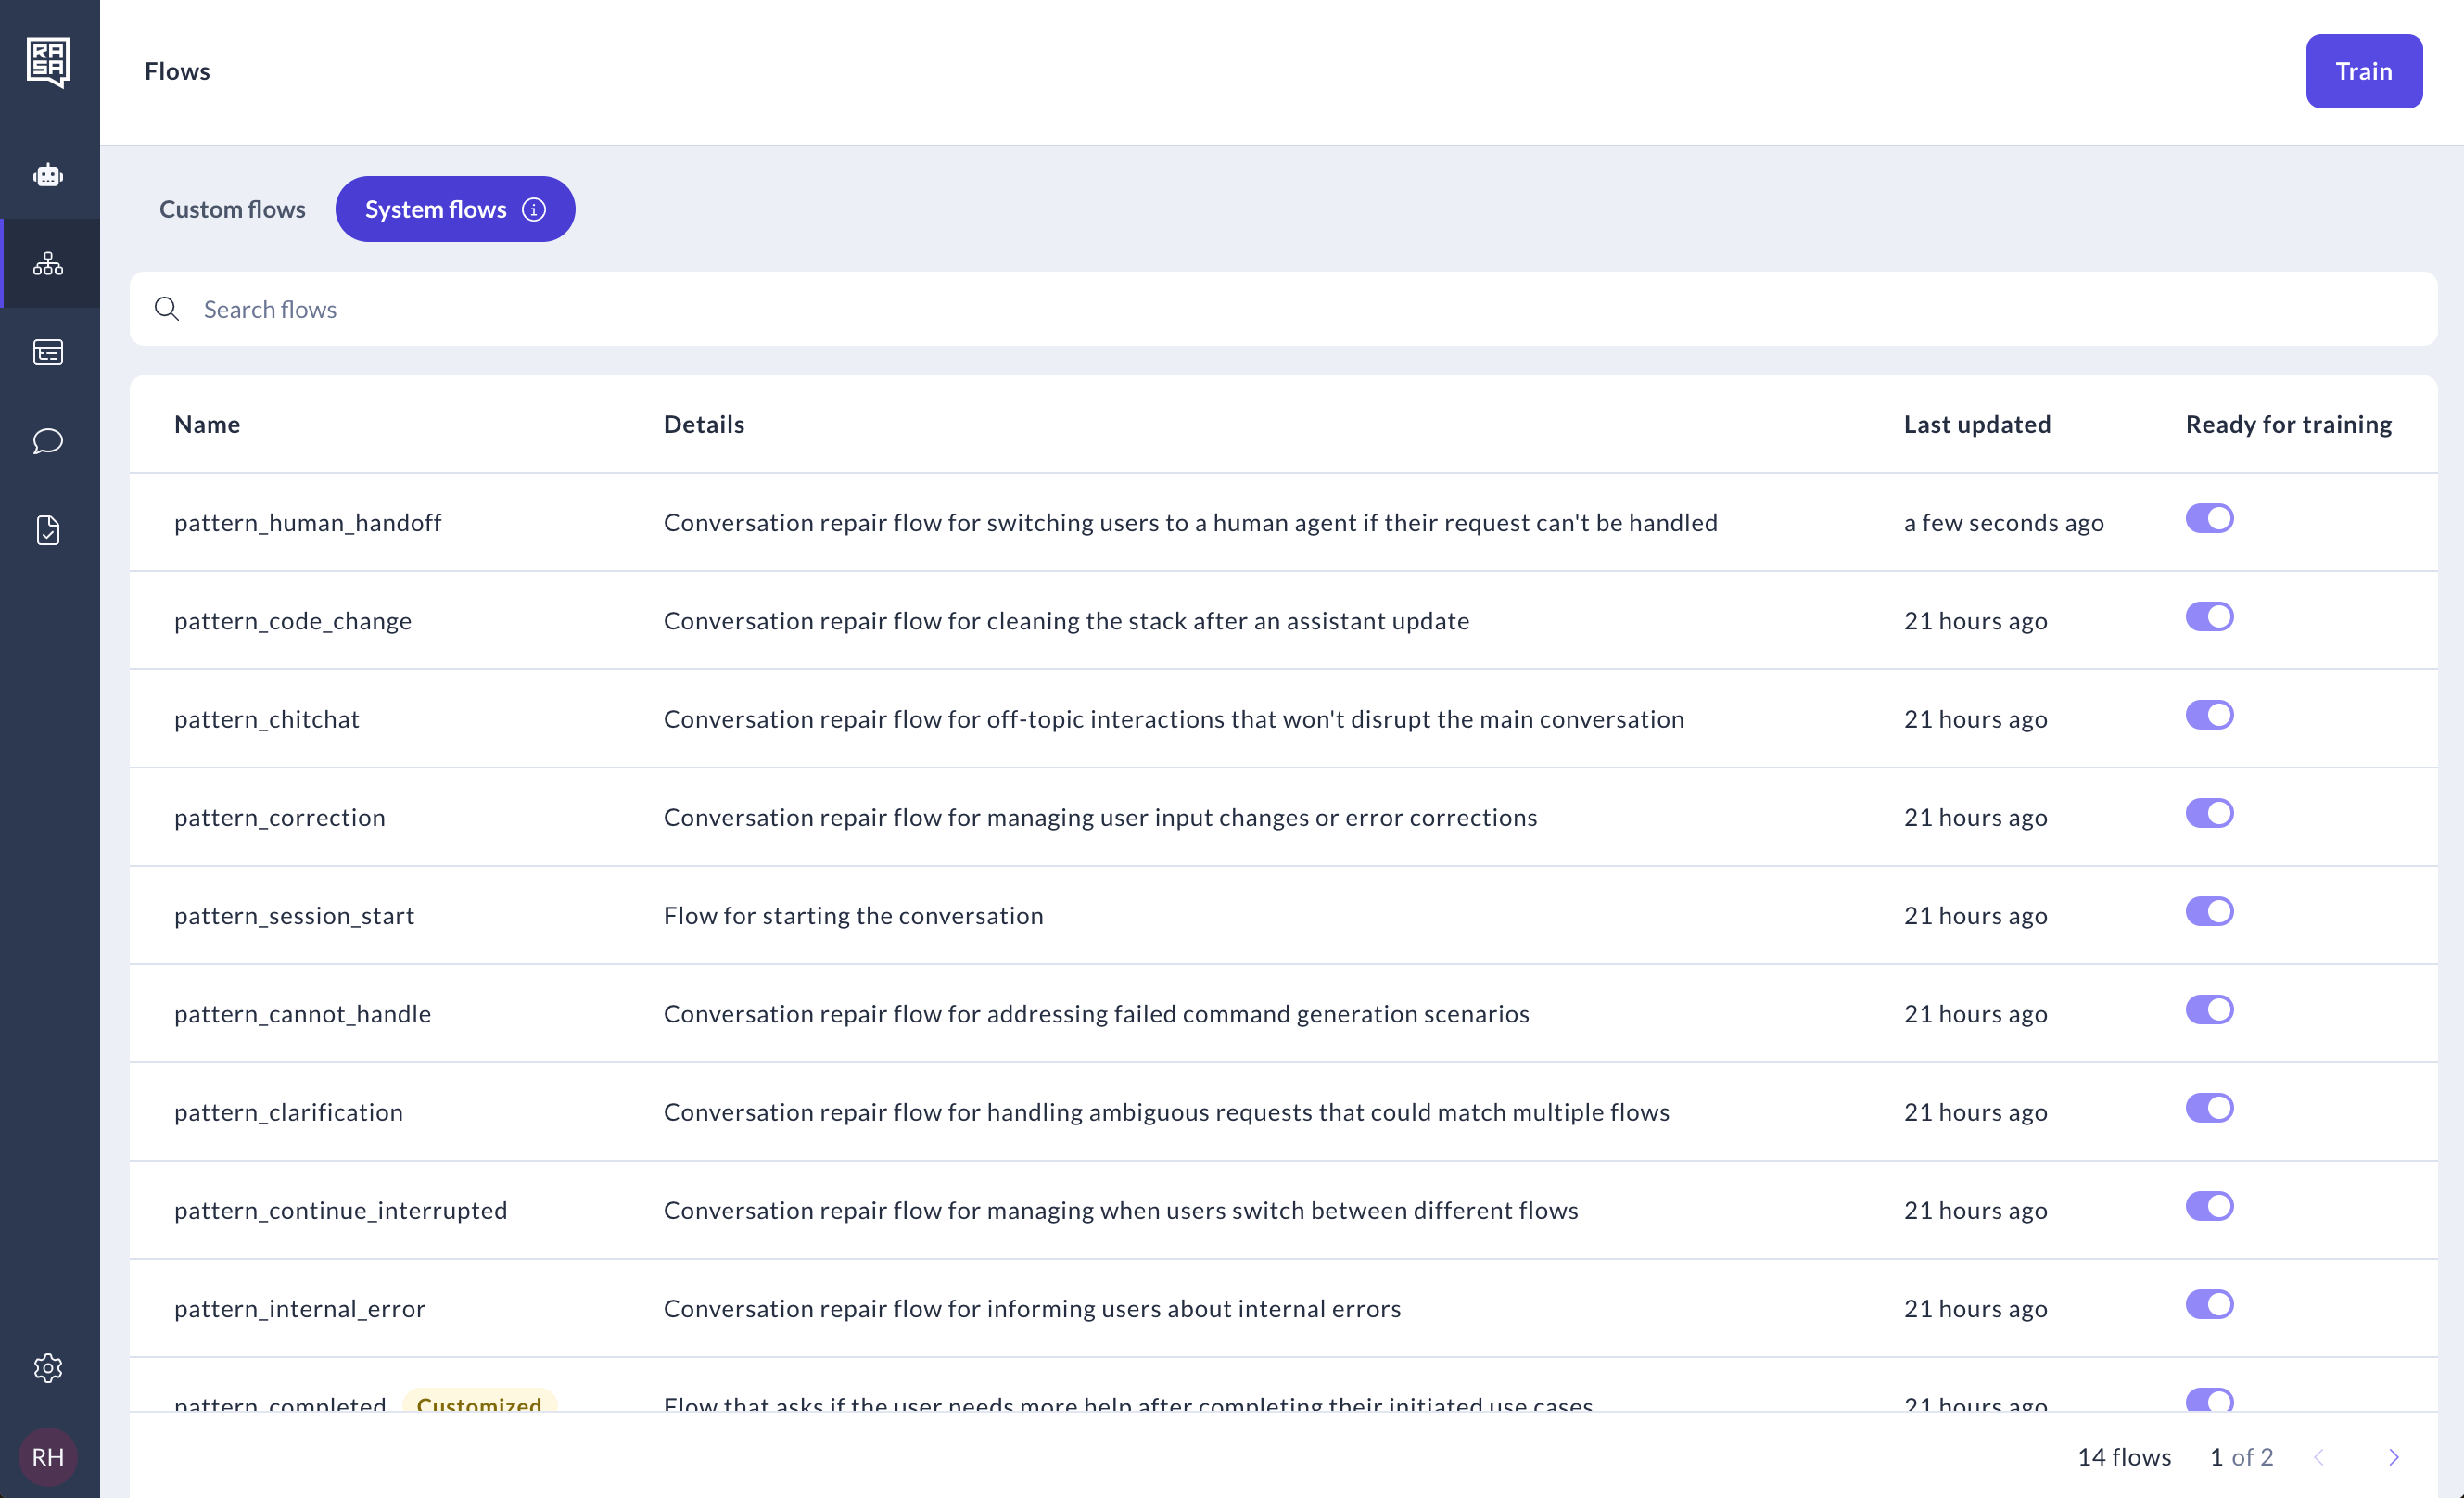
Modifying system flows
The default version of system flows is always included in your assistant model out of the box. While you can't disable them—since they are essential for the smooth functioning of your assistant—you can fully customize them to suit your specific business needs and conversation design best practices.
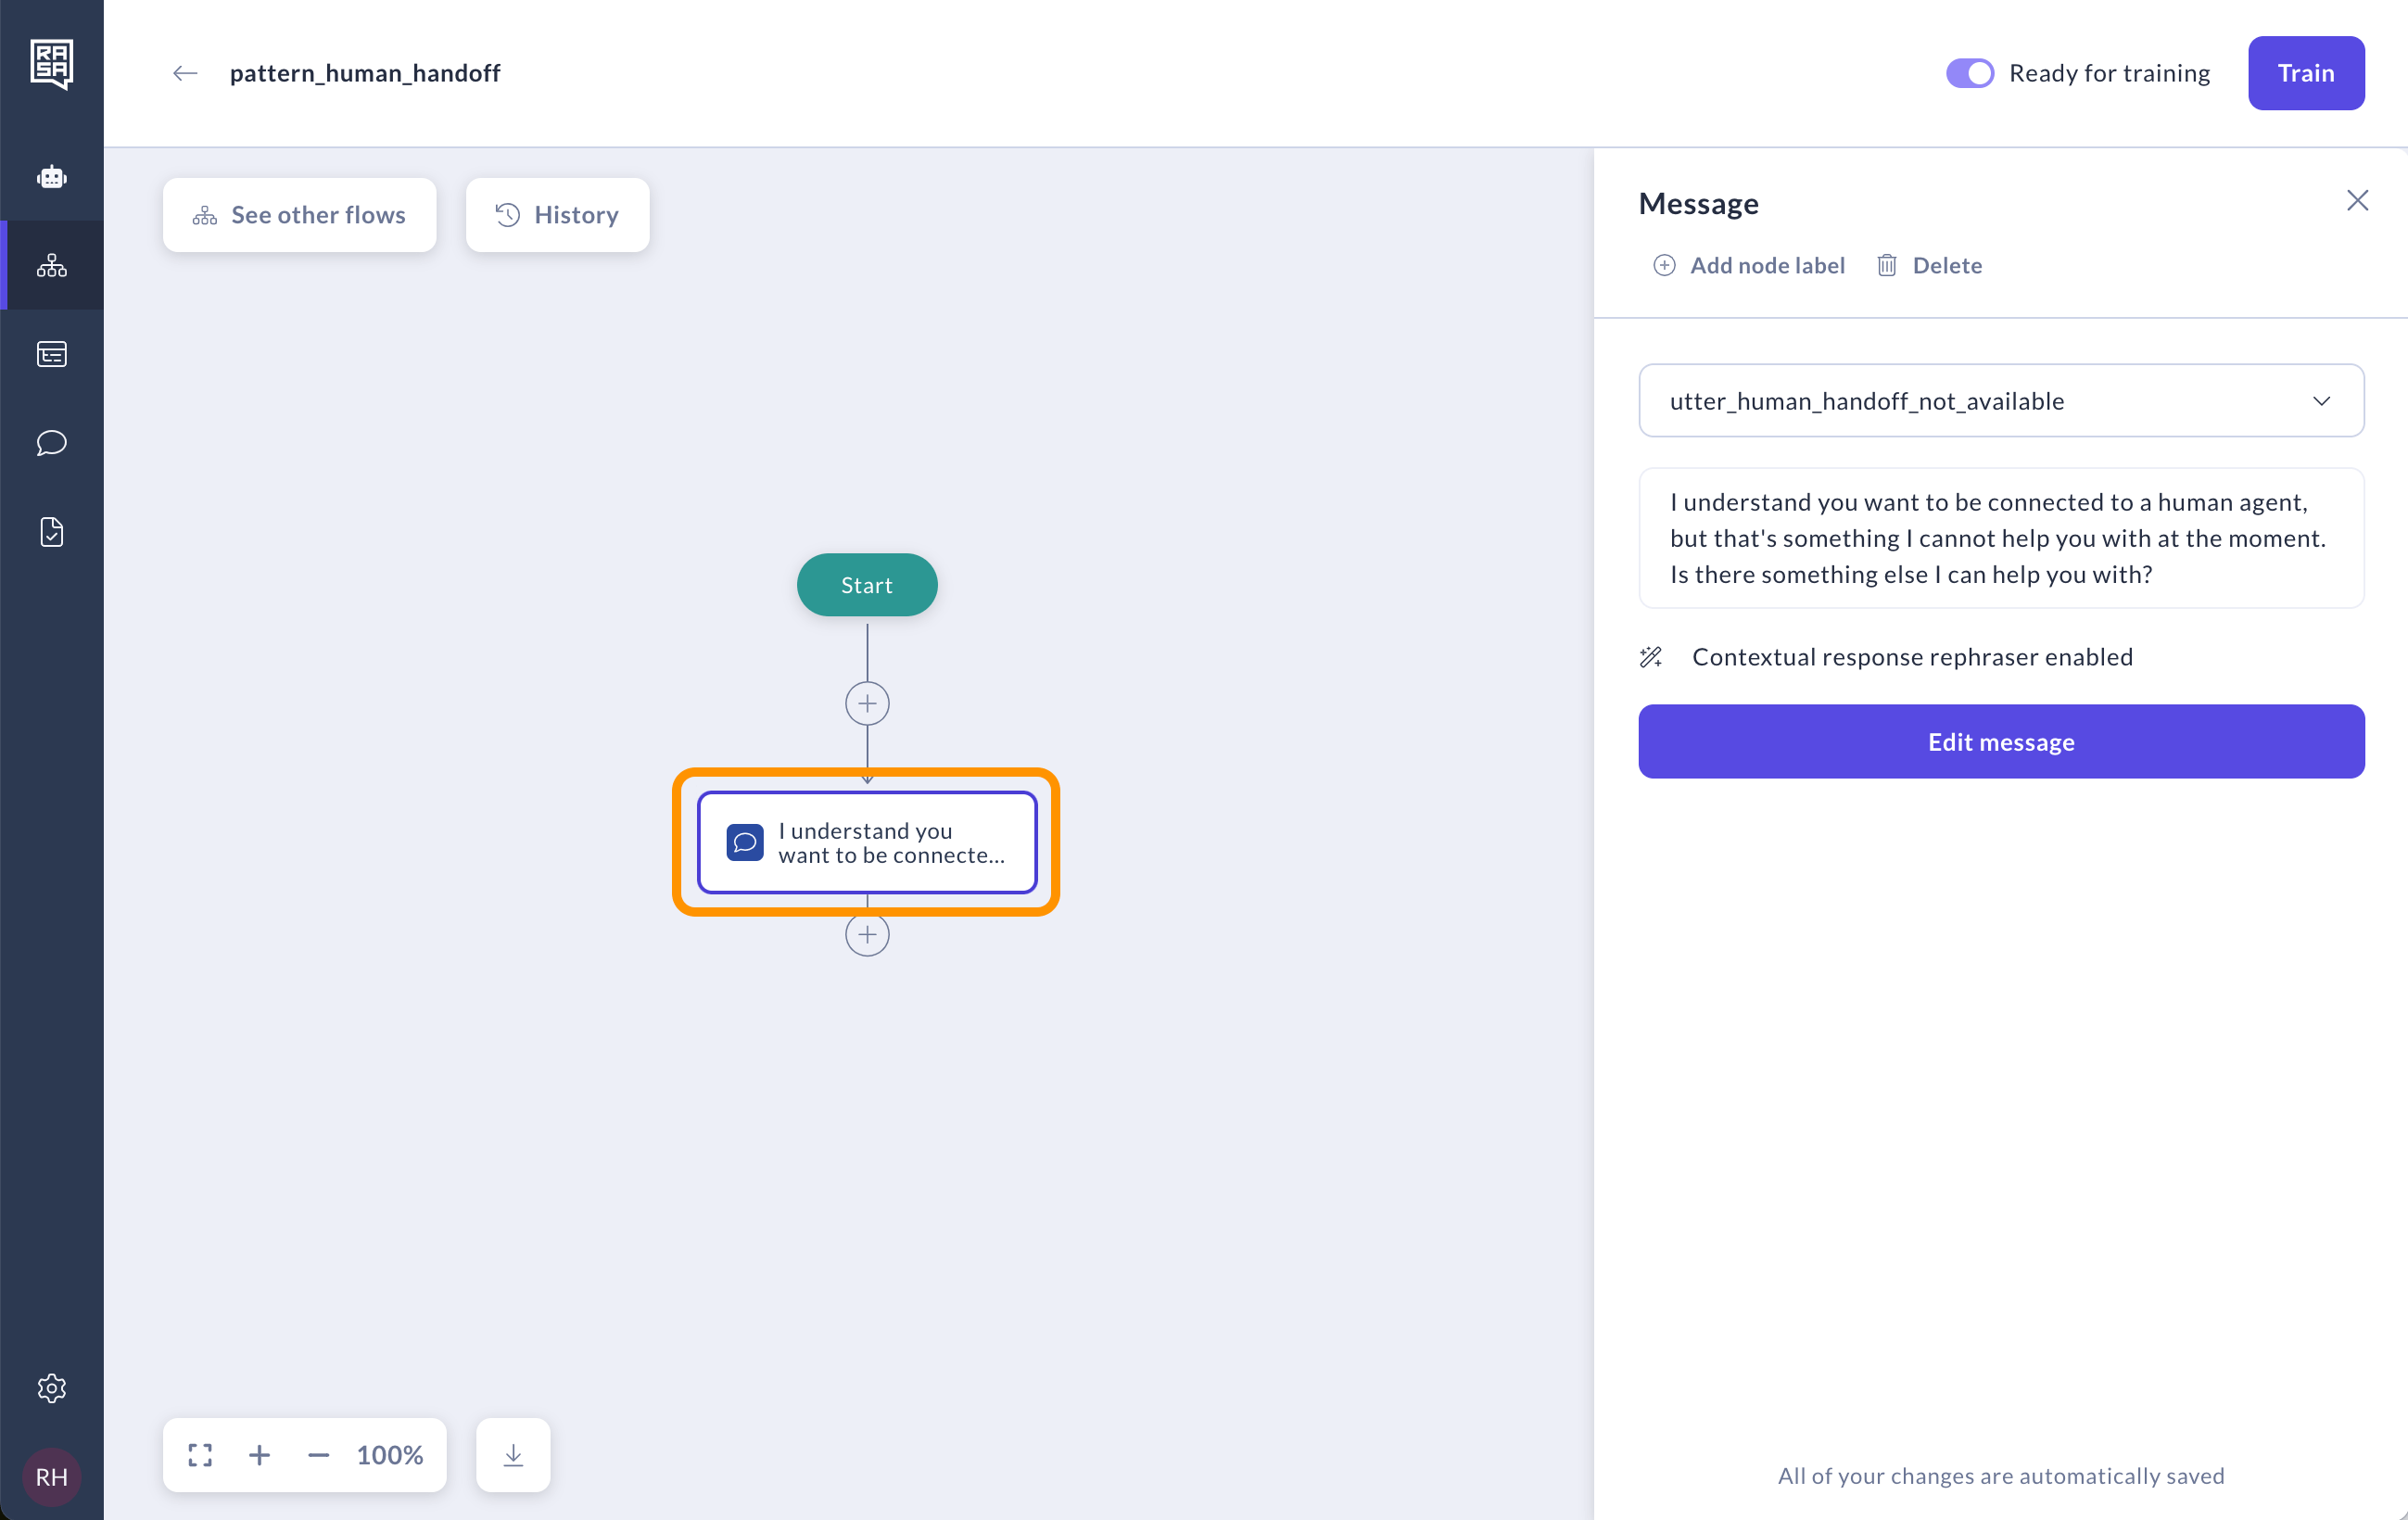
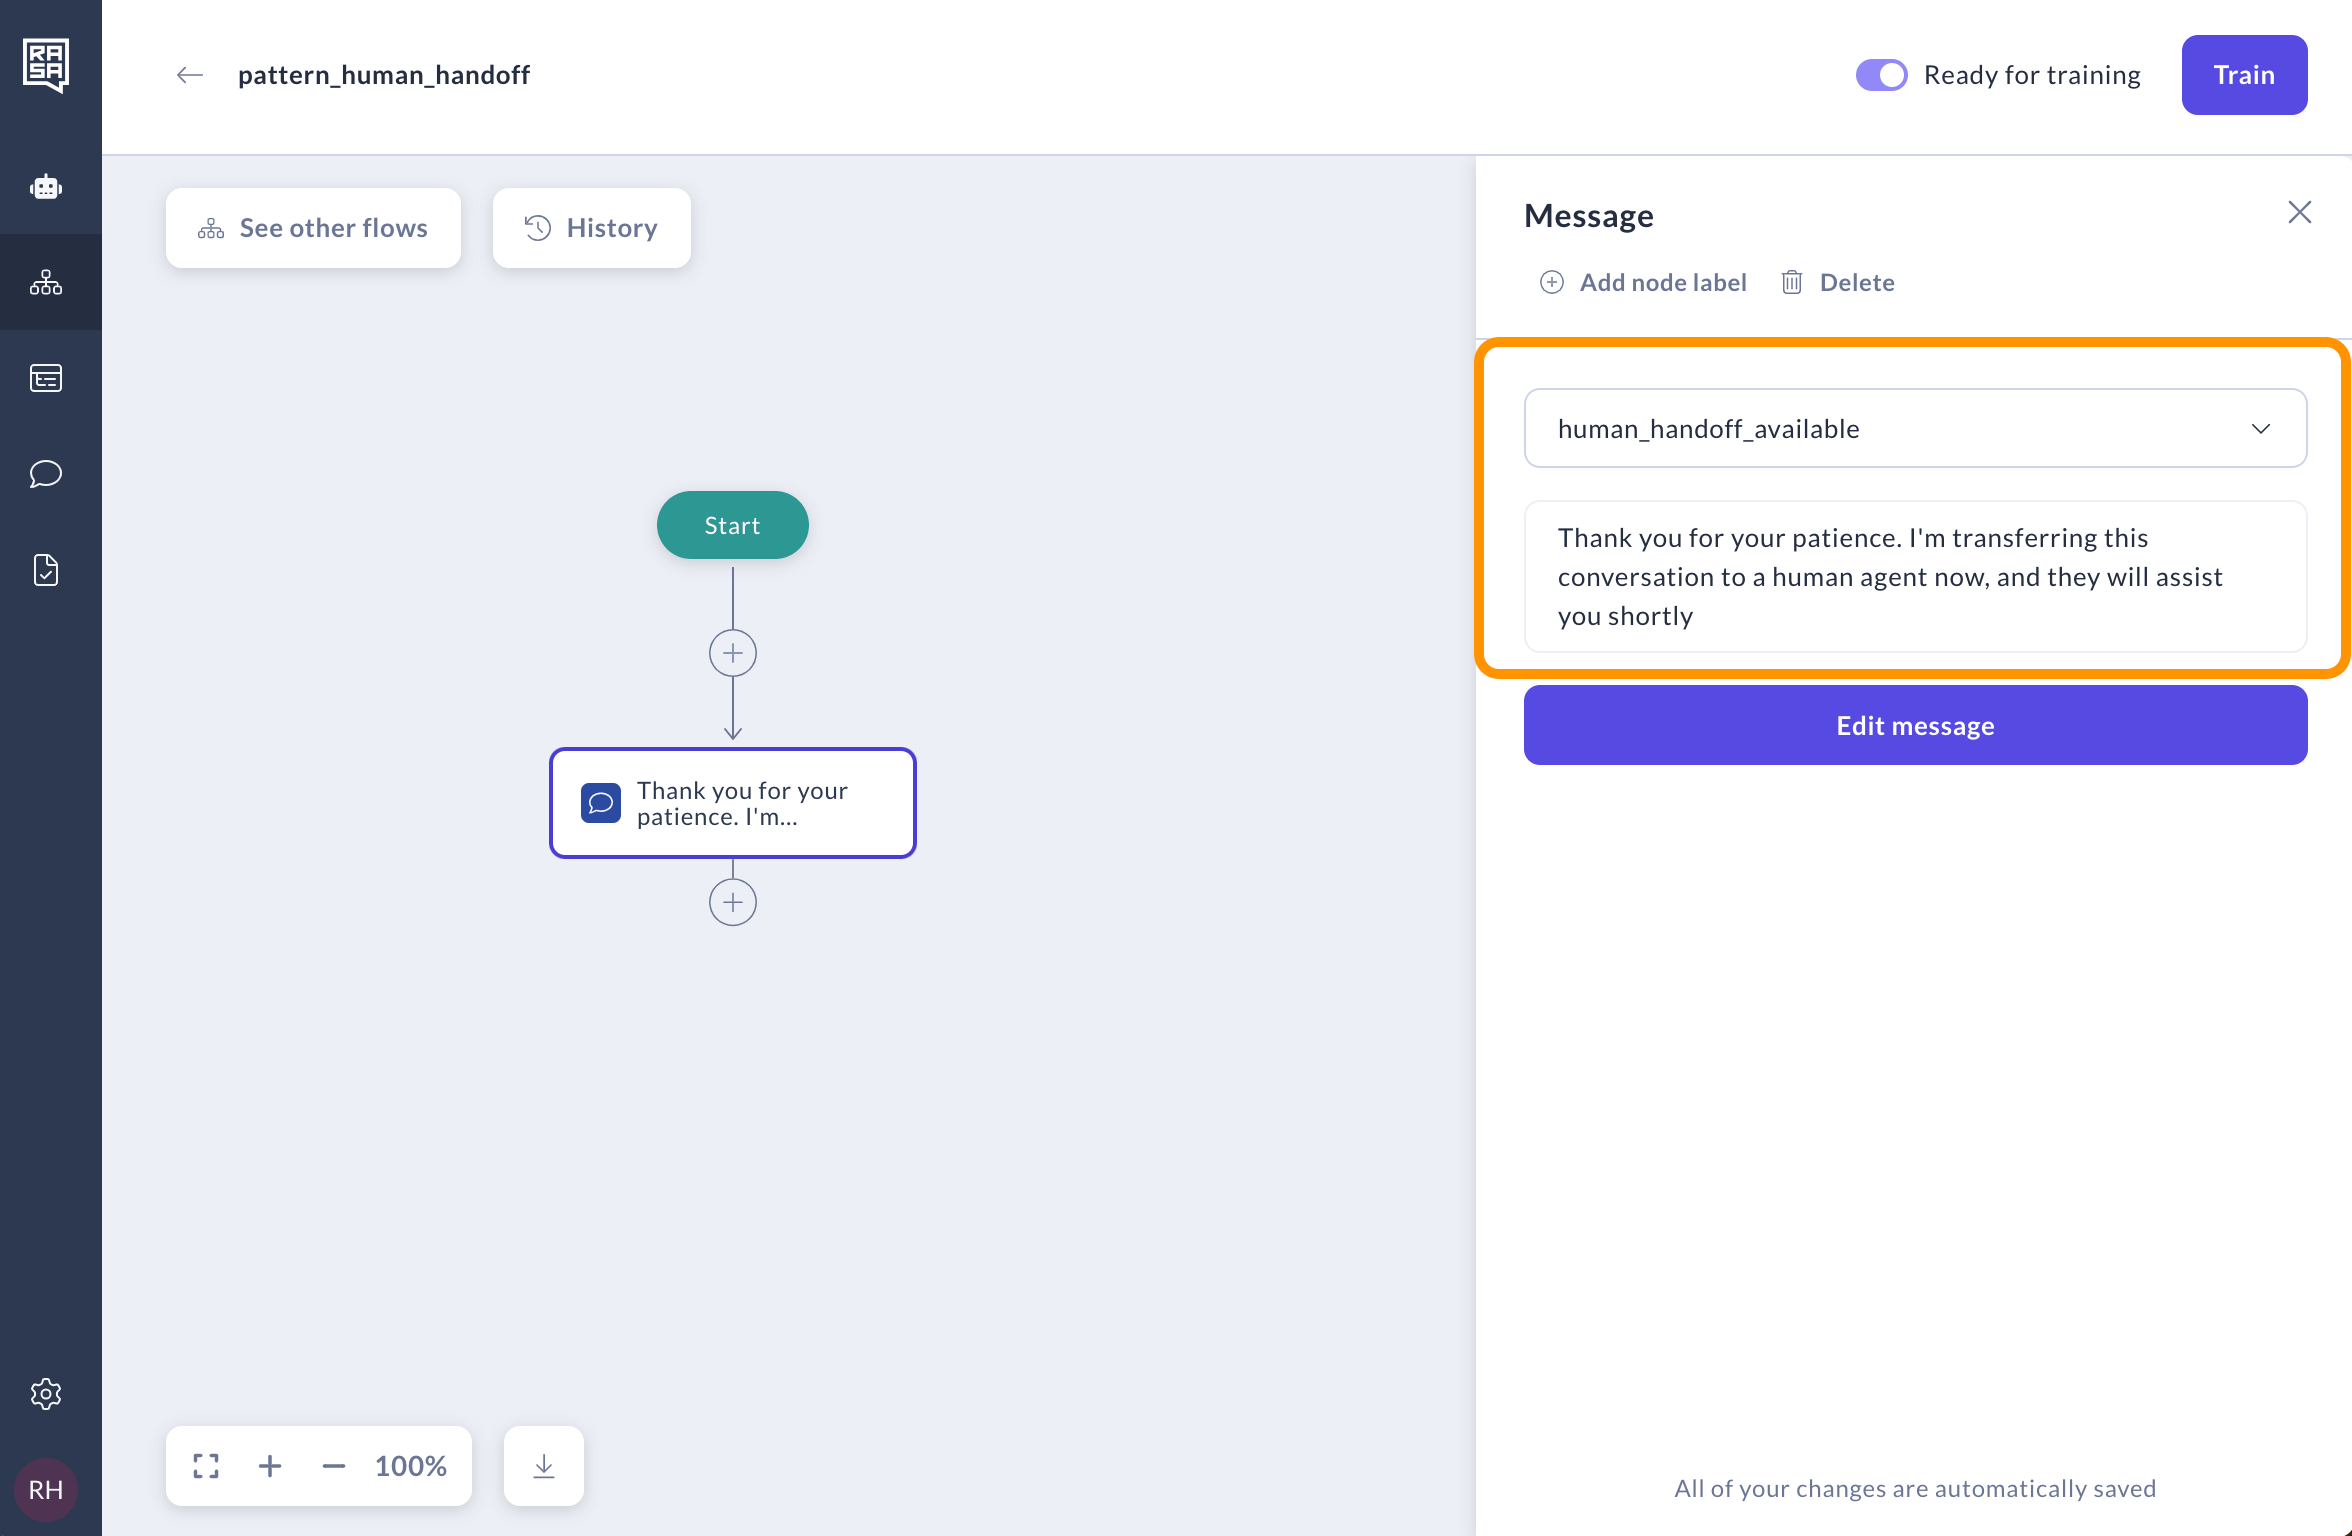
Editing system flow texts
To change the default text used in a system flow, you can override the message with a new one. Here's how:
Select the step in a system flow you want to customize.
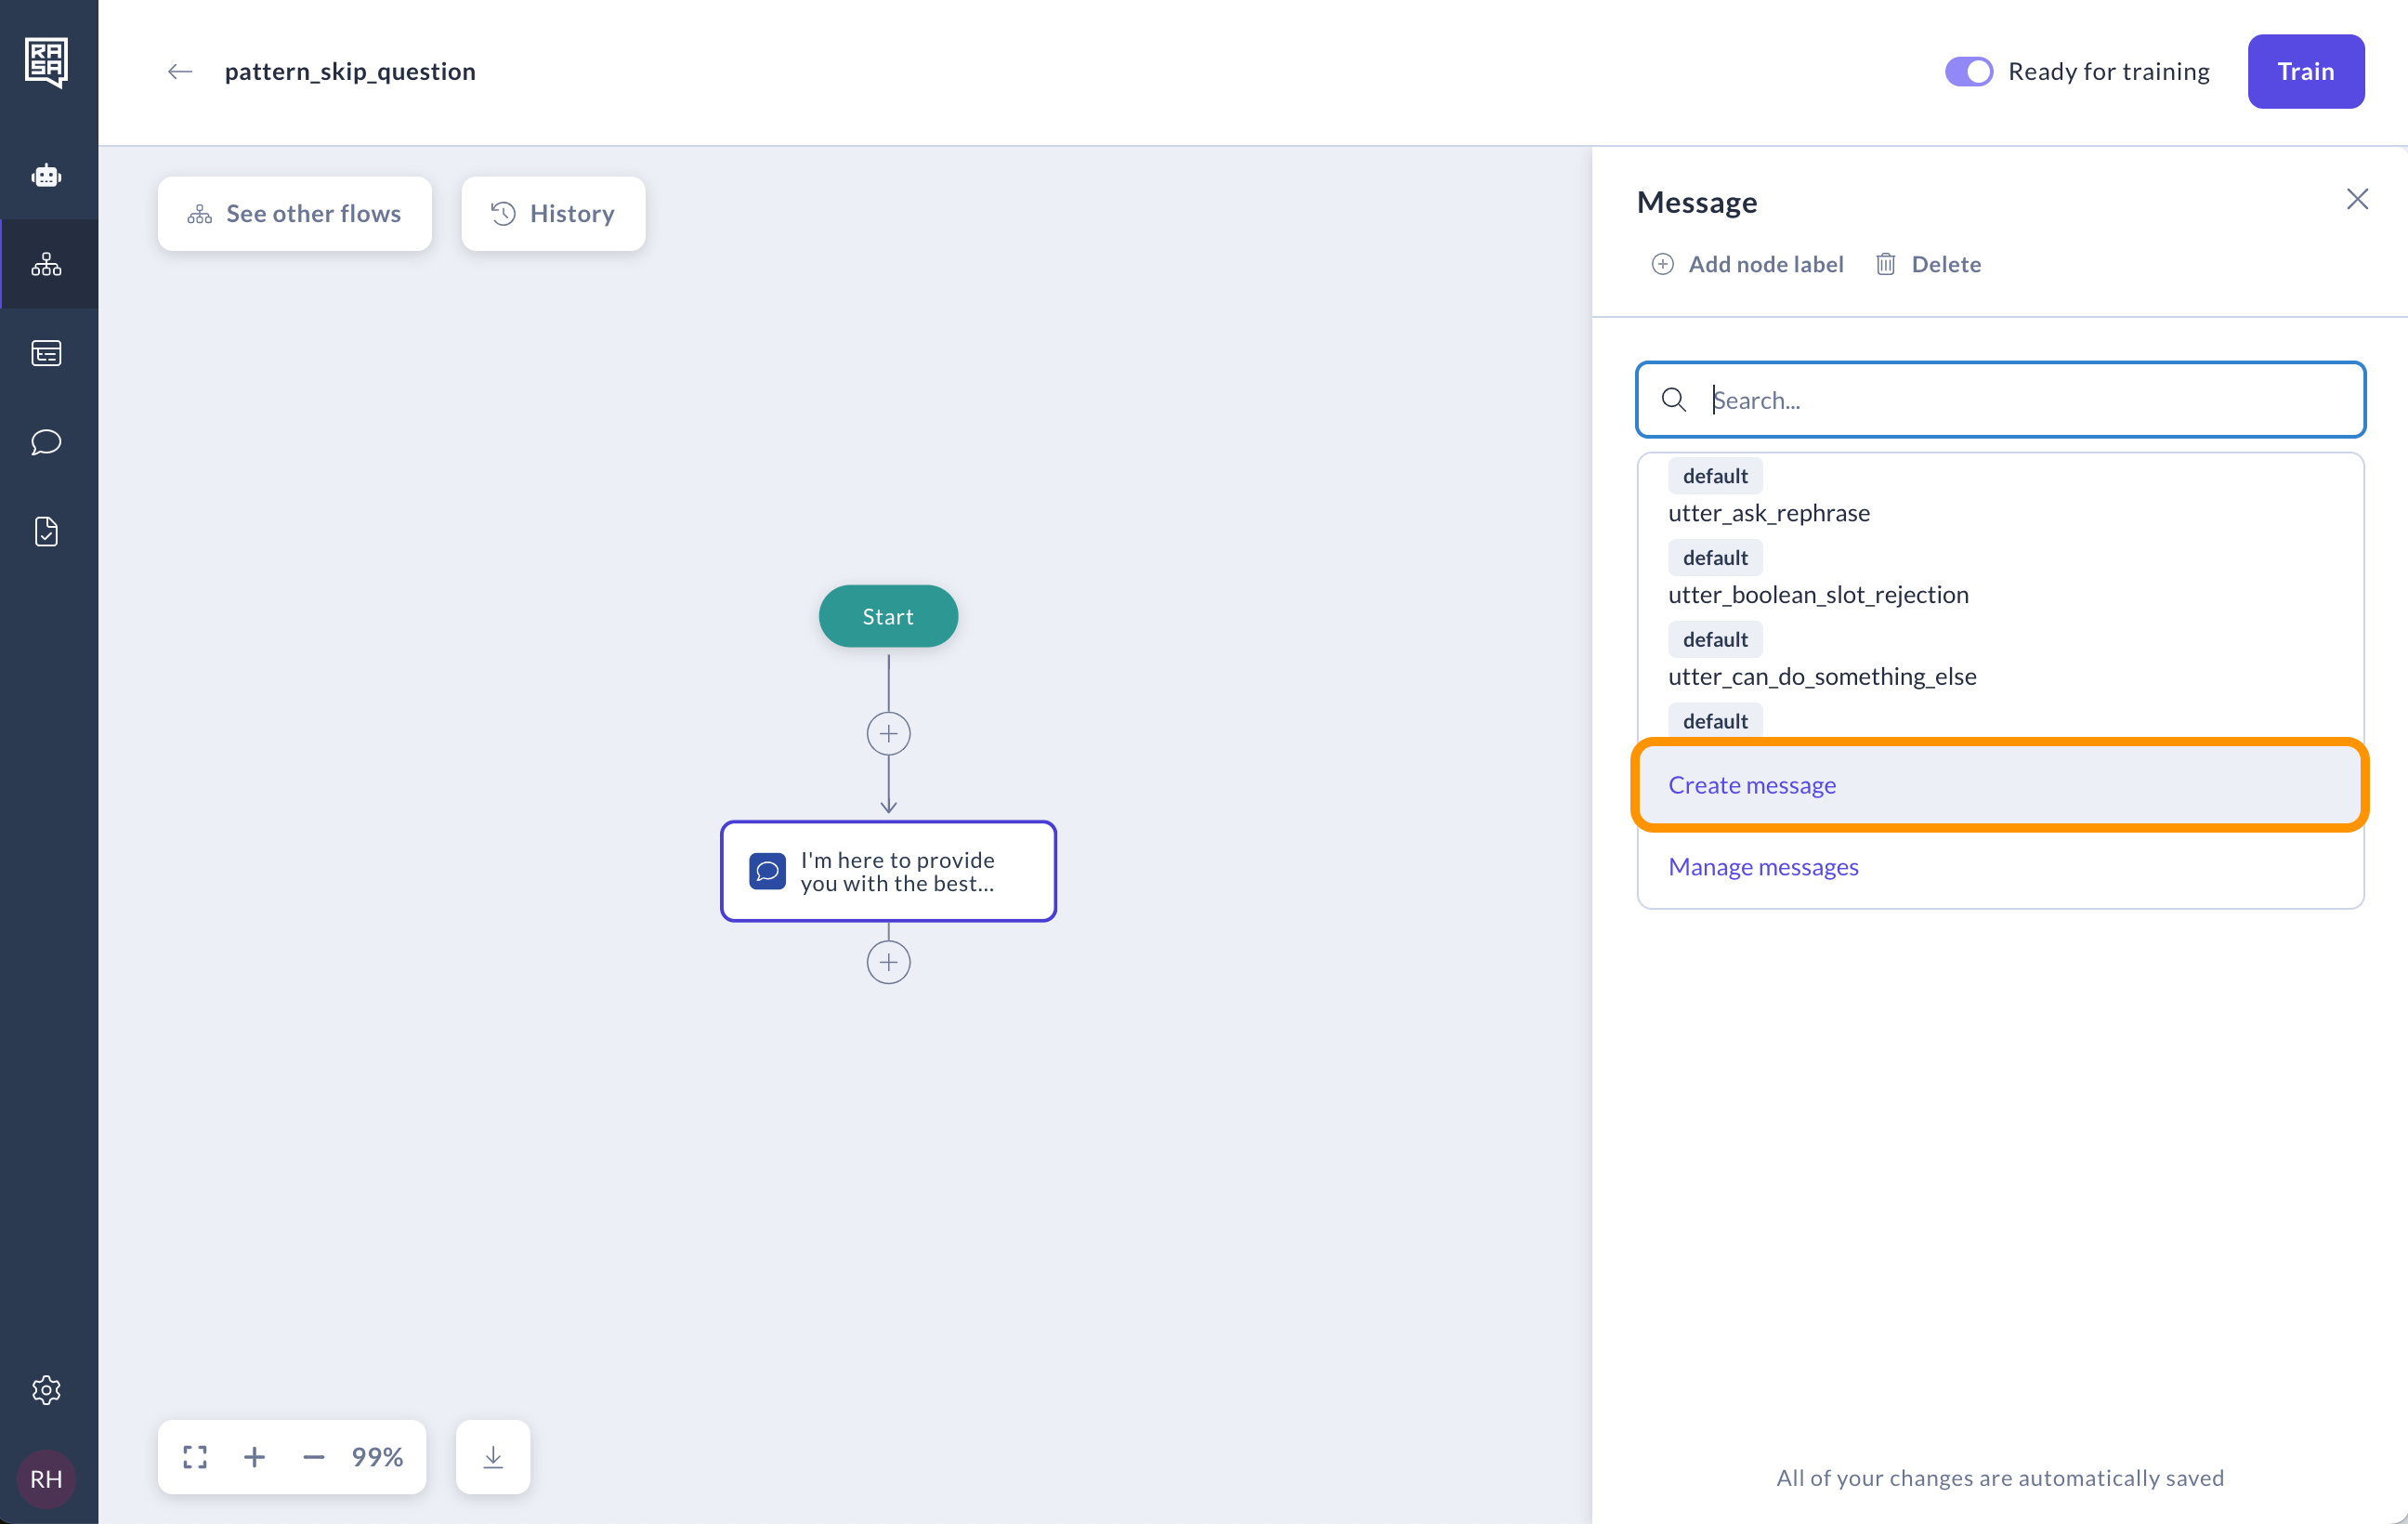
Click on the message name in the right panel and choose the "Create message" option.
In the modal that opens, specify the new message name and text, then click Save.
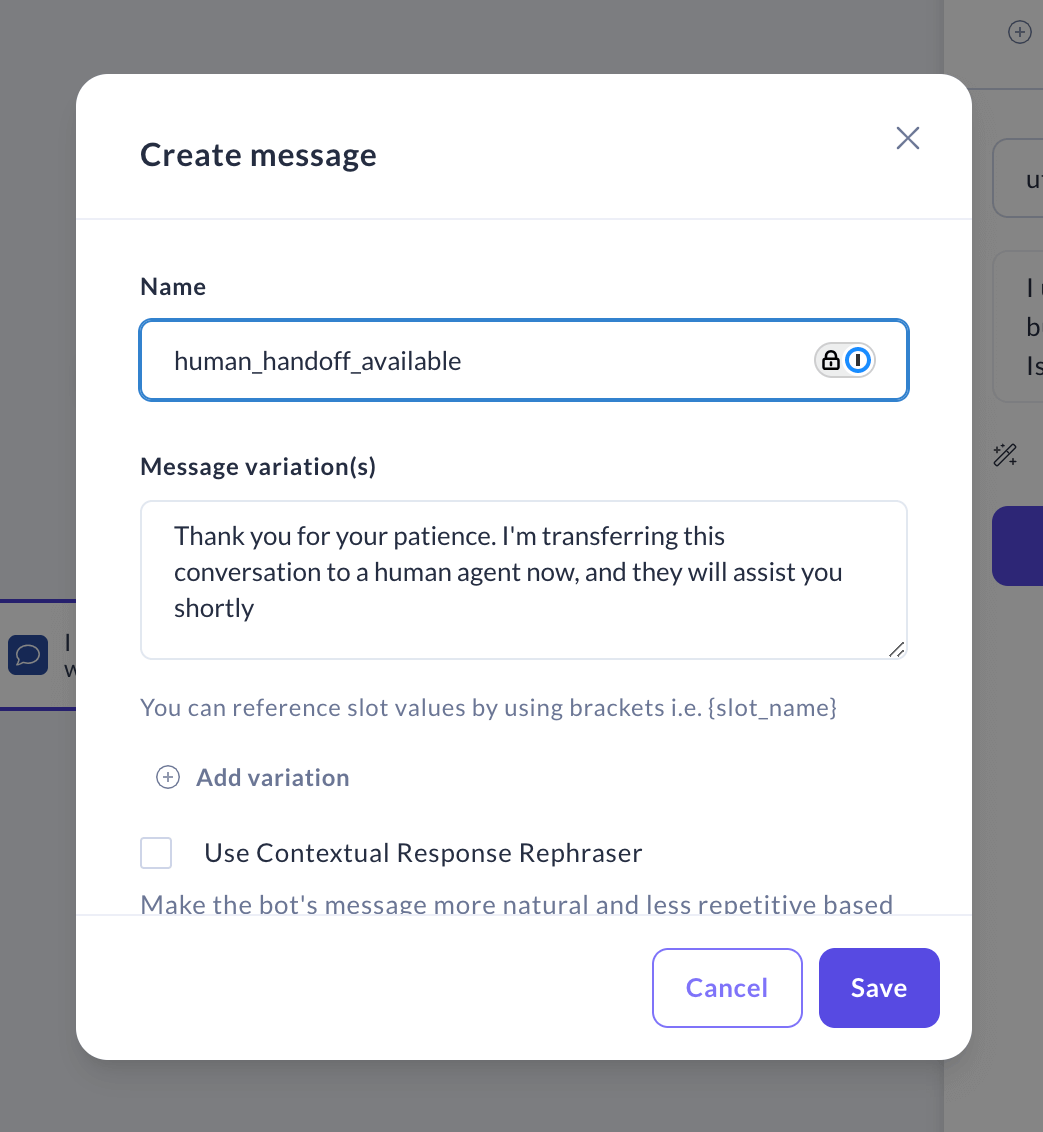
The message is now replaced.
Overriding system flow logic
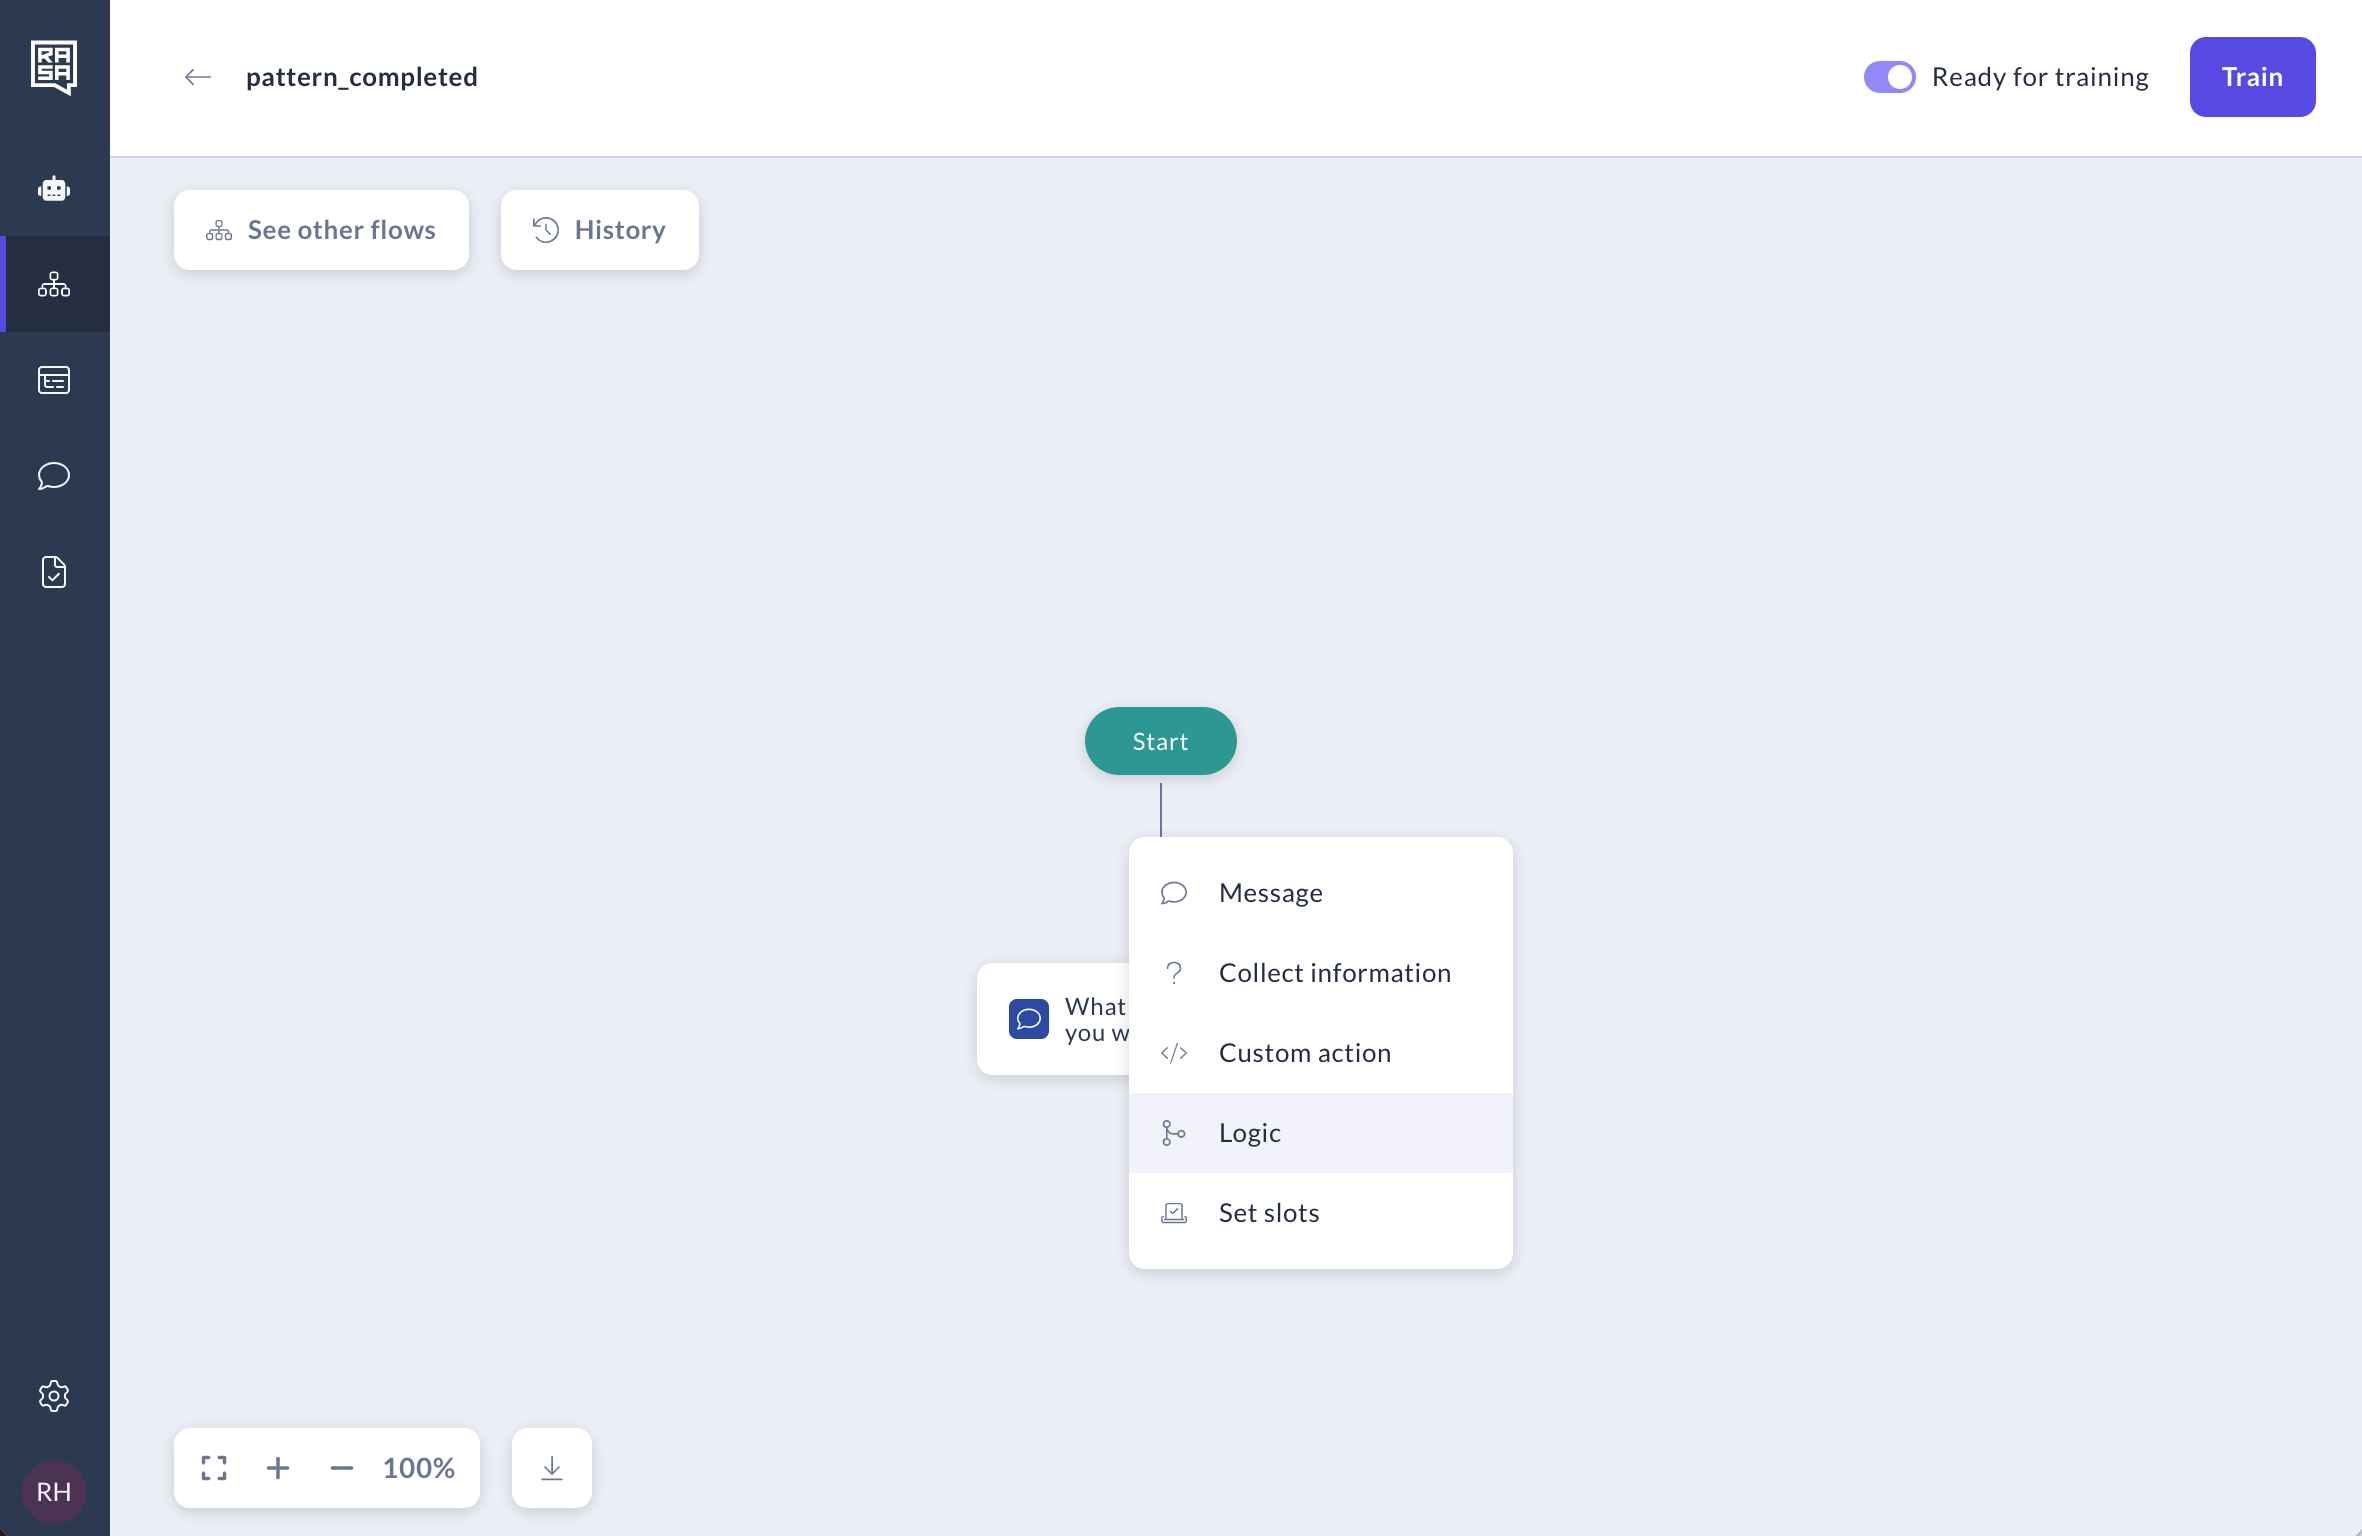
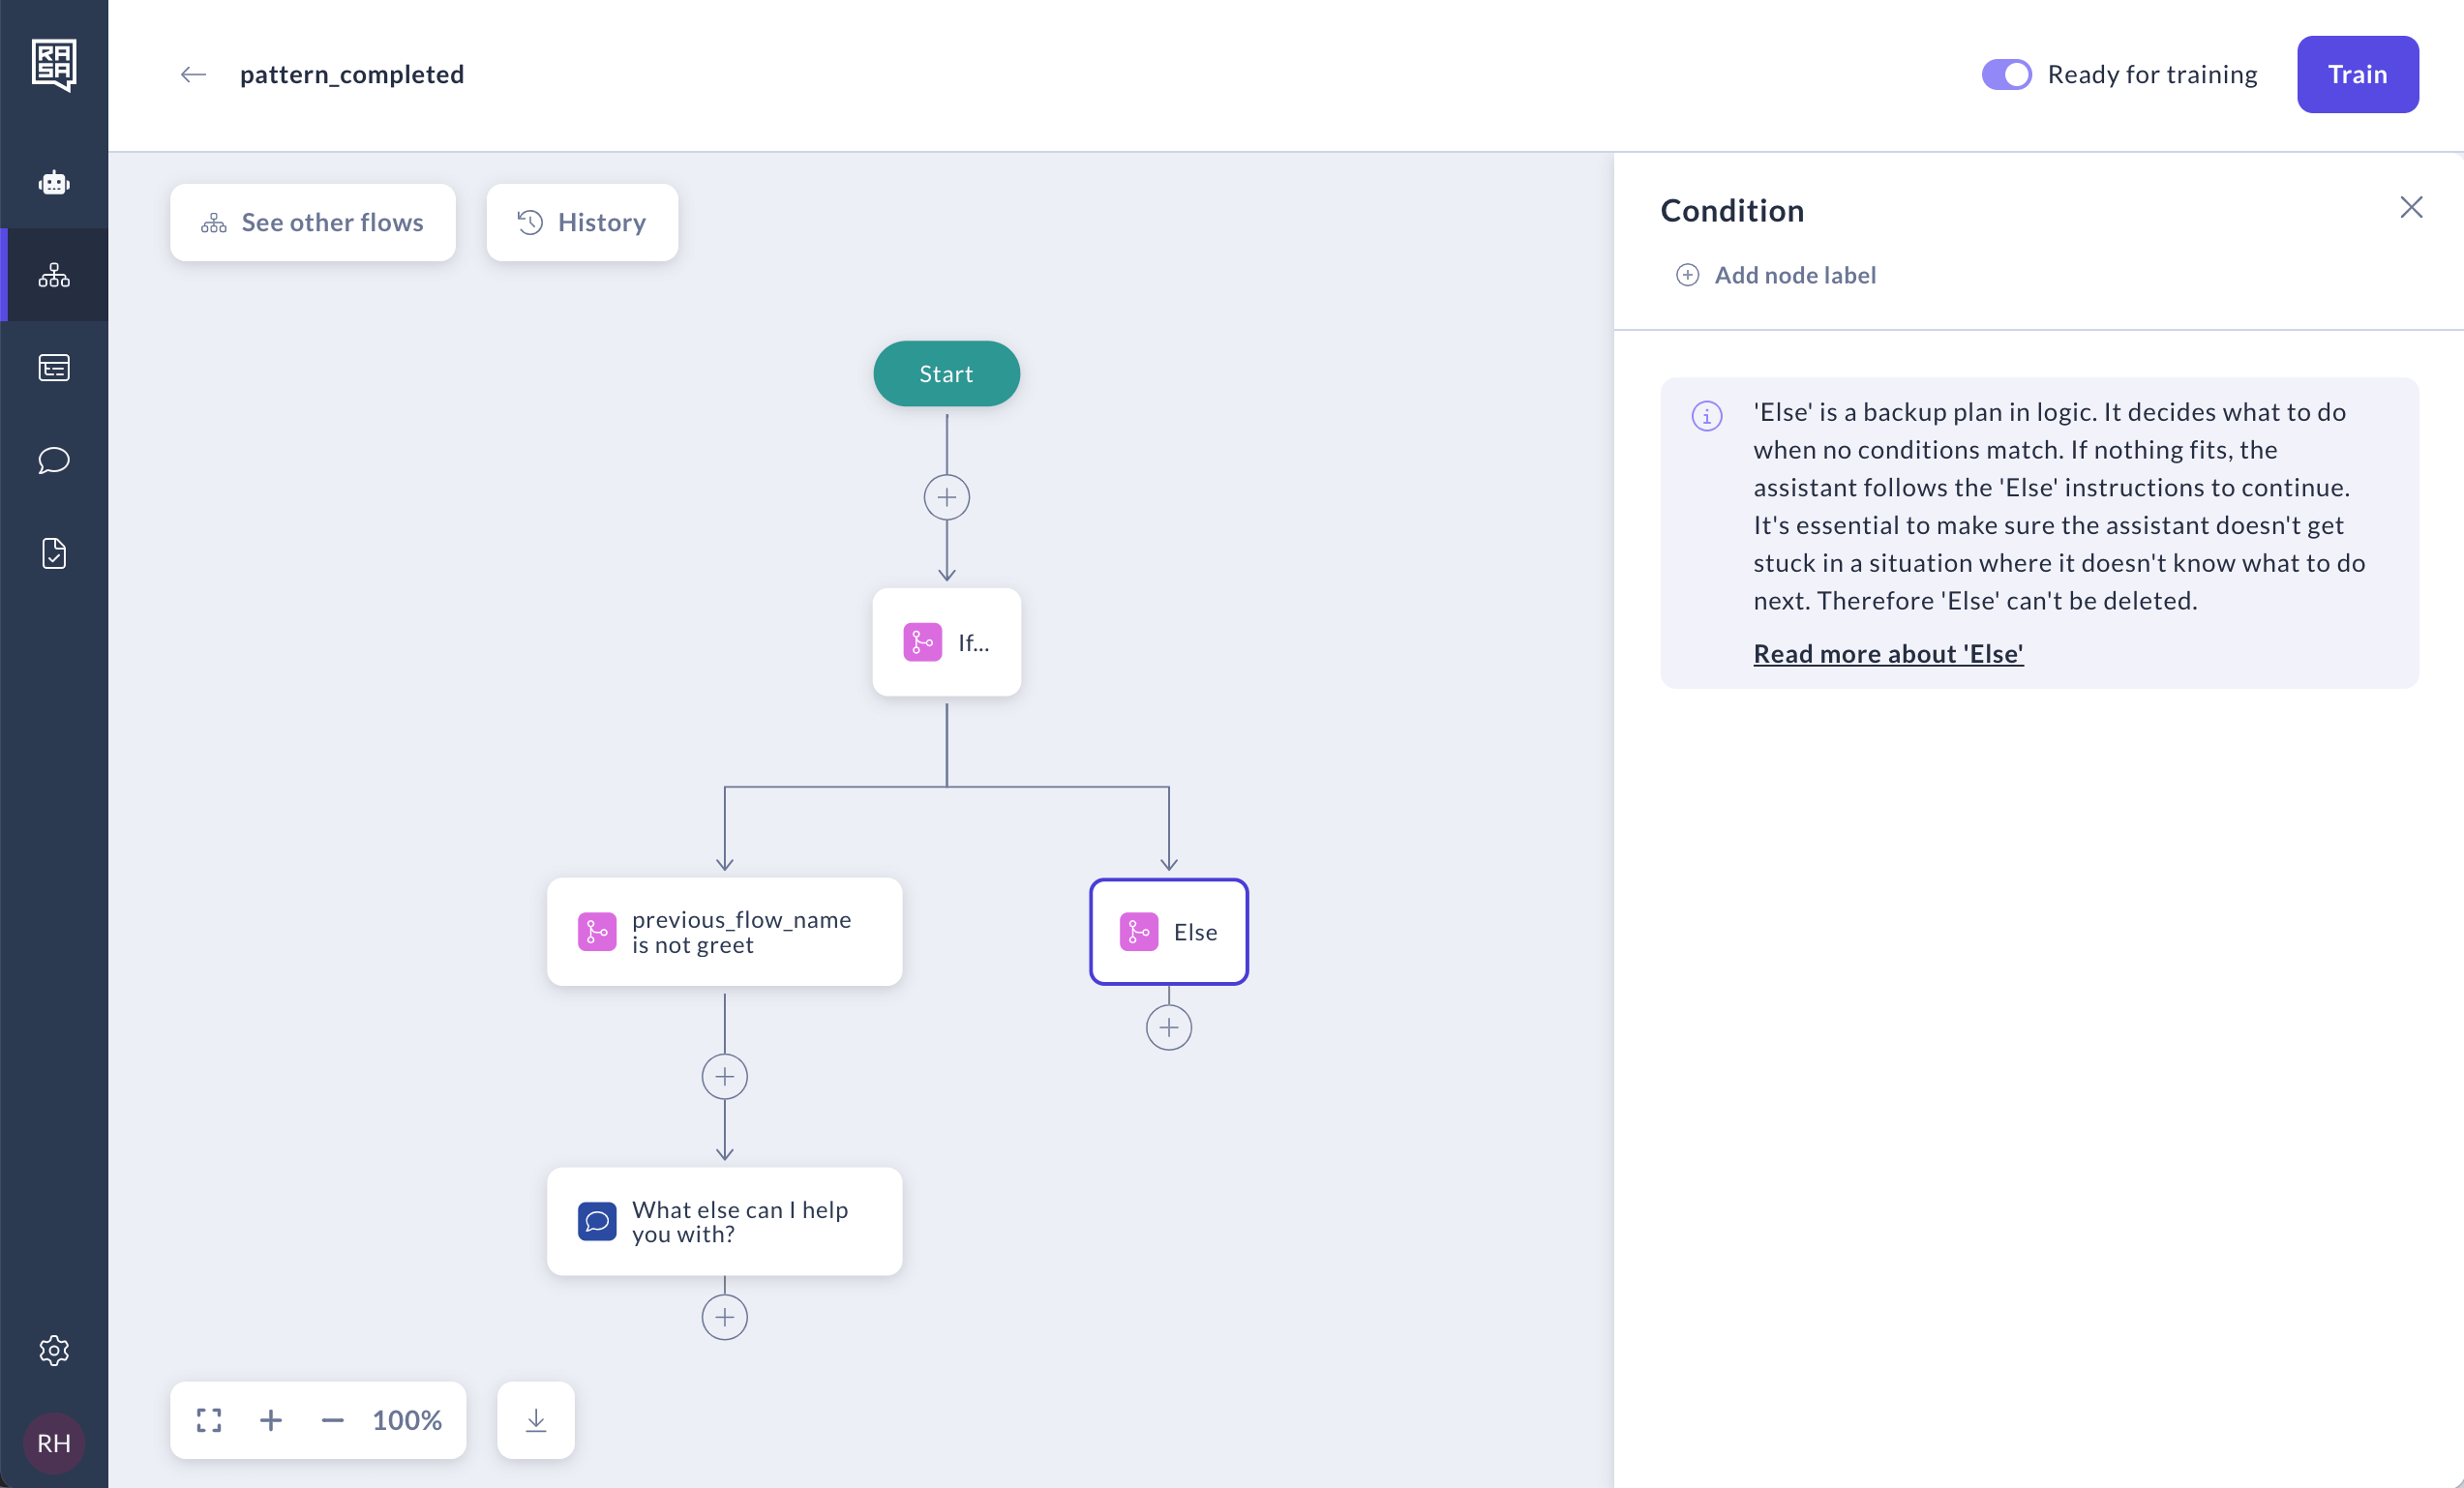
You can modify system flows just like custom ones by adding or removing steps. Let’s walk through an example of modifying the pattern_completed system flow that asks if the user needs more help after completing their goals or ending a conversation.
By default, the pattern_completed has one step—a message that asks, "What else can I help you with?" This message will be presented to the user after each flow ends unless there are specific links to other flows. However, after some flows, such as a greeting, we may want to skip this question, especially when the assistant hasn't provided any help yet.

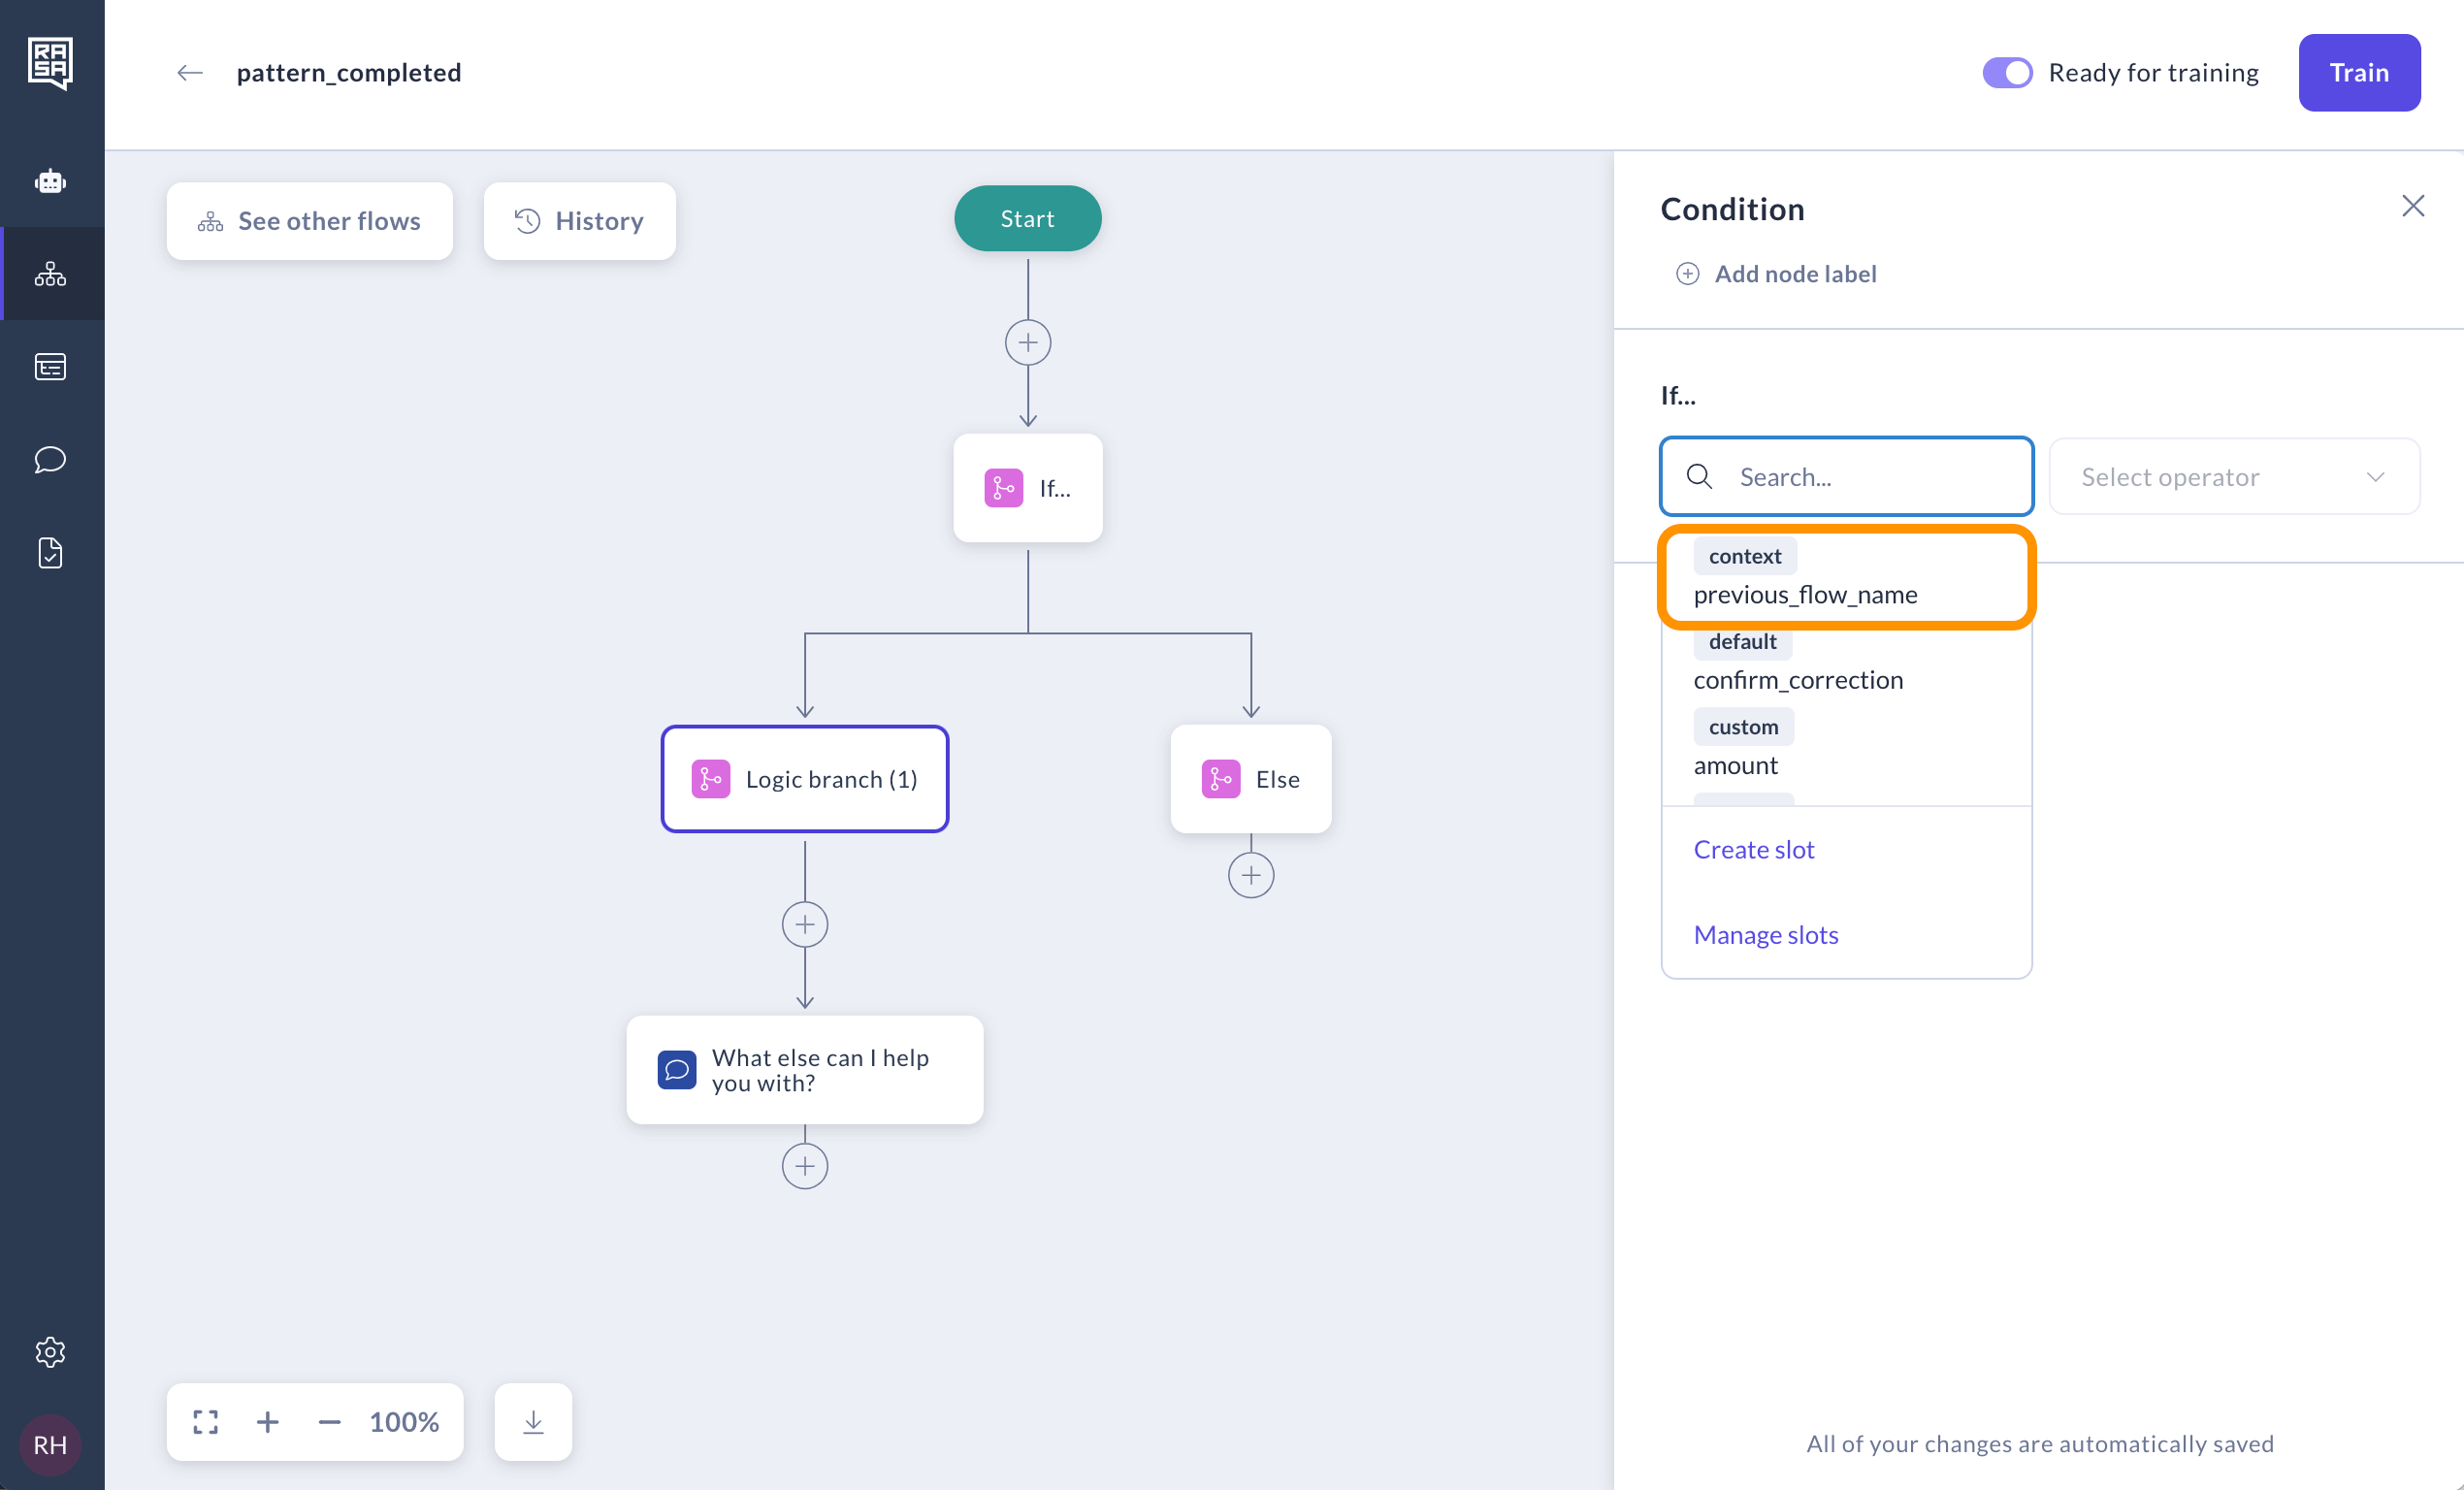
To reconfigure the system flow so that the question is skipped after specific flows, we can add a Logic branch before the message to specify those flows.
In the first logic branch, select the context "previous flow name" and specify that the previous flow shouldn't be the one that greets the user.
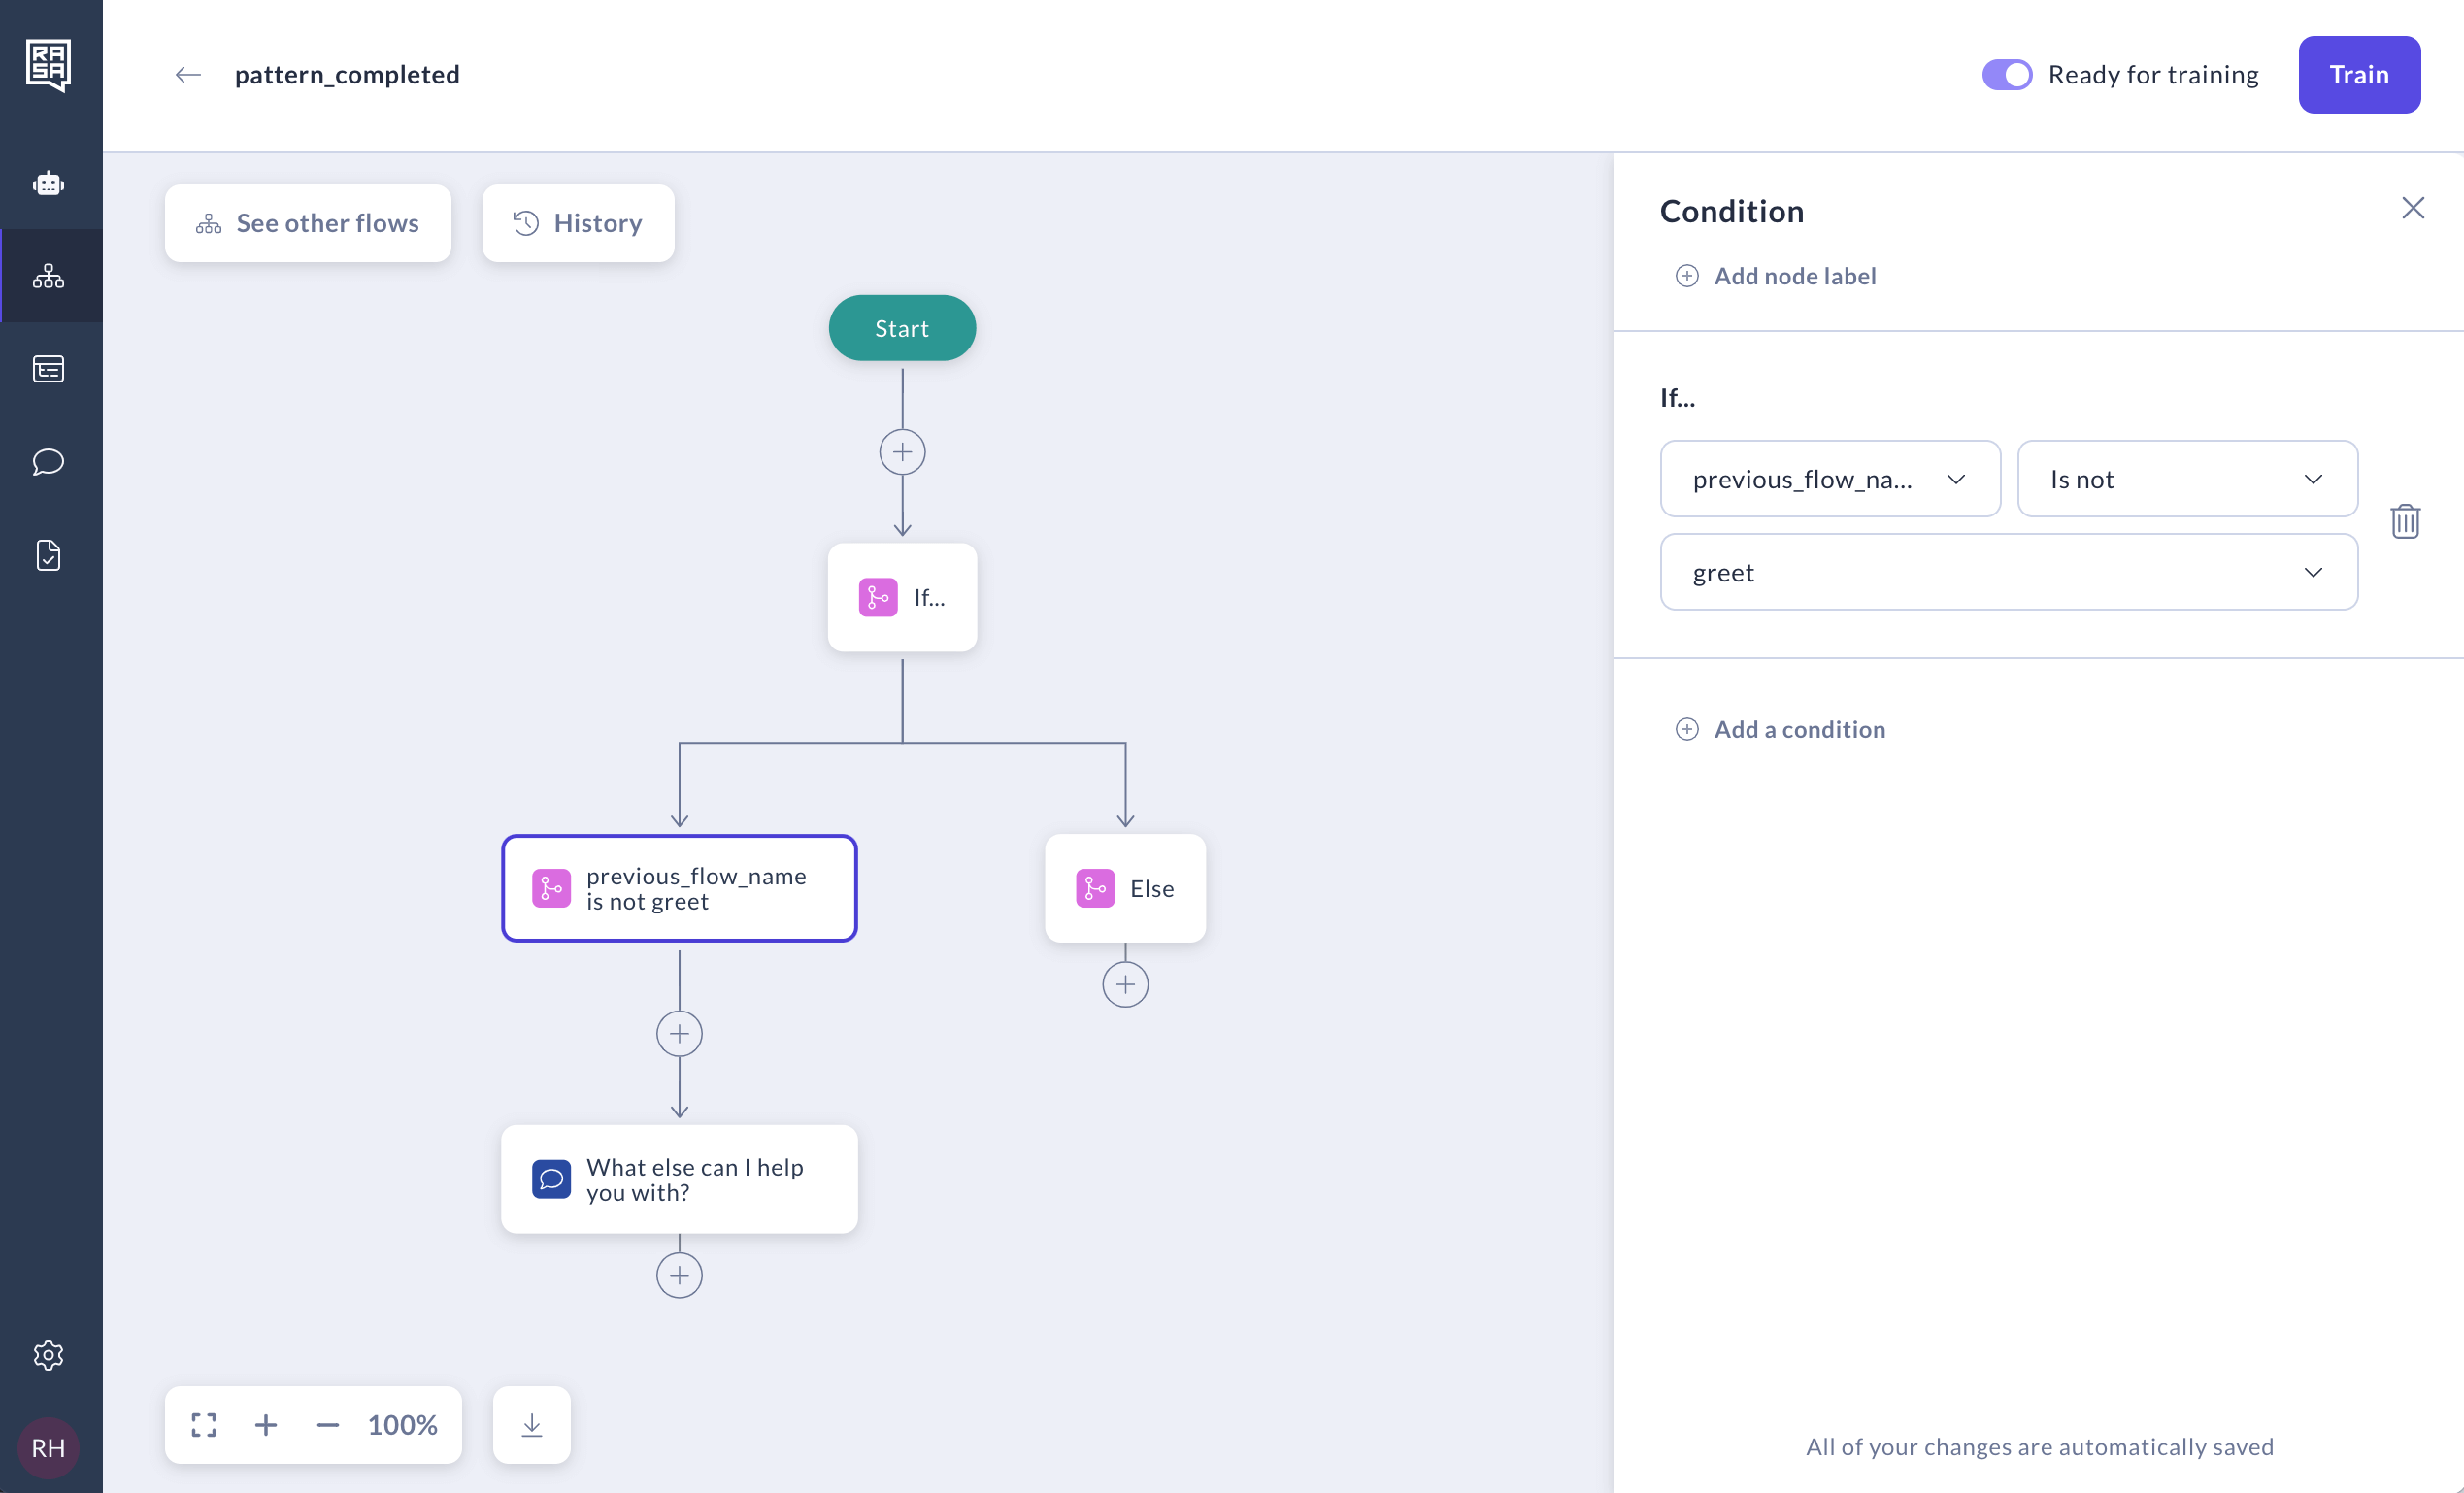
For the Else branch, which now handles the case after the "greet" flow, we want the assistant to remain silent and wait for the next question from the user, so we leave it empty.
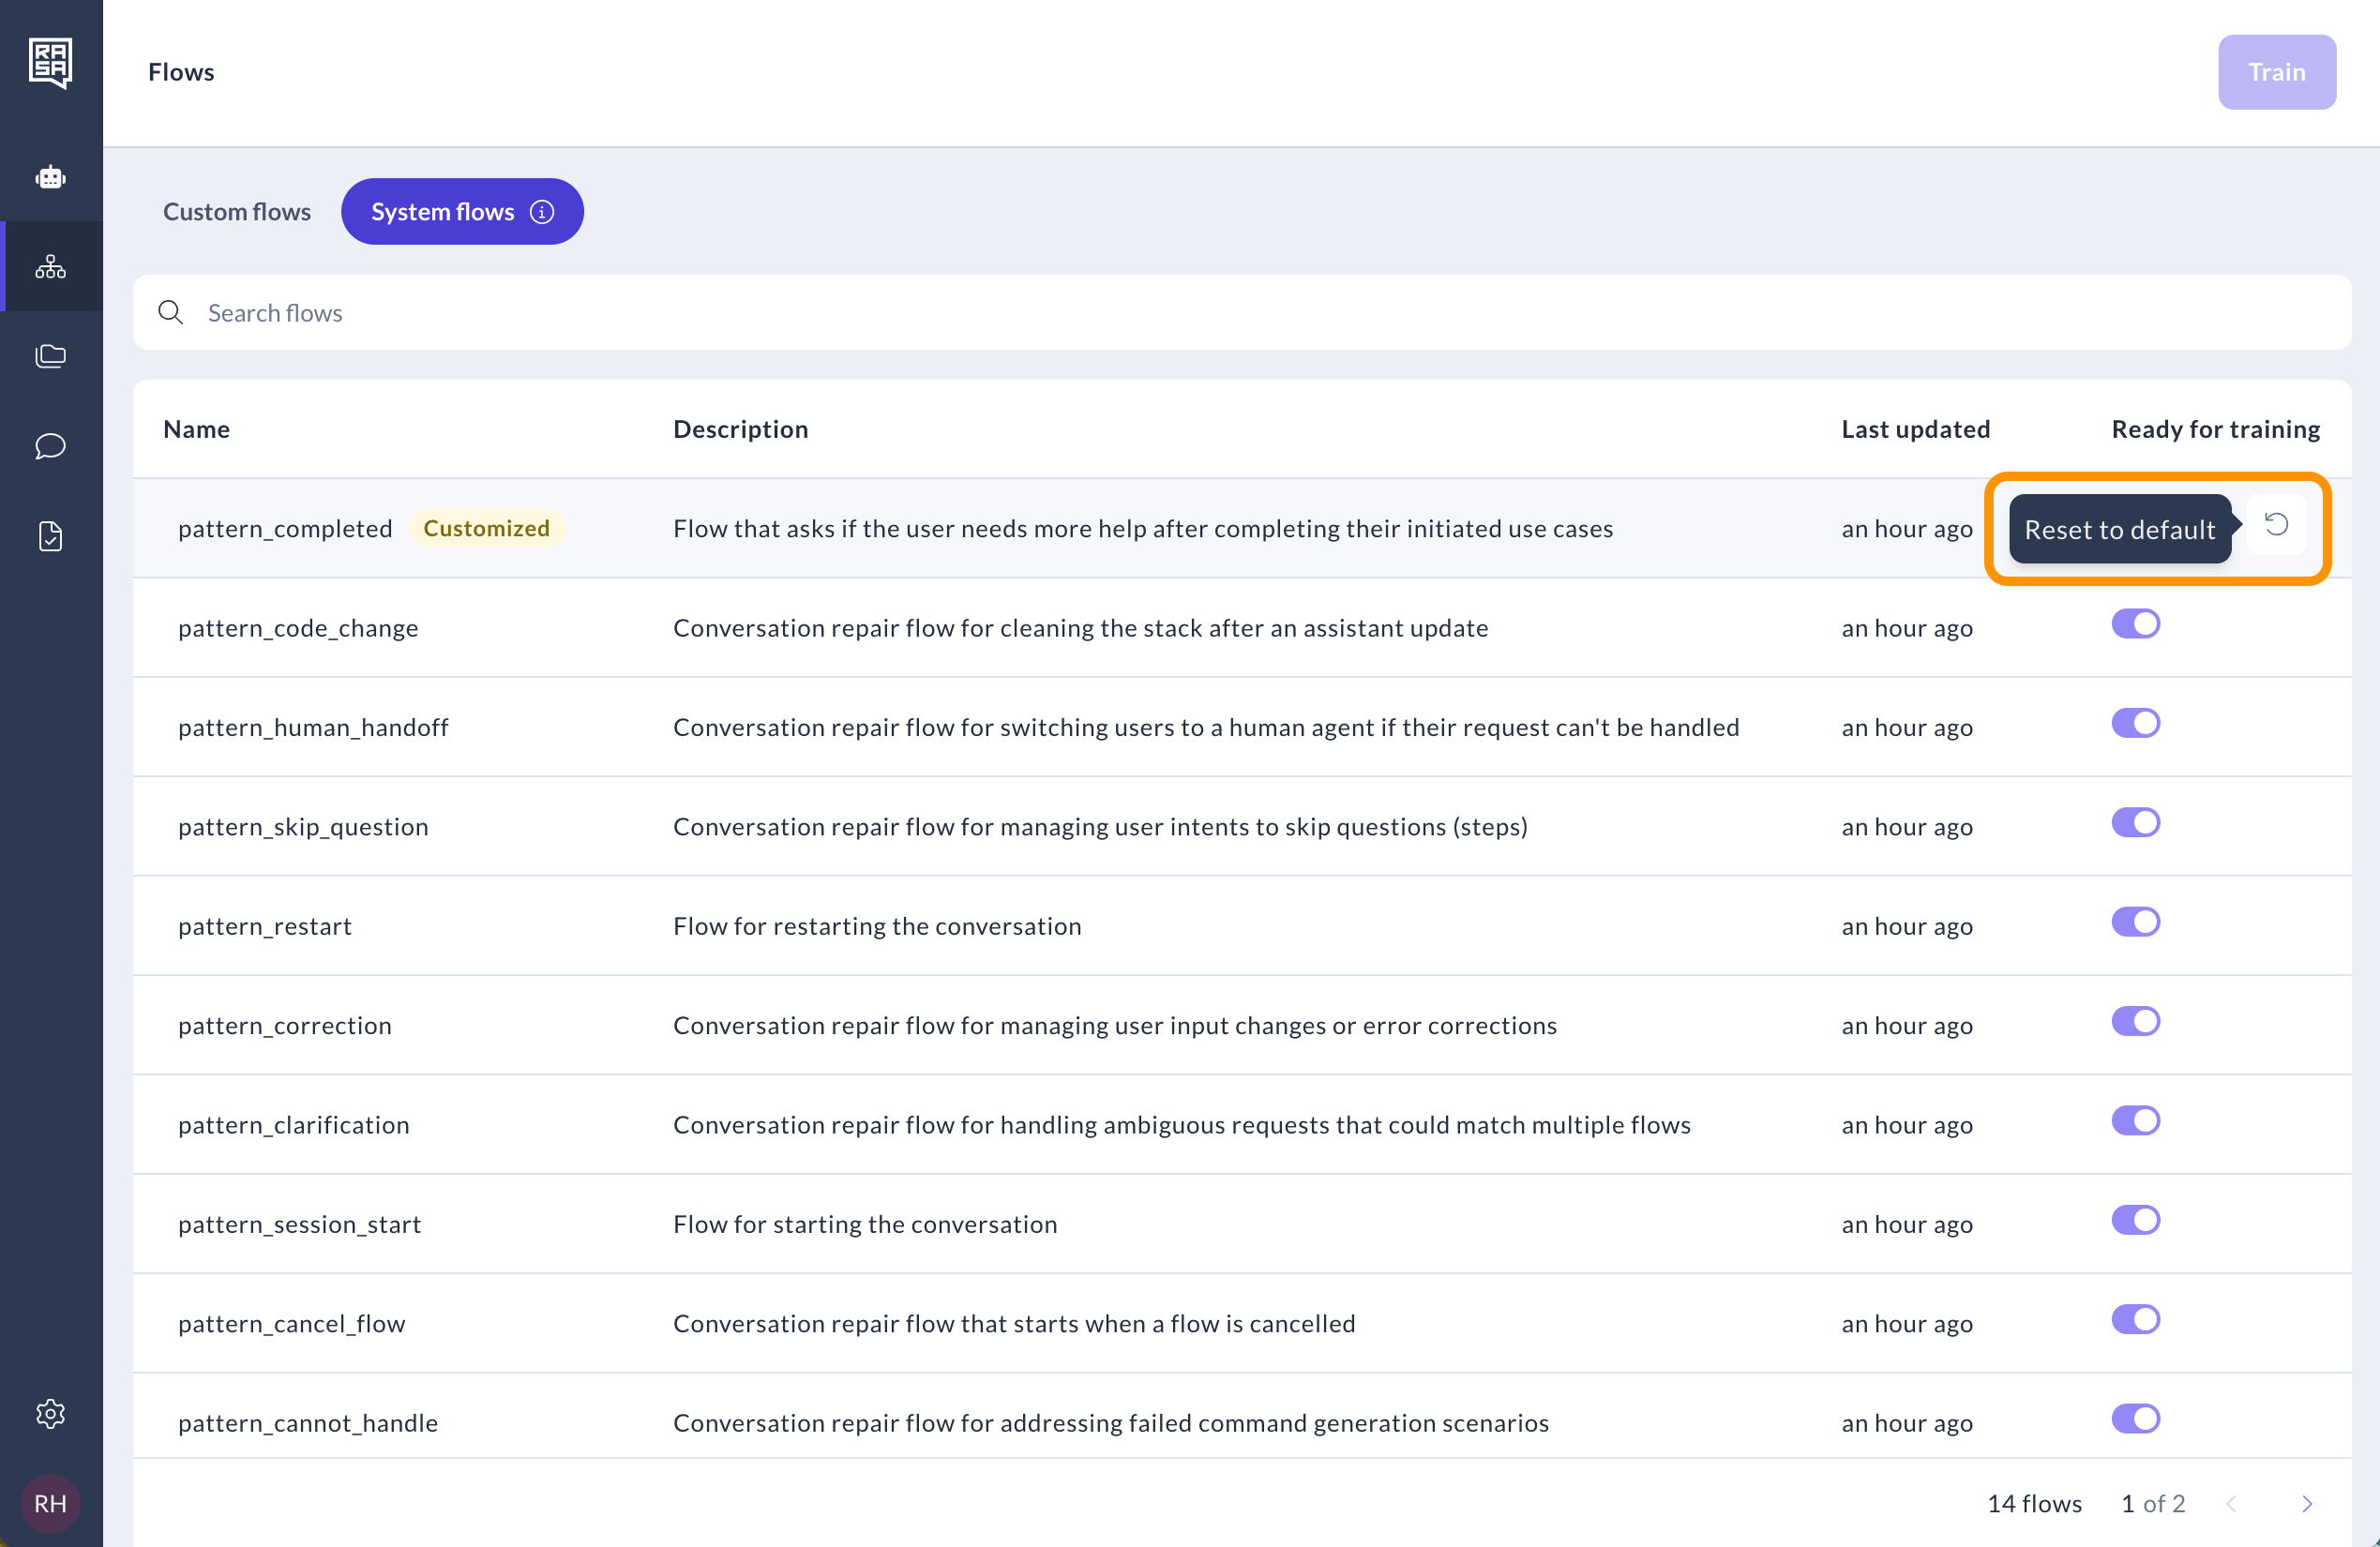
After modifying a system flow, make sure to re-train your assistant and test the changes on the Try your assistant page. Resetting to default
After customizing a system flow, you will see the "Customized" label next to it. If you want to cancel your updates and reset a system flow to its default configuration, simply hover over it in the table and click the "Reset to default" button.
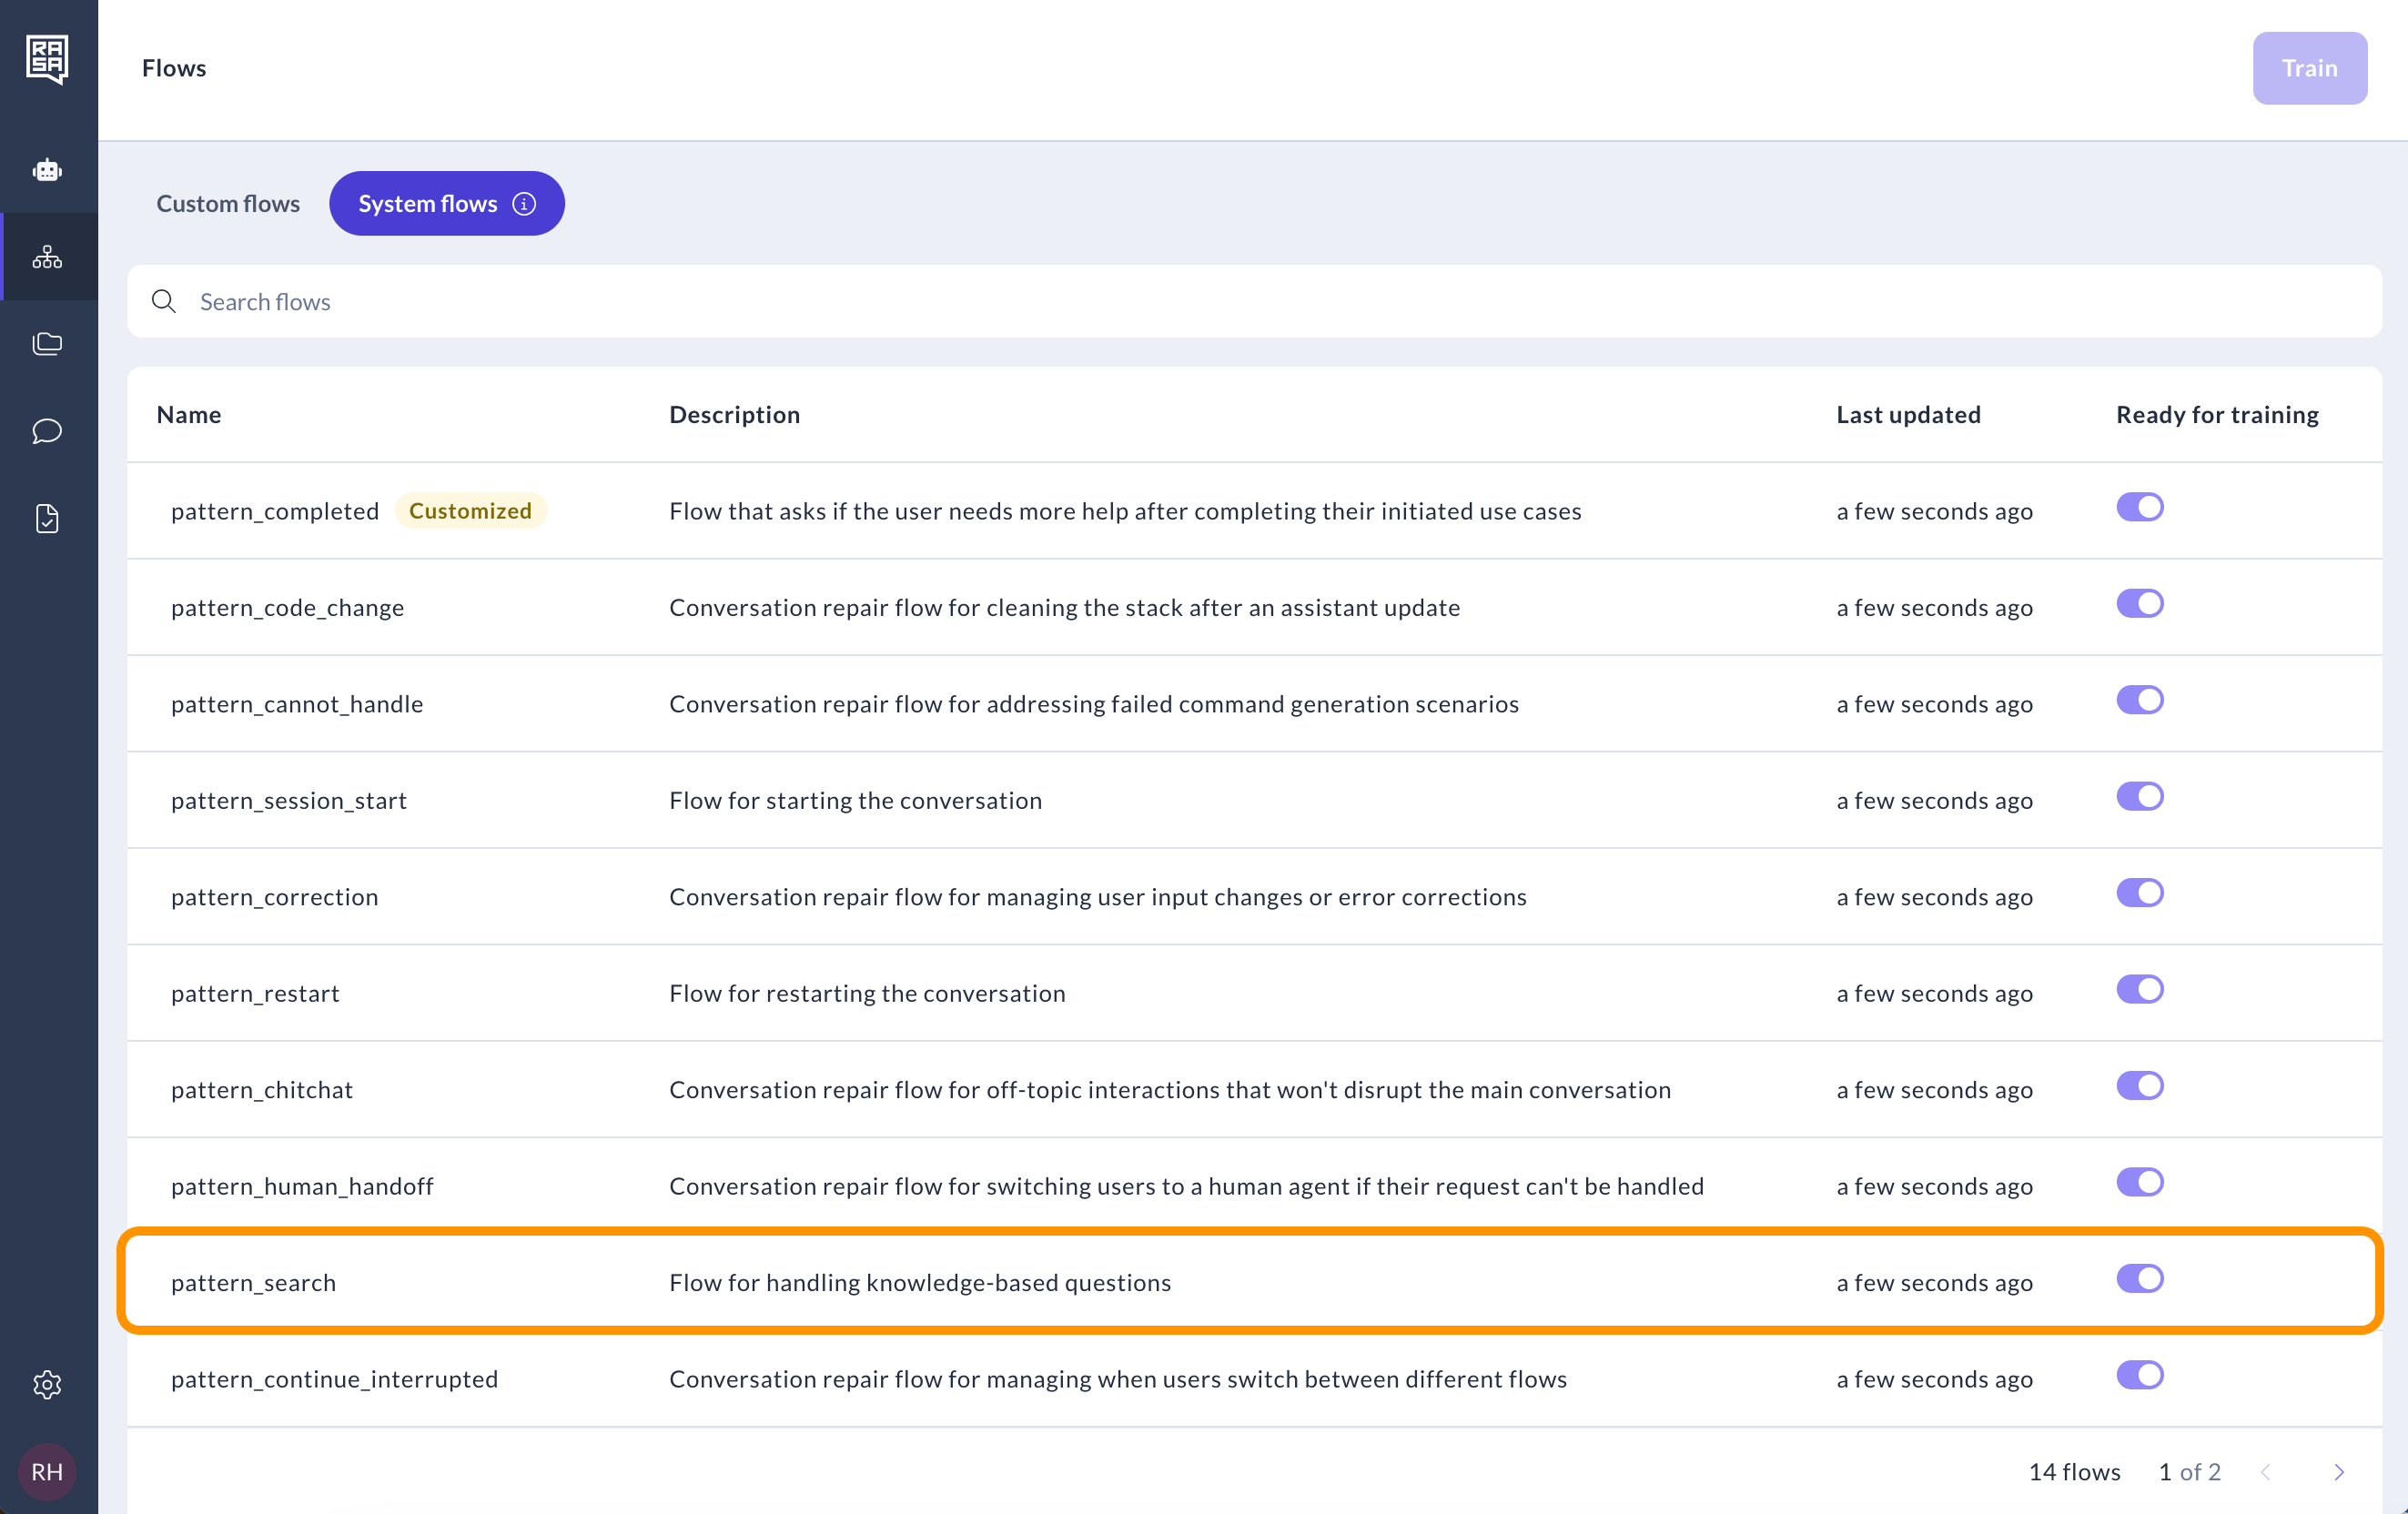
Enabling Enterprise search policy via pattern_search
You can enable the Enterprise search policy in Studio and integrate knowledge base document search by modifying assistant configuration and pattern_search.
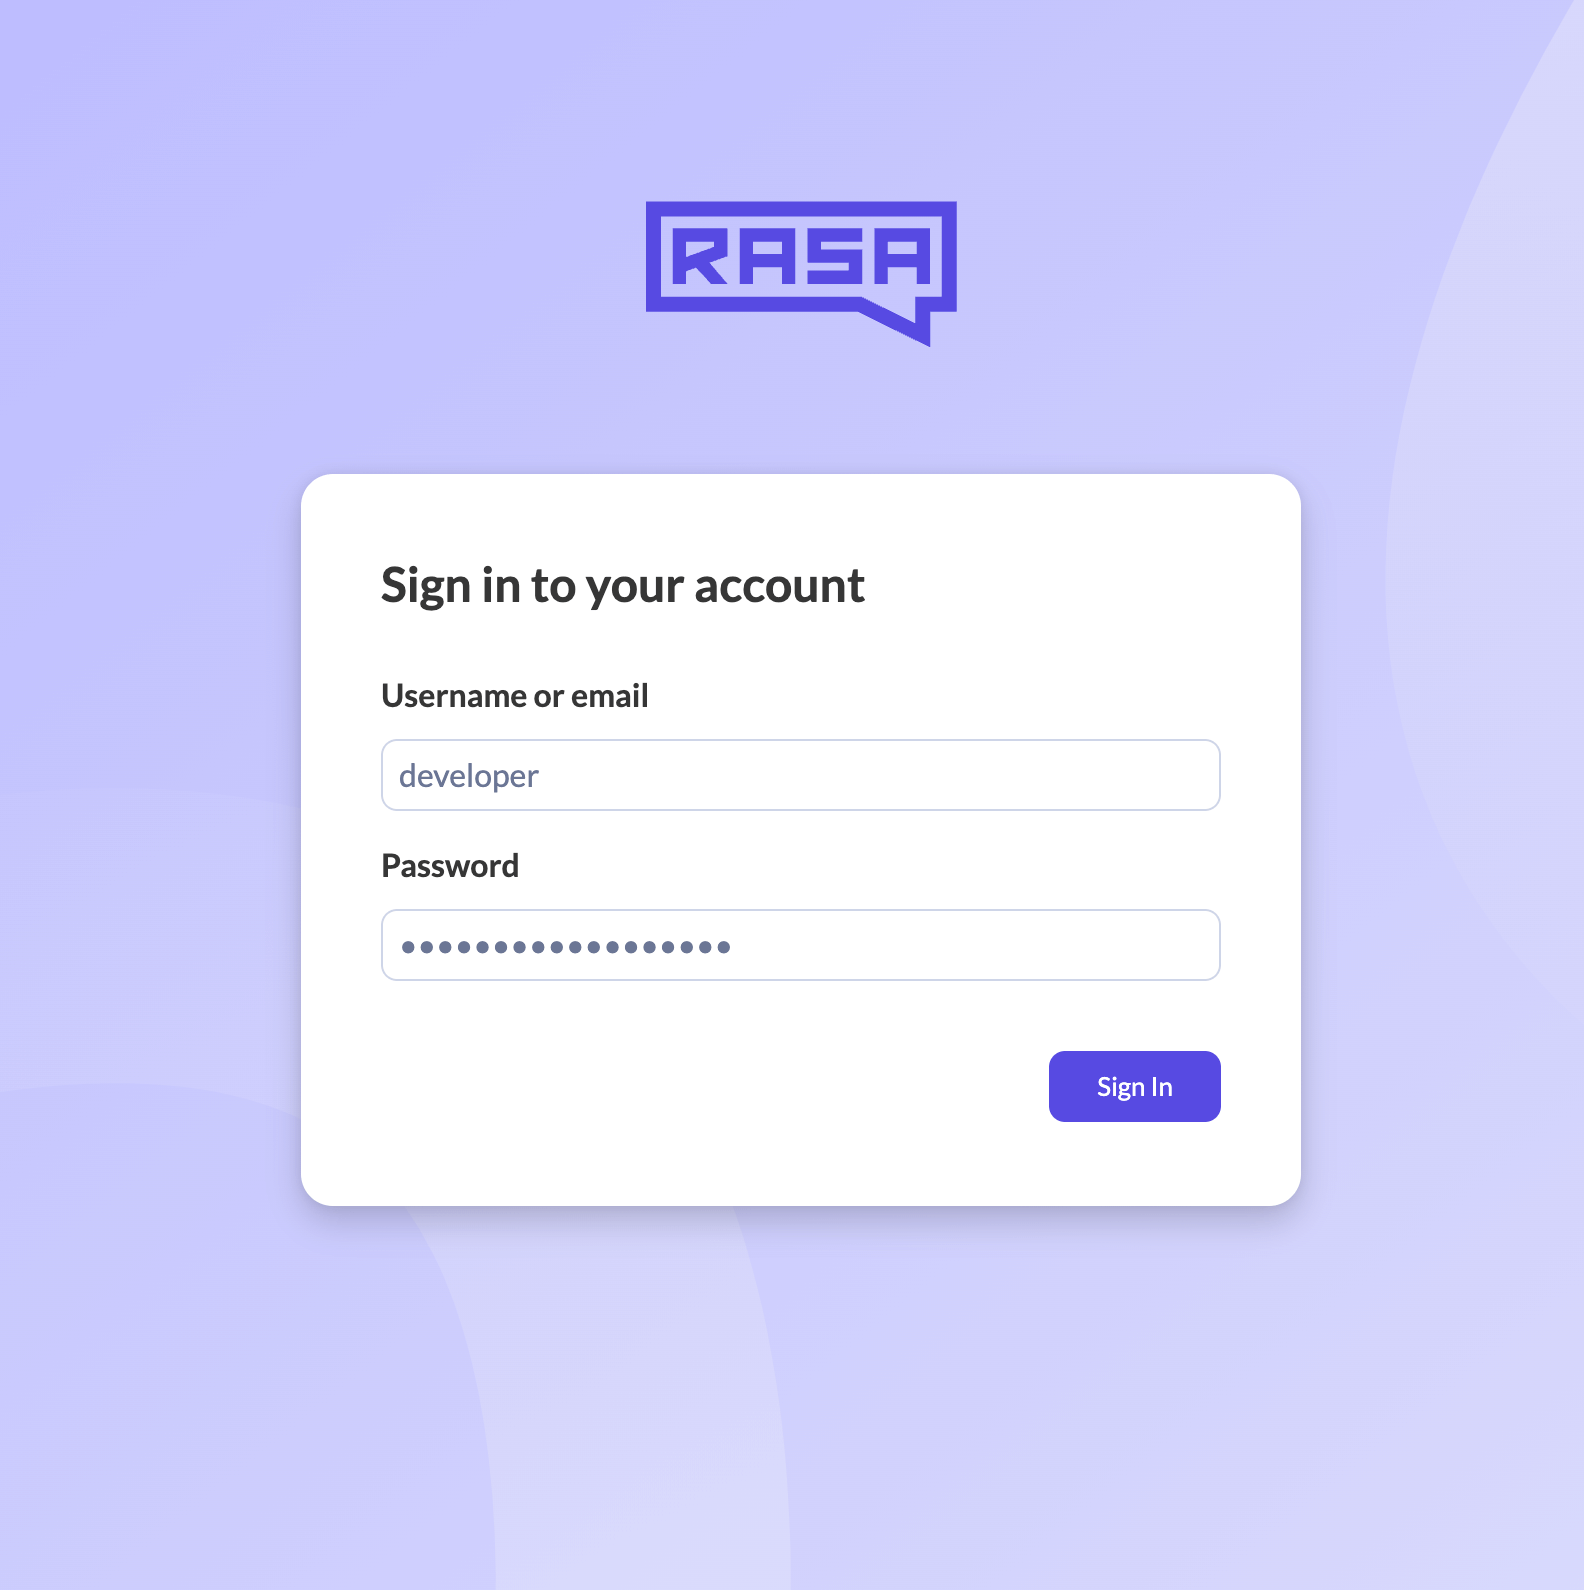
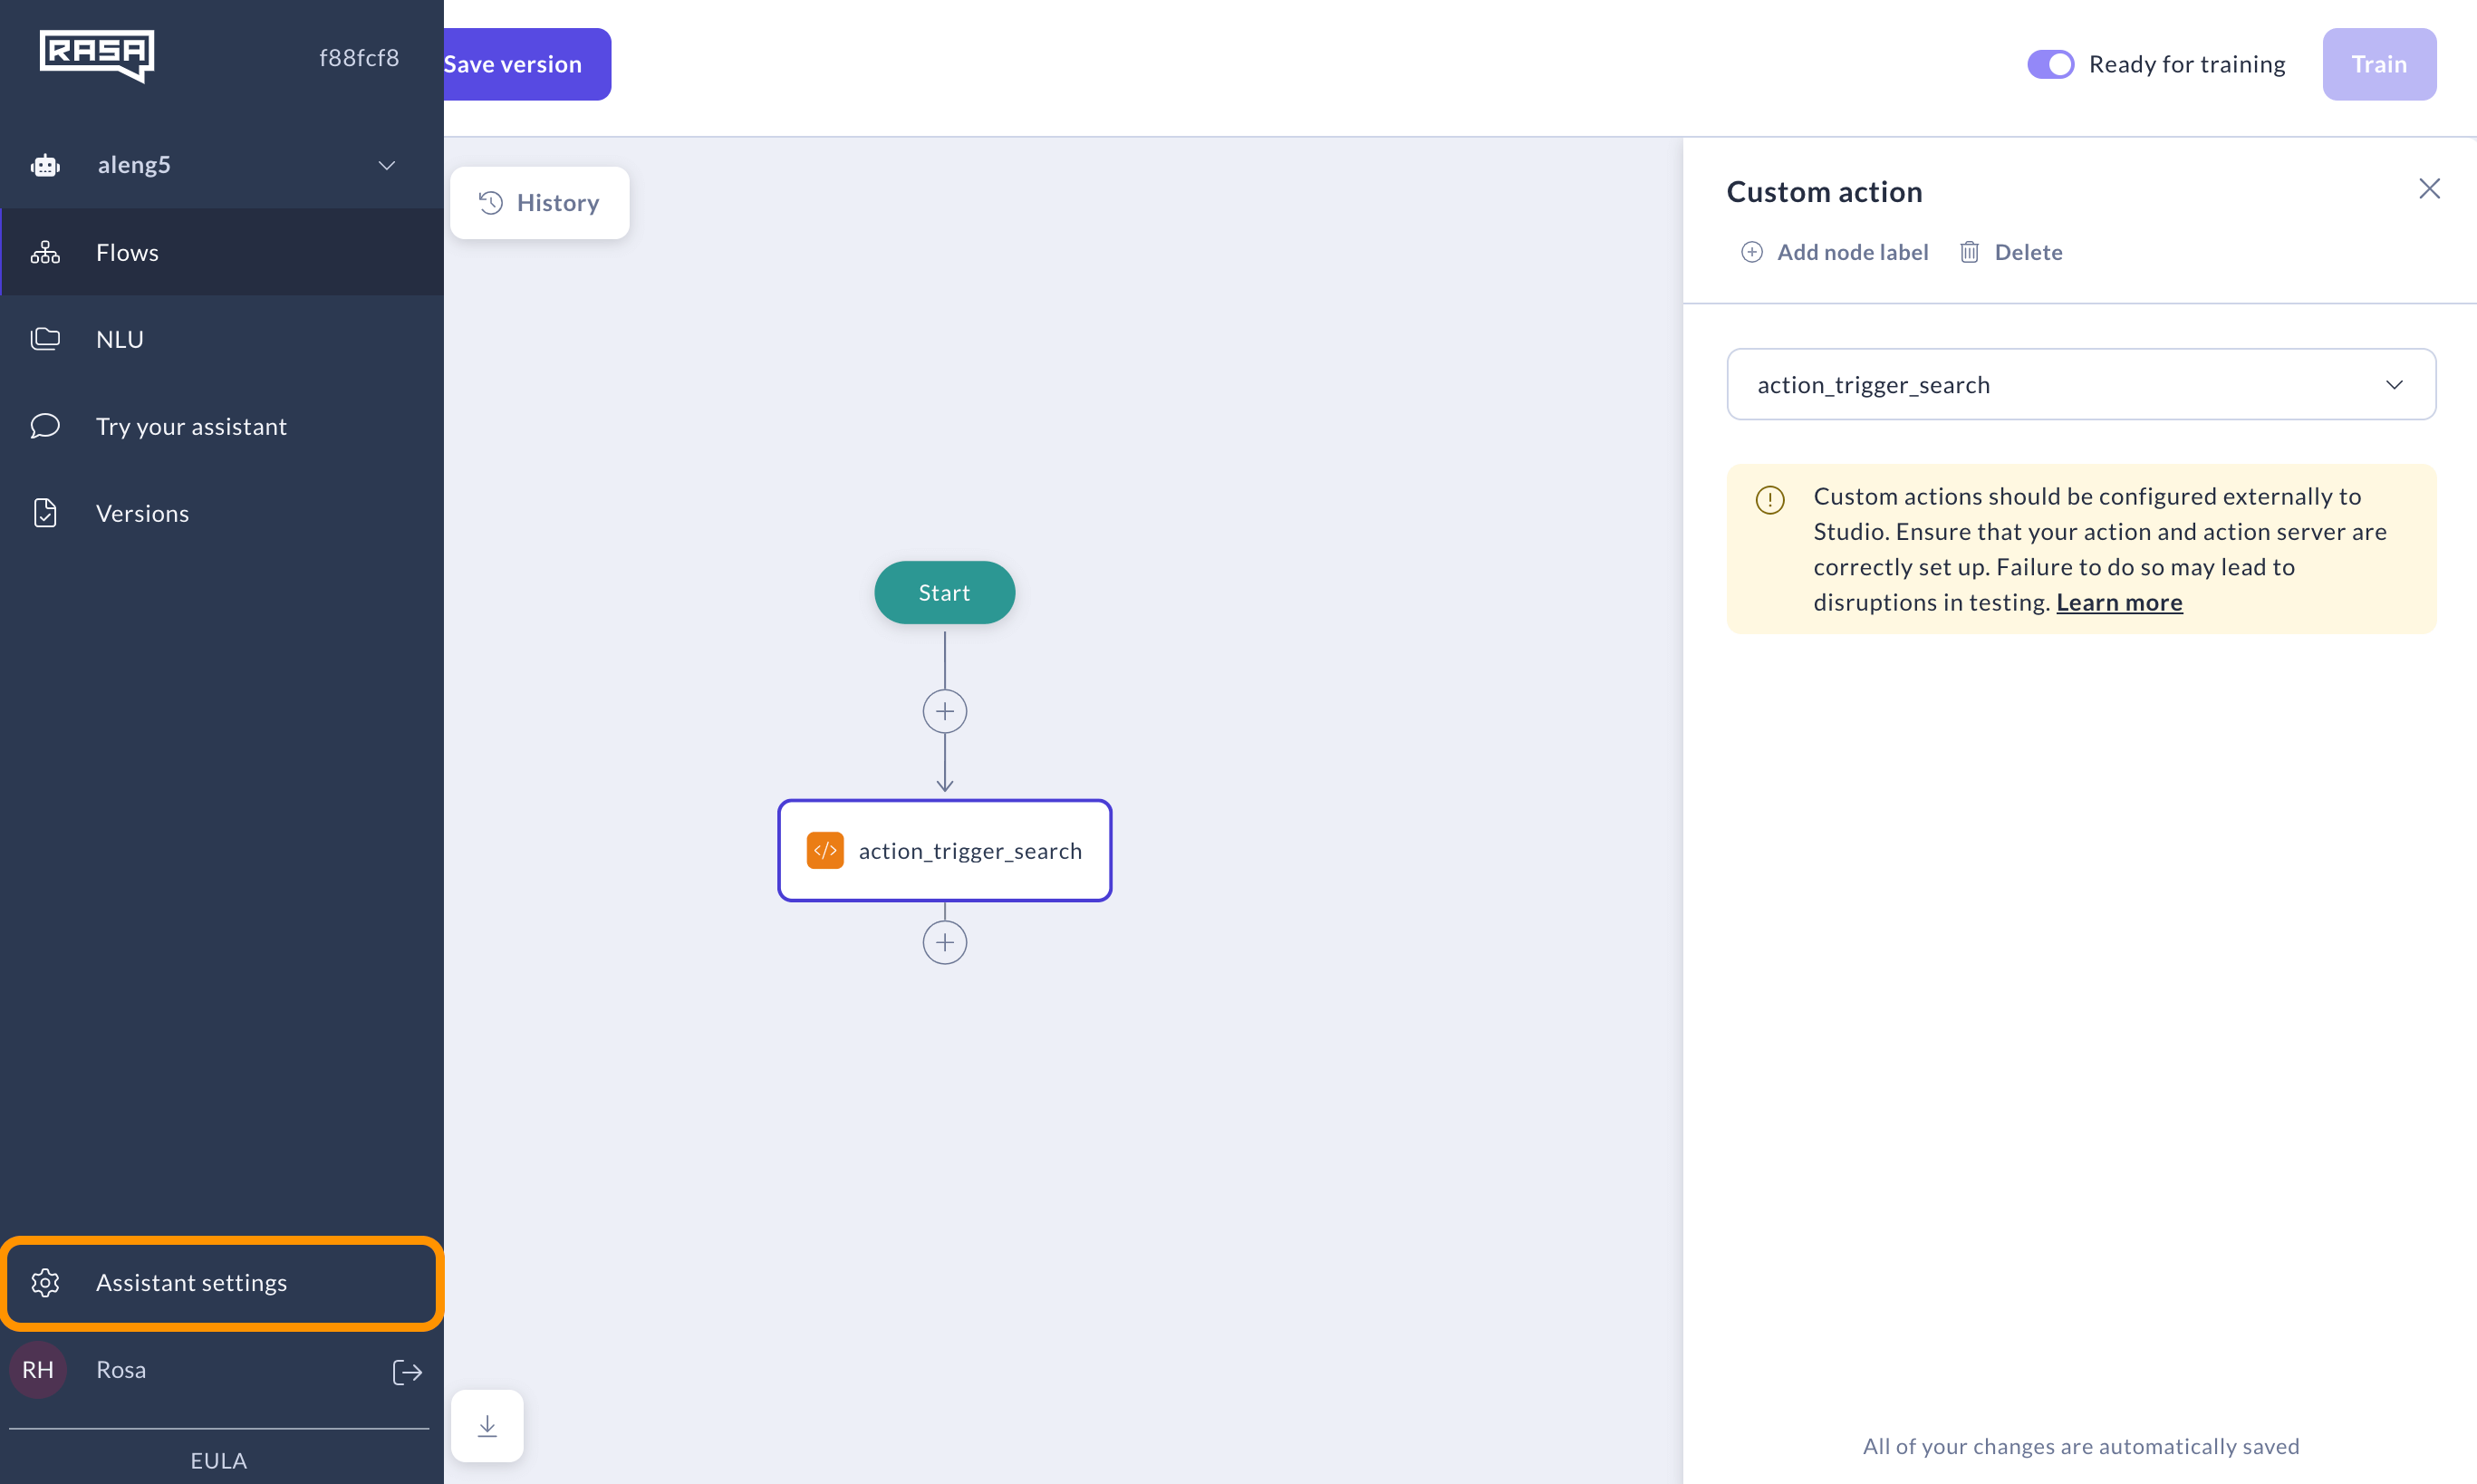
Log in with a superuser or developer role to access Assistant configuration.
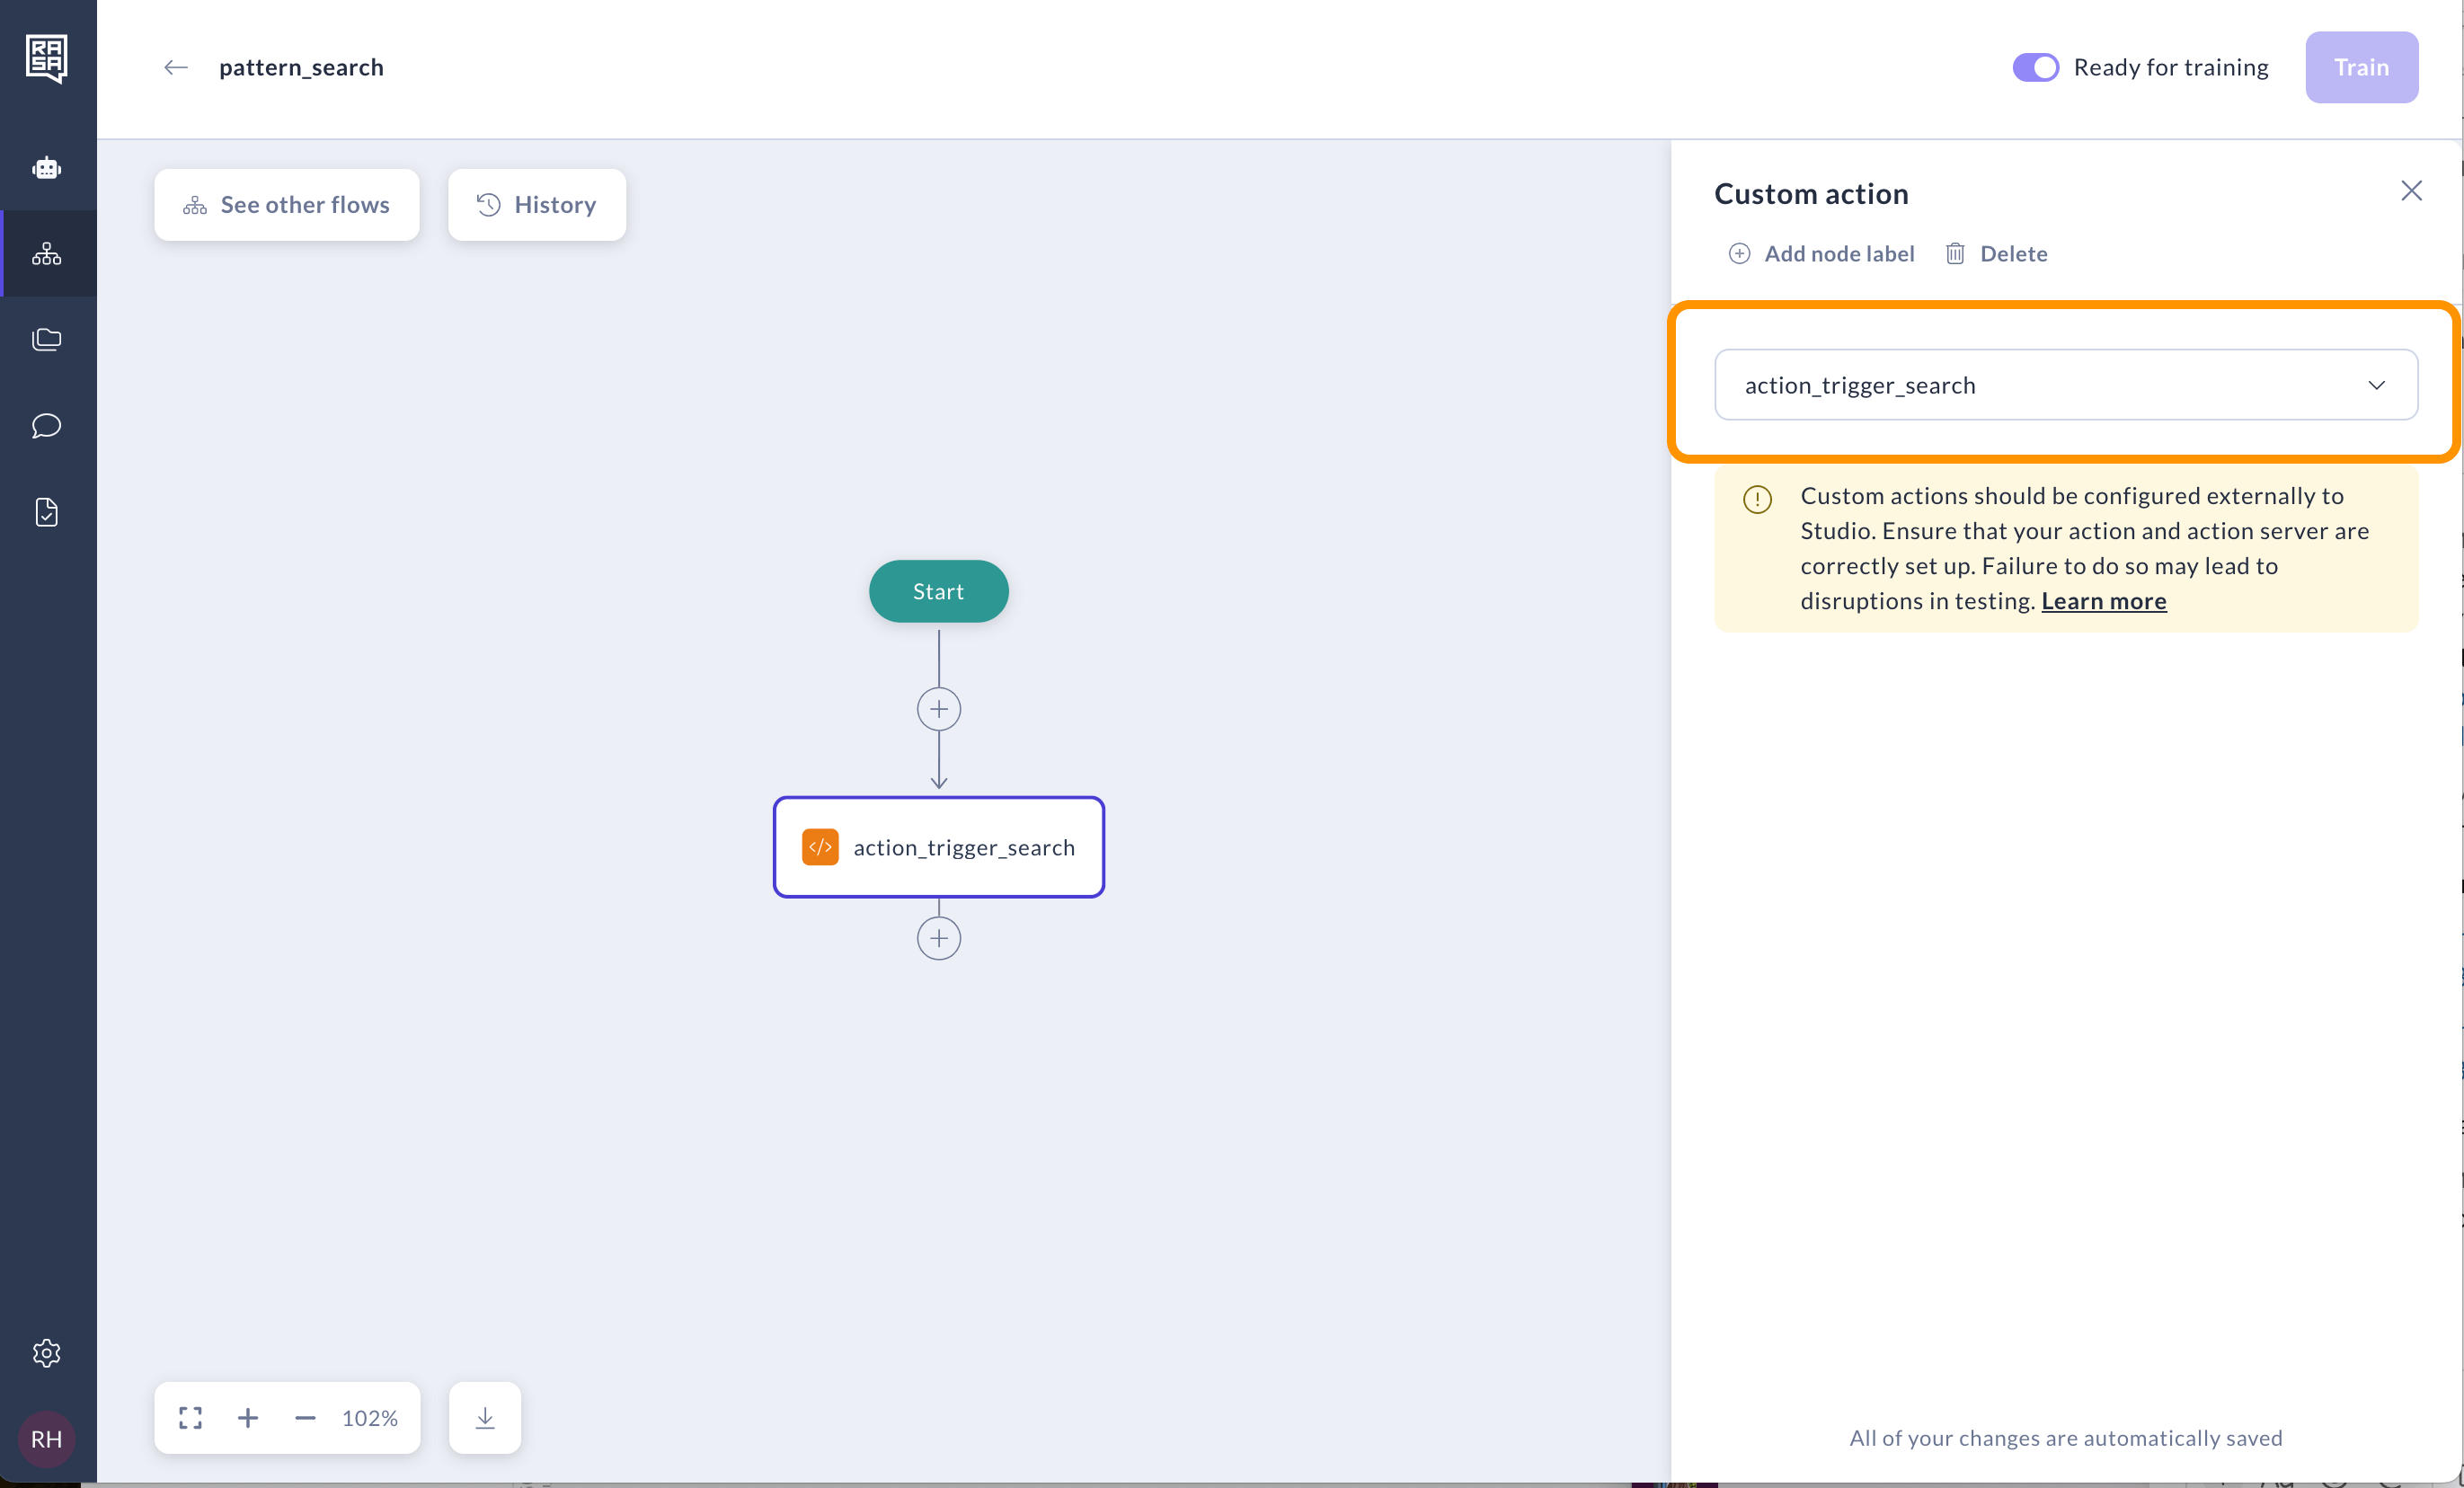
Go to the "System flows" tab and open pattern_search to modify it.
Delete the message and add the custom action step instead. In the right panel, select the action named action_trigger_search.
Go to the Assistant settings page to modify the configuration.
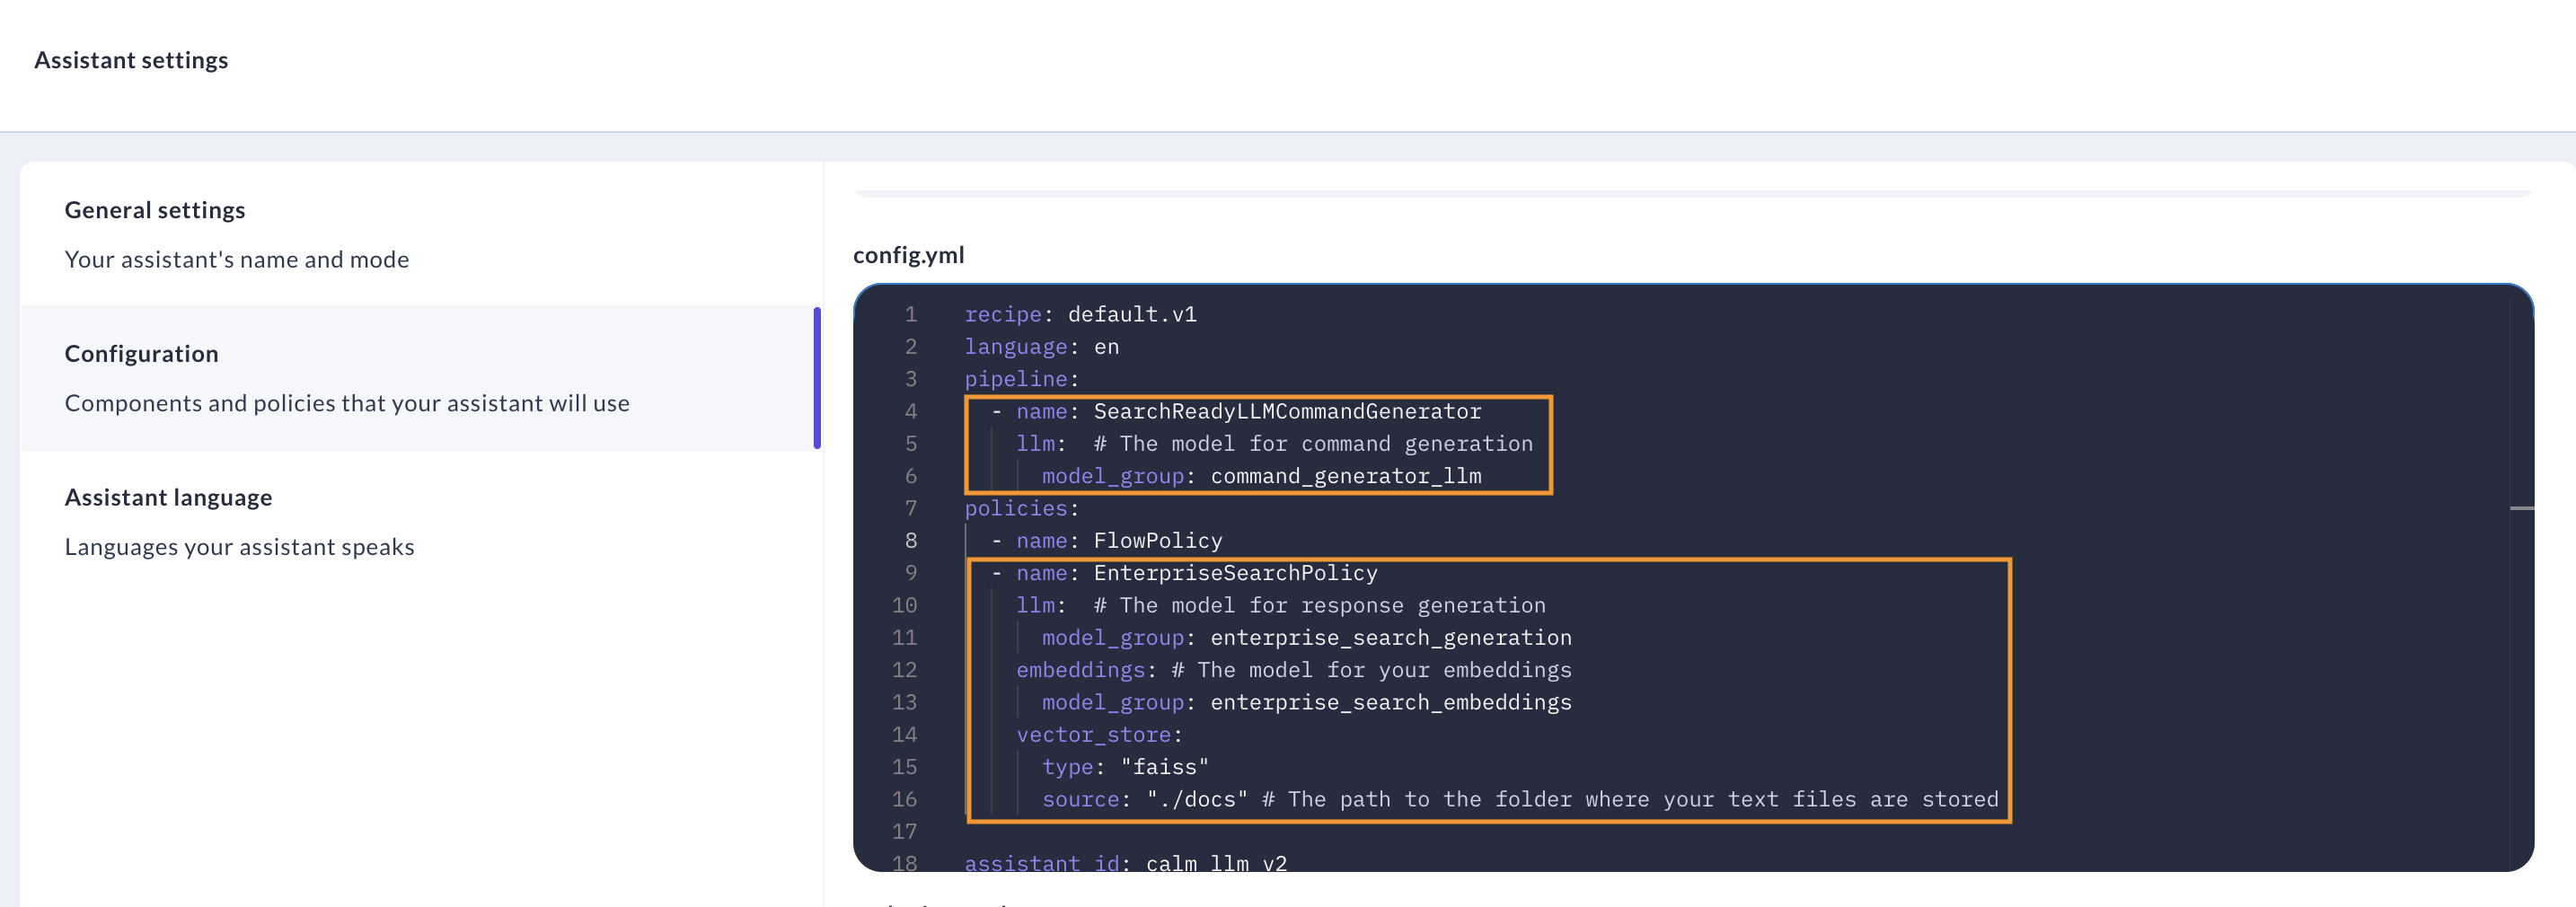
In the config.yml field, add Enterprise Search Policy and specify the type of your vector store.
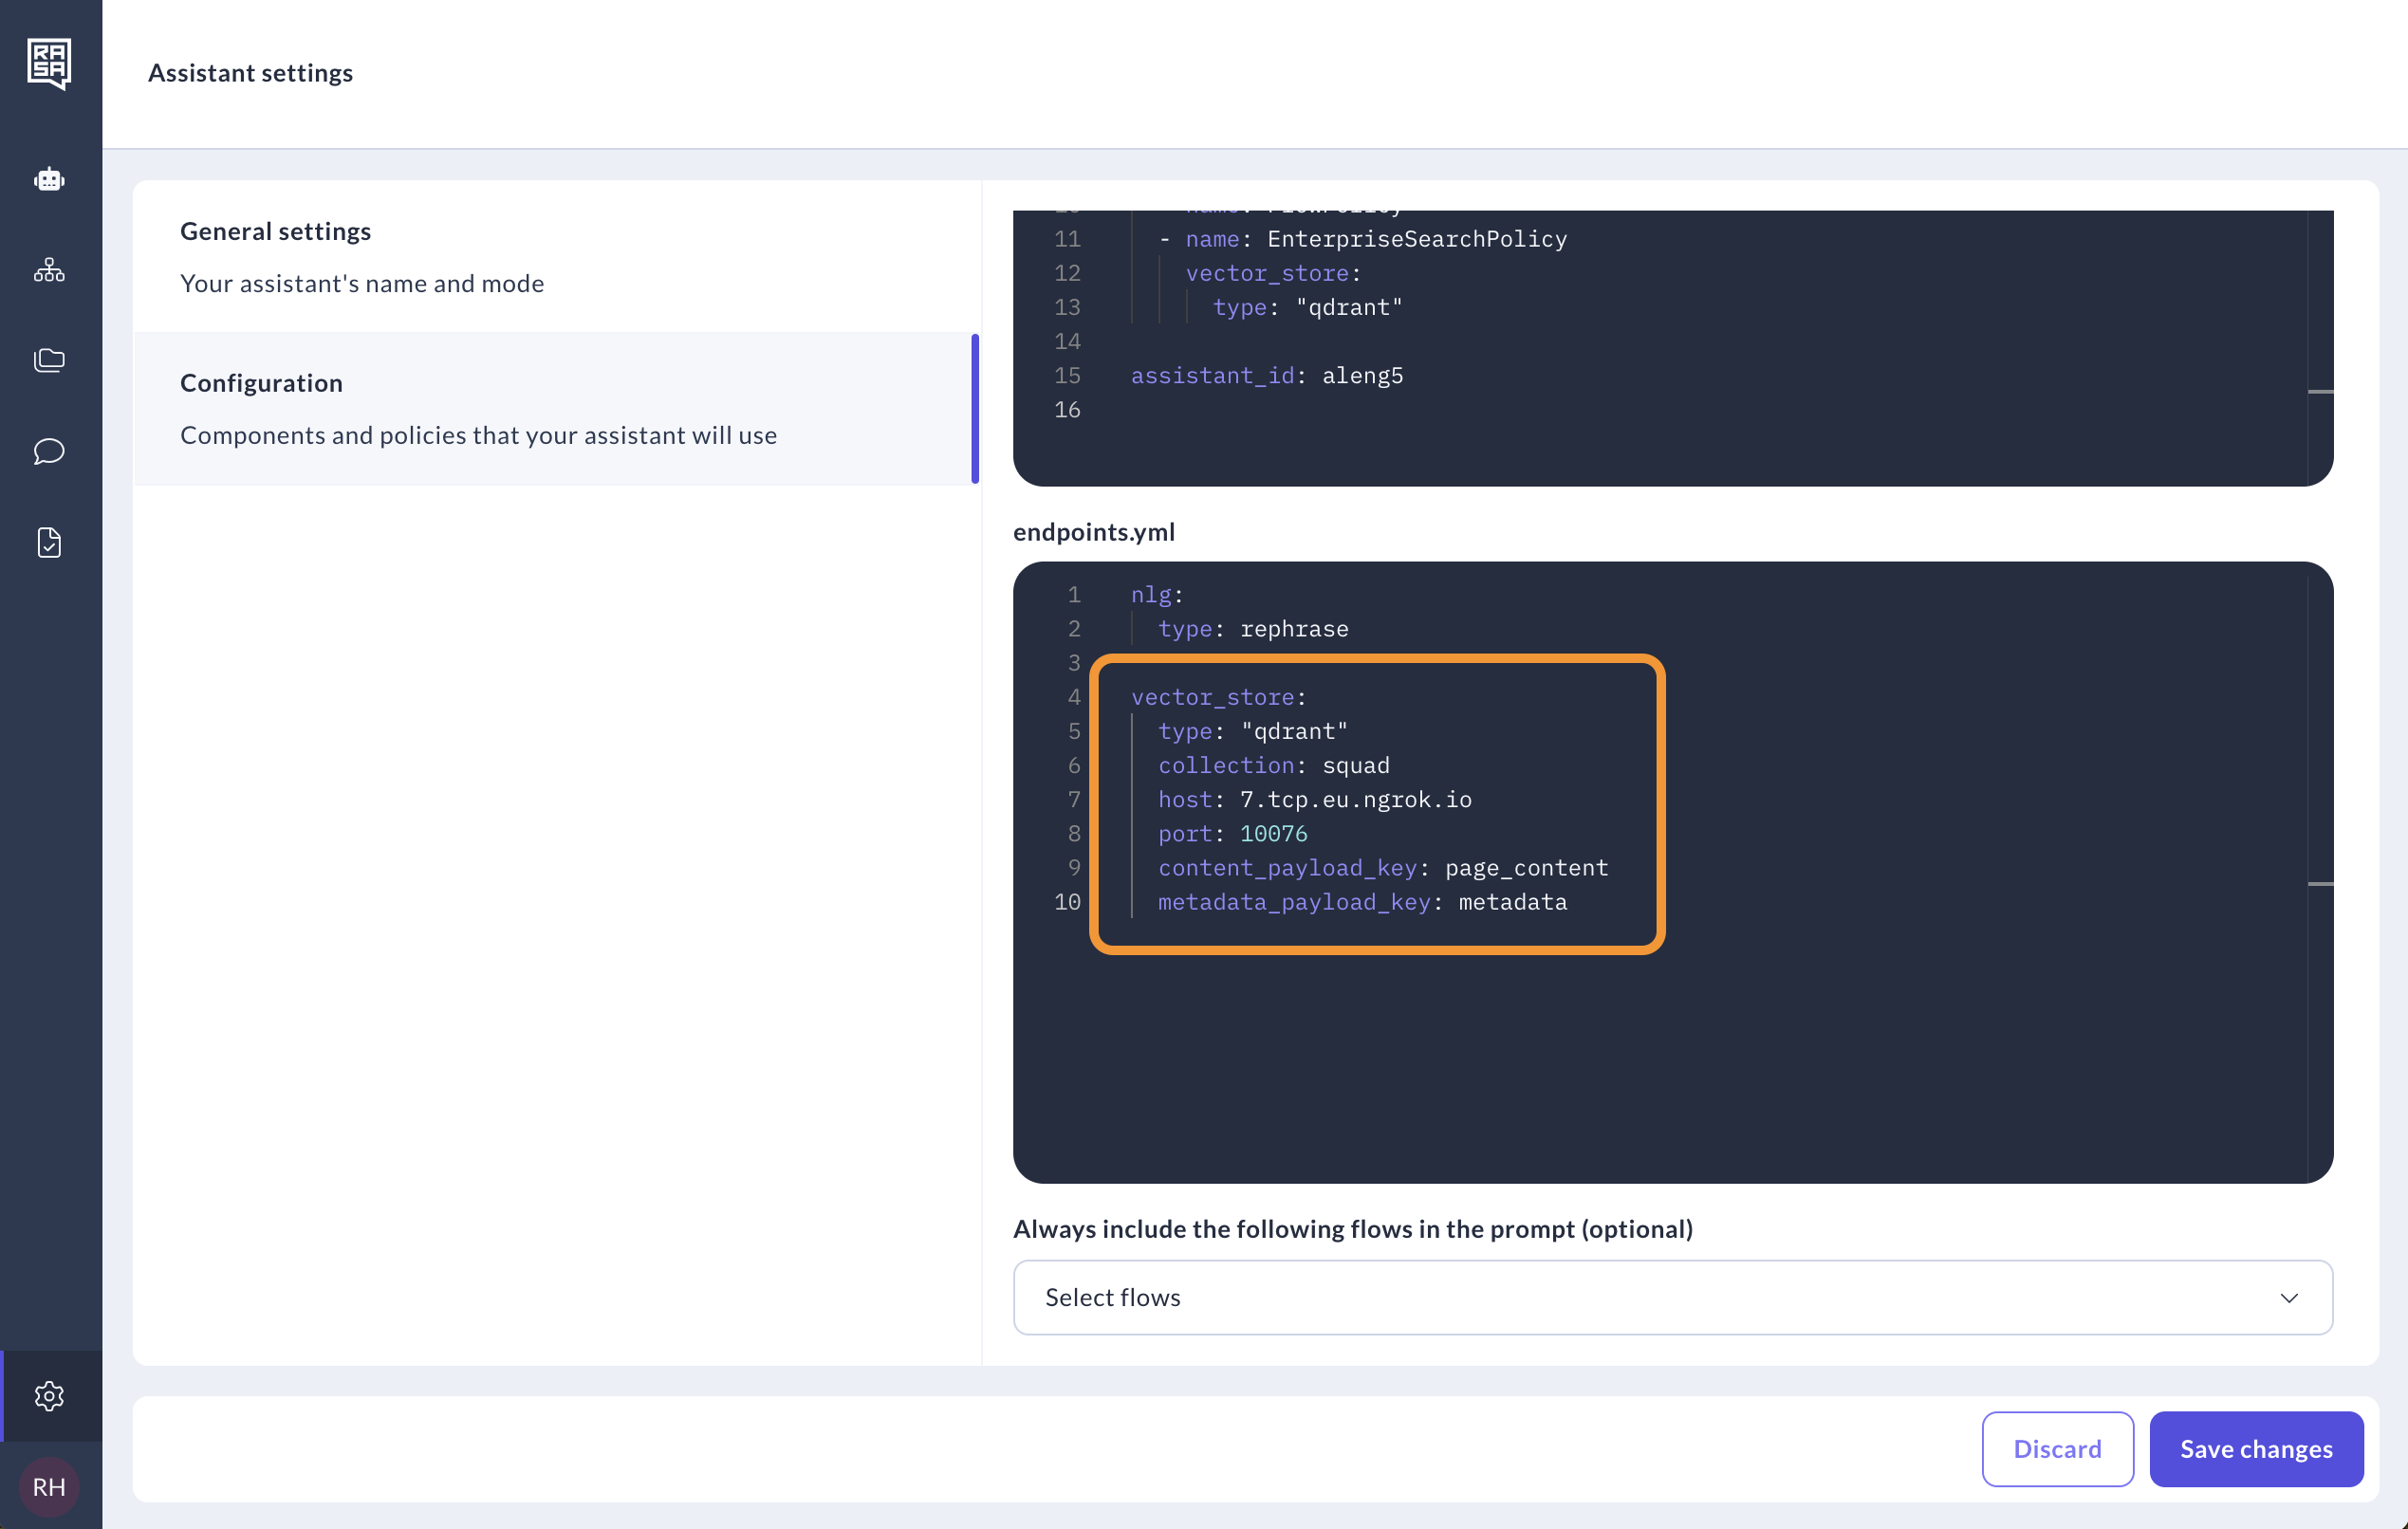
In the endpoints.yml, set up the connection to your vector store. Click "Save".
Train your assistant and test it on the Try your assistant page. You will be able to see the answers generated by the Enterprise search.