Train your Assistant
This guide will walk you through the process of training your assistant in Rasa Studio. By the end, you'll understand how to initiate training, monitor its progress, resolve common errors, and debug issues.
Before You Start
Training a model requires specific permissions that are not available to every Studio role. Ensure your role has the right access before continuing.
About Training
Training compiles your flows, NLU data, and other inputs into a functional model, that you can use for testing or deploy to production.
Rasa Studio provides two ways to train your assistant:
⭐️ Training in Studio (Recommended):
For rapid iteration and testing your assistant within the Studio UI.
Training your assistant locally with Rasa:
Useful for technical users who have additional custom components or advanced integration steps that they want incorporated before training.
If you're interested in diving into technical details of how training works see more in our Training Architecture Reference.
Training in Studio
Get Started
-
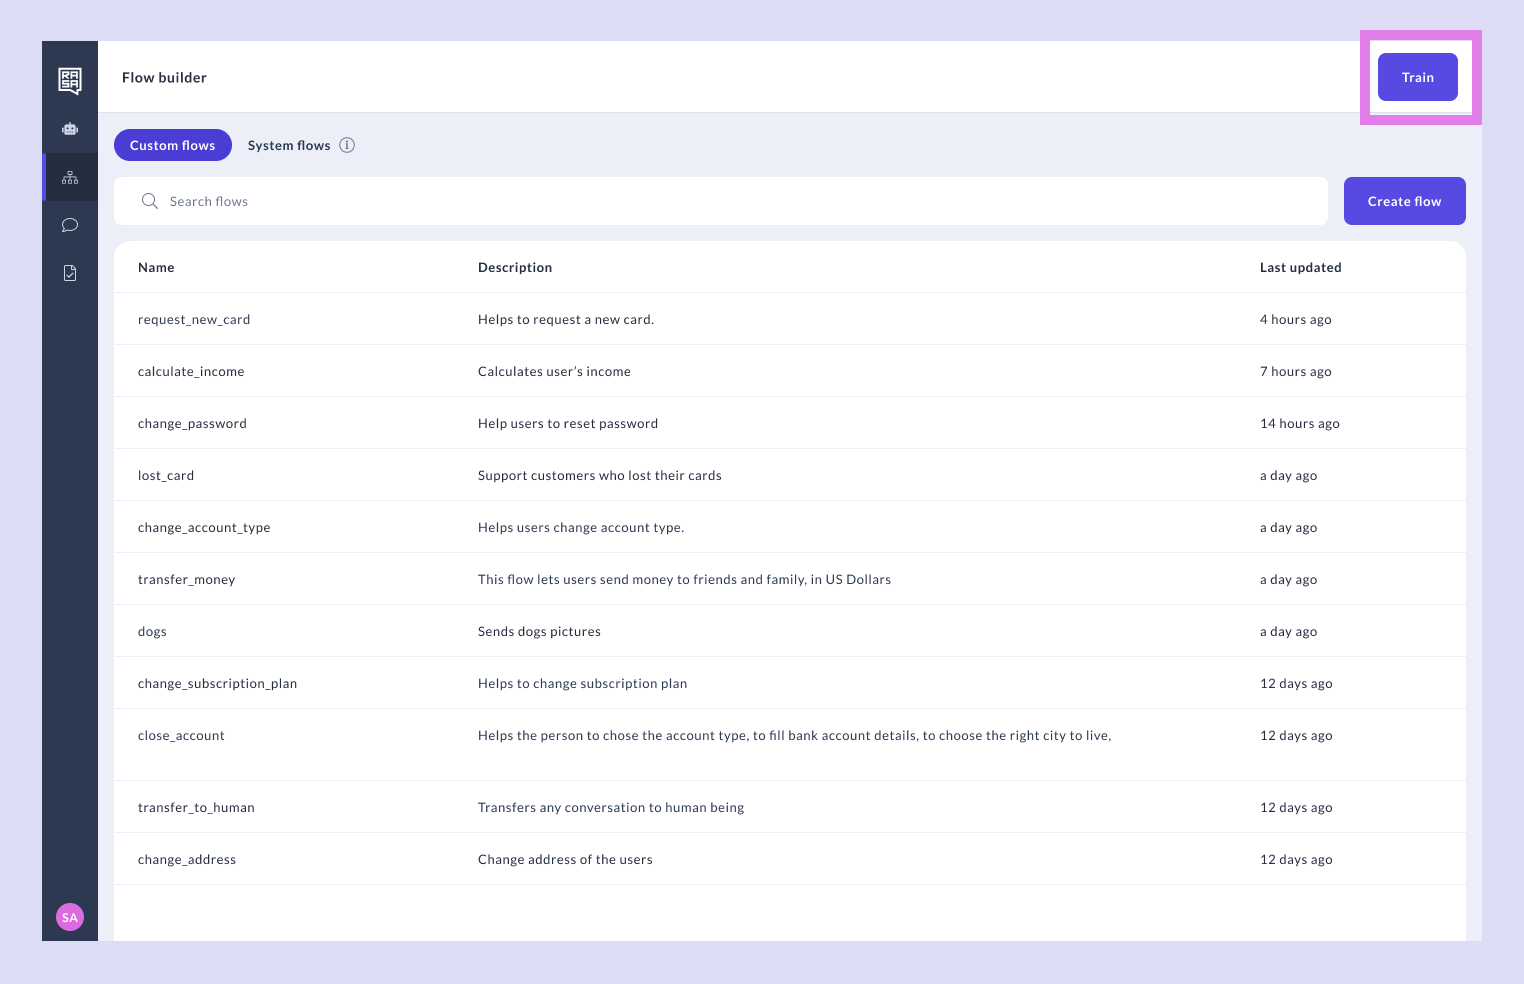
Access Training
Navigate to the Flow builder. You should be able to see the "Train" button:
-
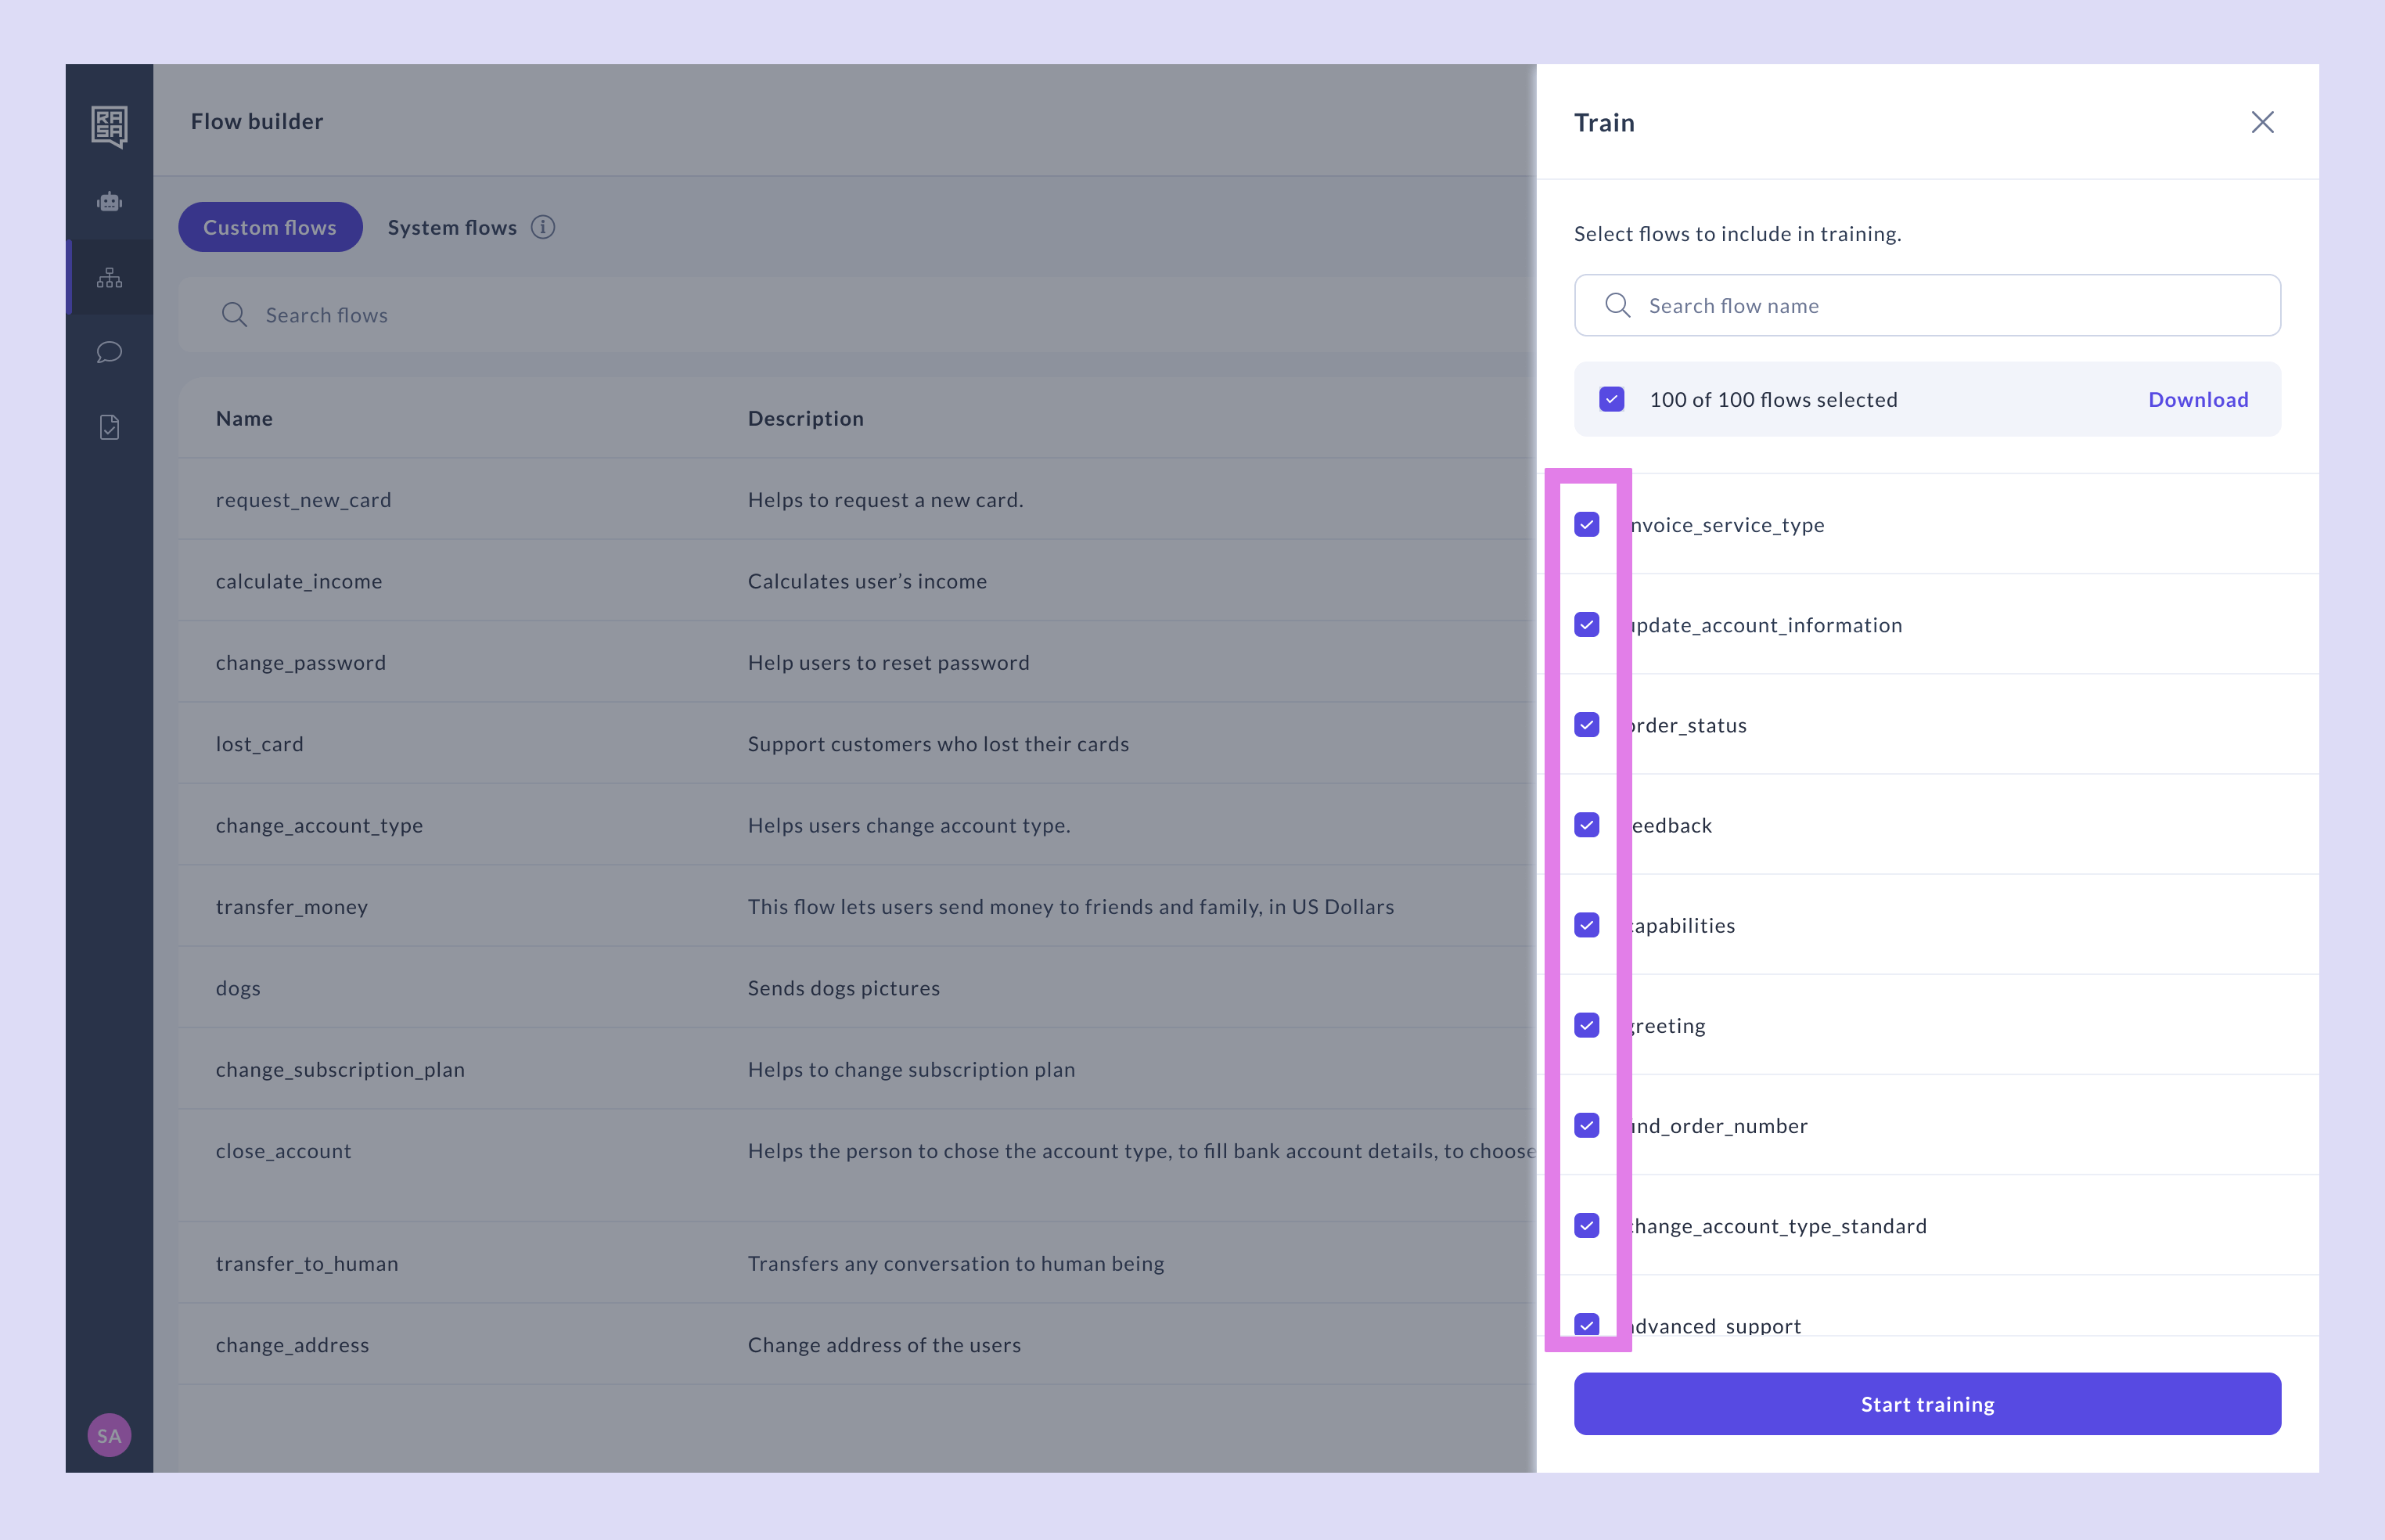
Select Flows
In the Train panel, make sure all the flows you want to include in training are selected. Note that NLU, responses and all other primitives saved in Studio are always included in training.
-
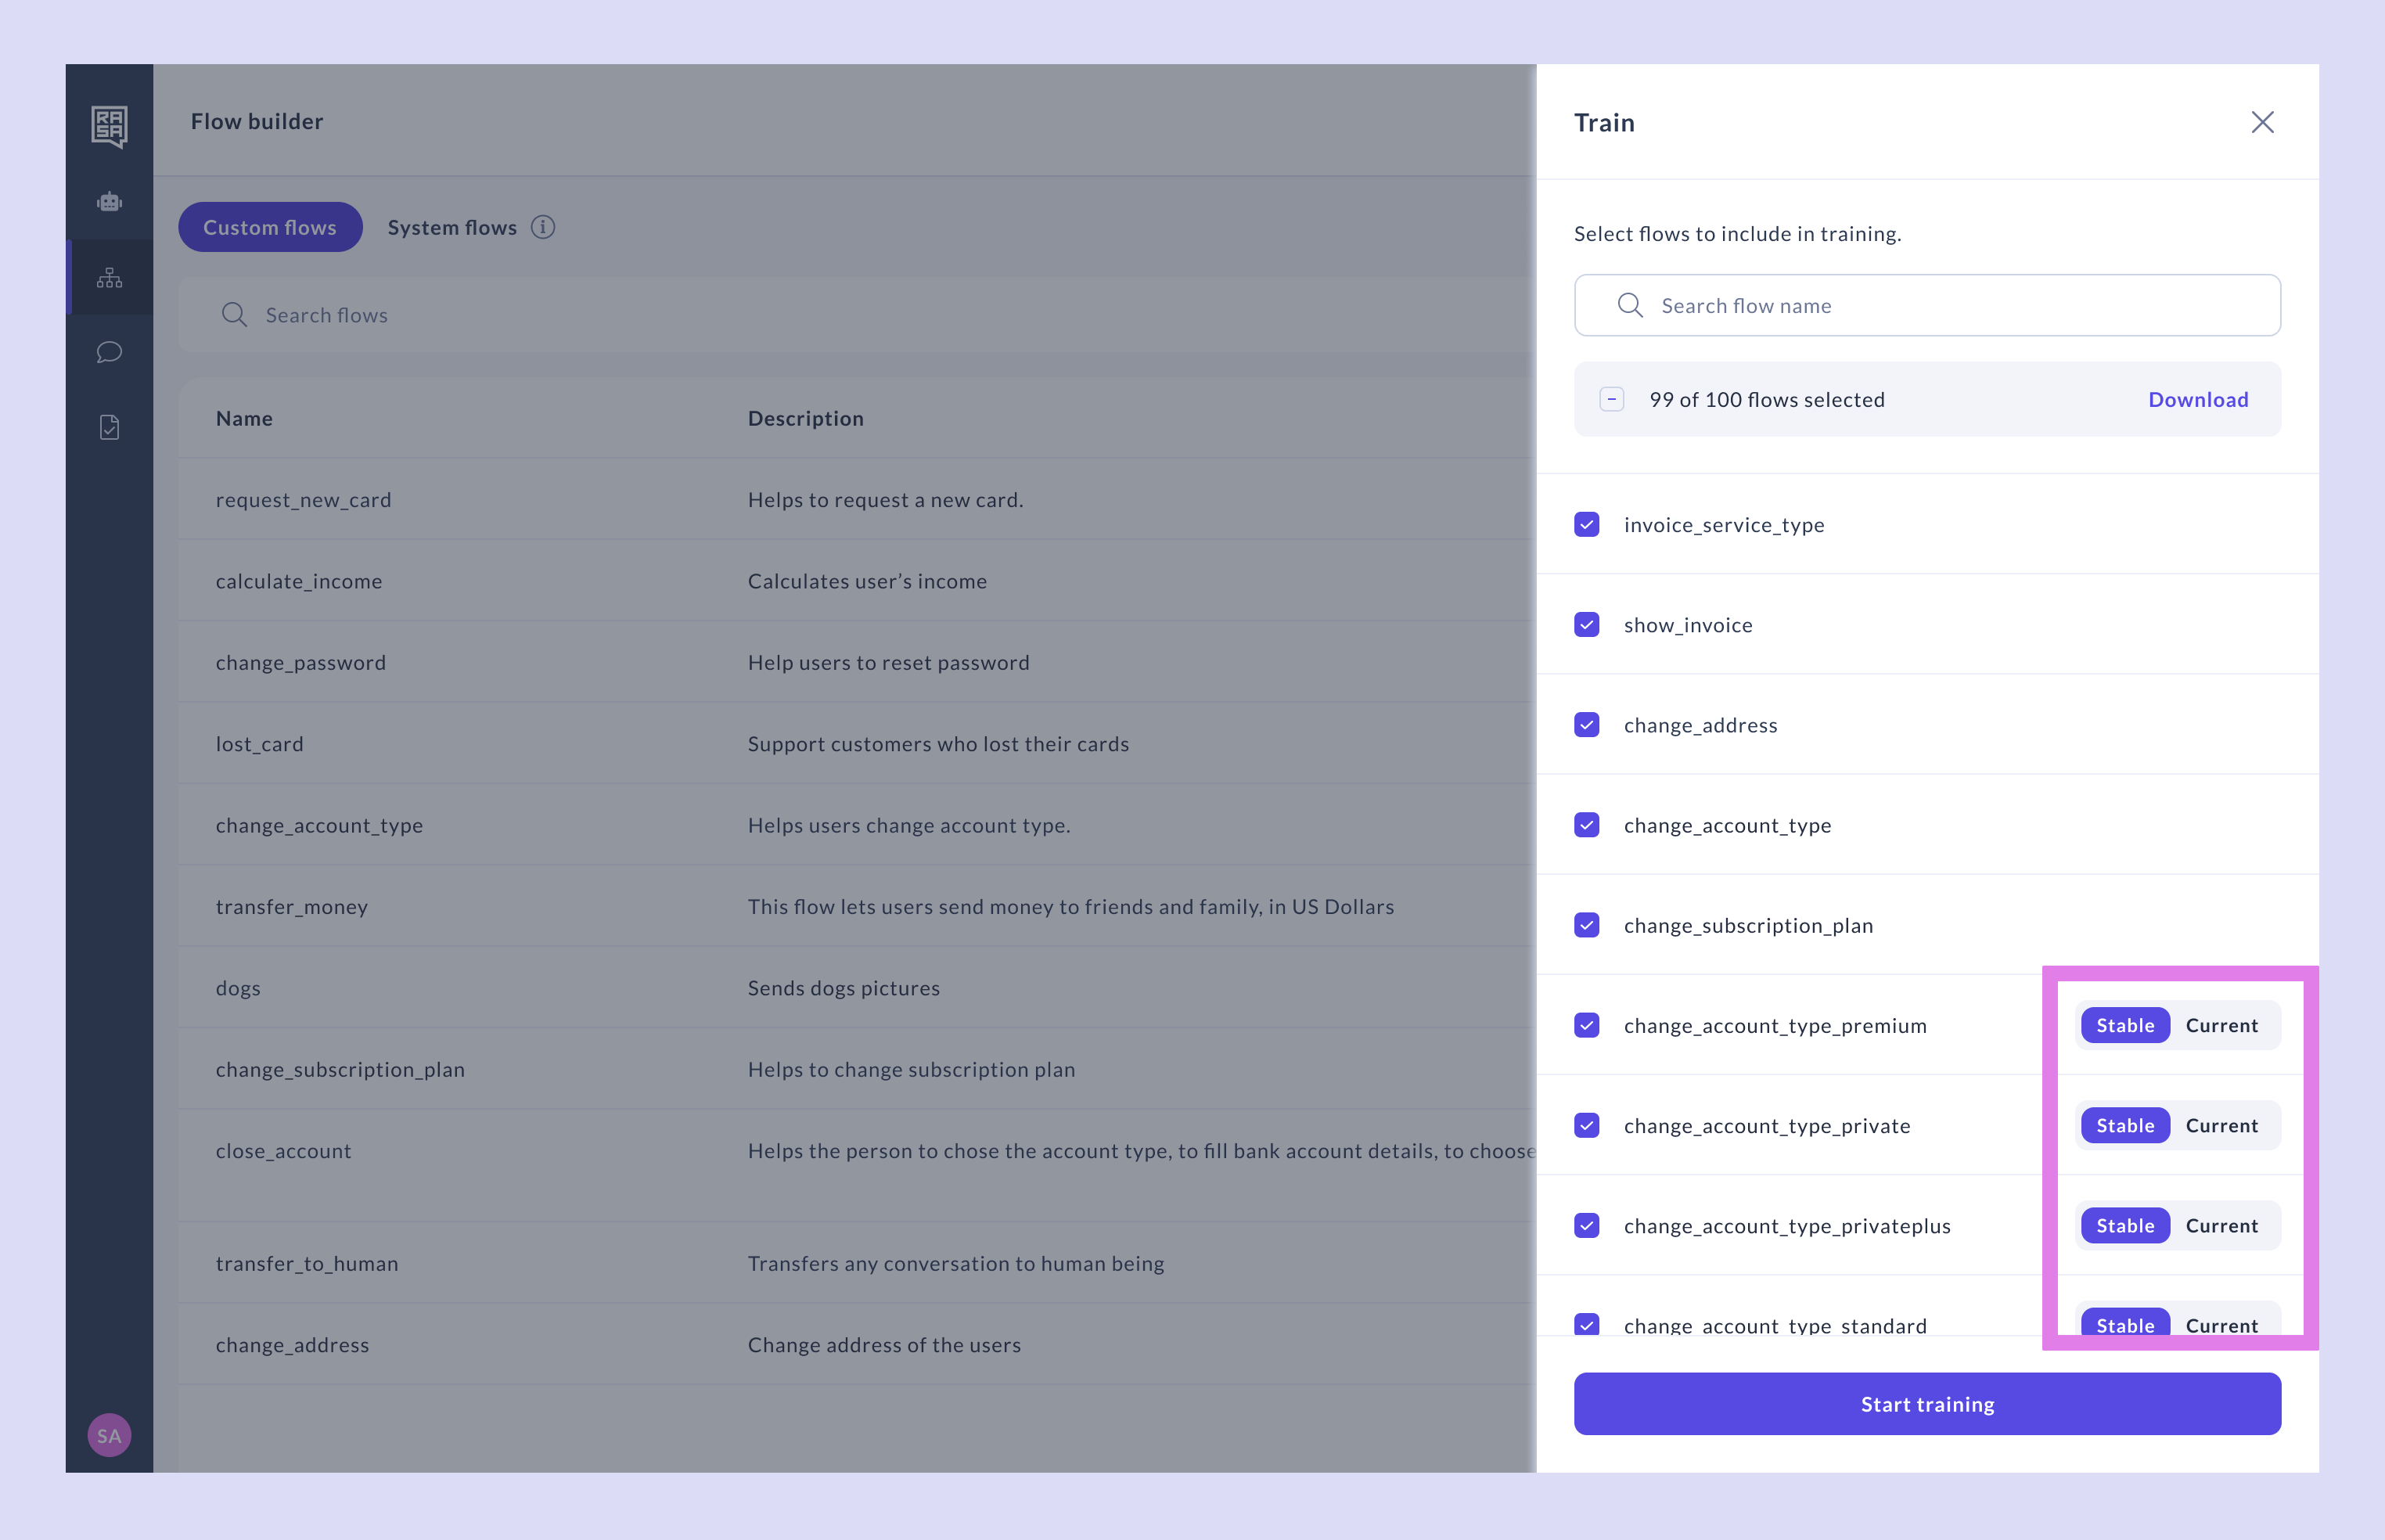
Select Flow Version (optional)
If you're using flow versioning and have saved some flows as "Stable," you’ll also see a switch to select between the "Draft" and "Stable" versions. Choose either the latest stable version or the current draft to include in training. Select the "Stable" version if you don’t want to include the latest changes made to the flow. Learn more about creating a stable version of flows.
-
Train
Once your flows are ready, click the "Start training" button. Studio will validate your flows before beginning the training process. When the training is completed successfully, test the newly created assistant version on Try your assistant.
Validate and Improve
Rasa Studio validates your flows before the training process begins. This step helps you catch common issues—like missing intents or invalid syntax—early in the process, saving time and effort.
-
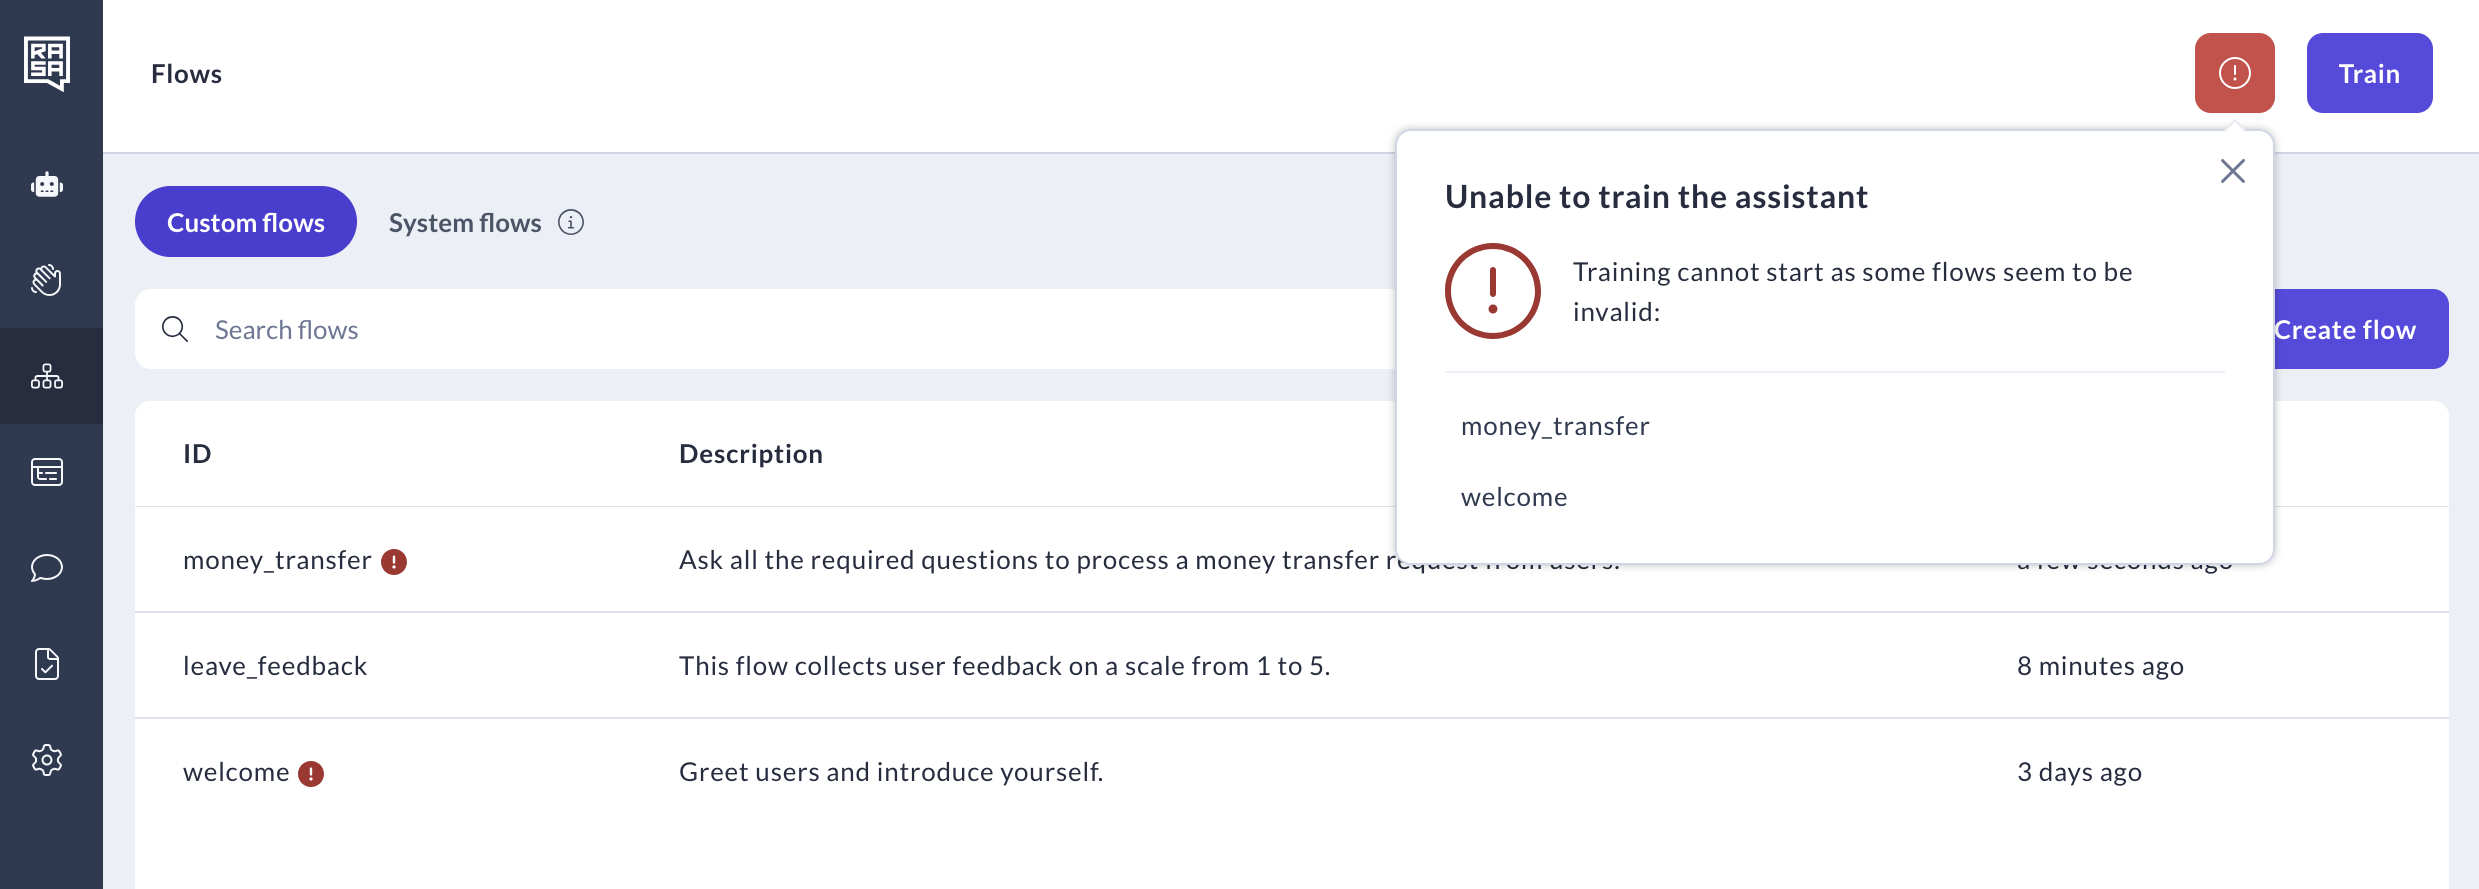
Resolve Validation Errors
If errors are found during validation, you’ll see an "Unable to train" message.
- Click on the flow names in the error list to locate and fix issues.
- Examples of errors include missing intents, invalid syntax, or unsupported actions.
-
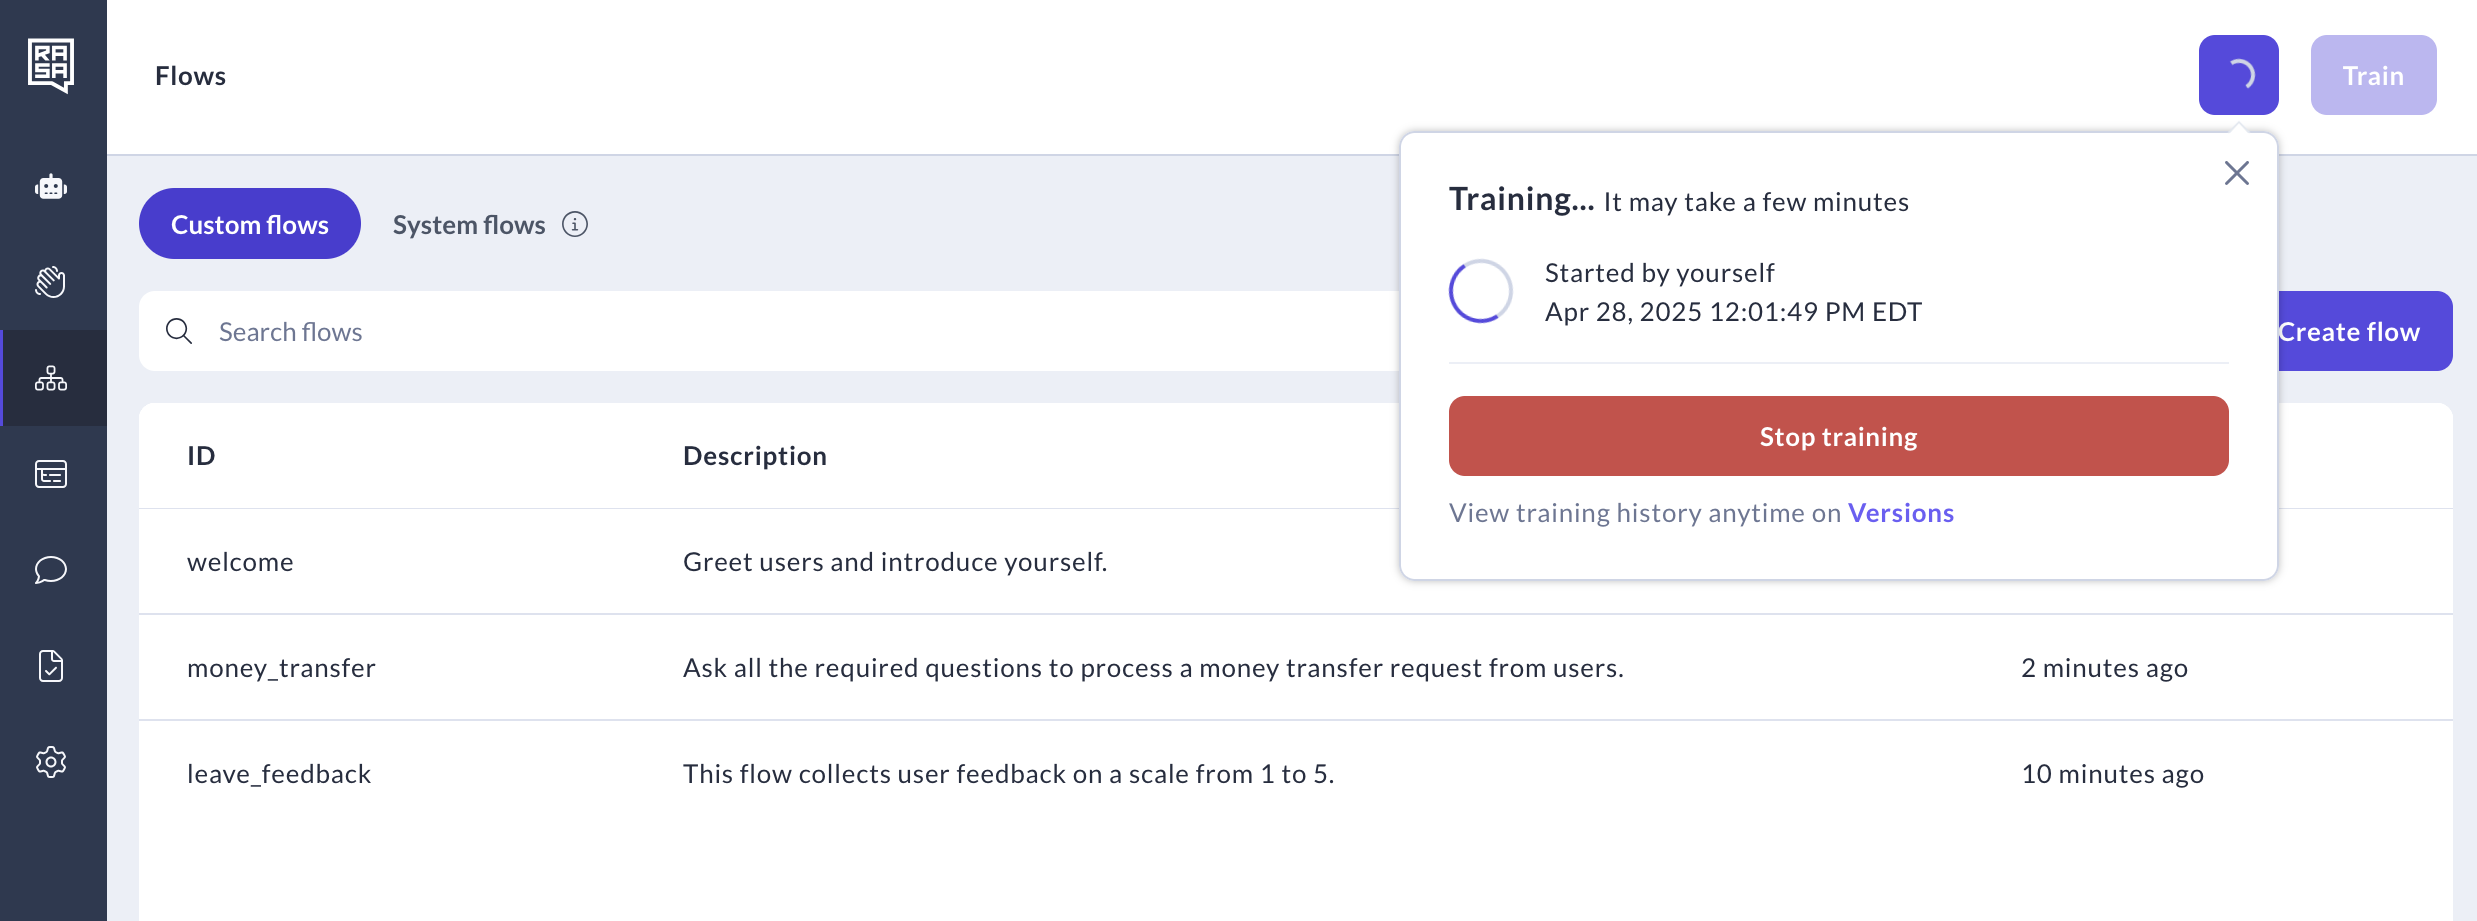
Monitor Progress
After validation, Studio will display a training progress message. Other users can view the status but cannot stop or restart training until it’s complete.
How to Manage Training Outcomes
Once validation is complete, training begins automatically. Studio provides details on the outcomes as well as logs to help you debug any issues that might come up.
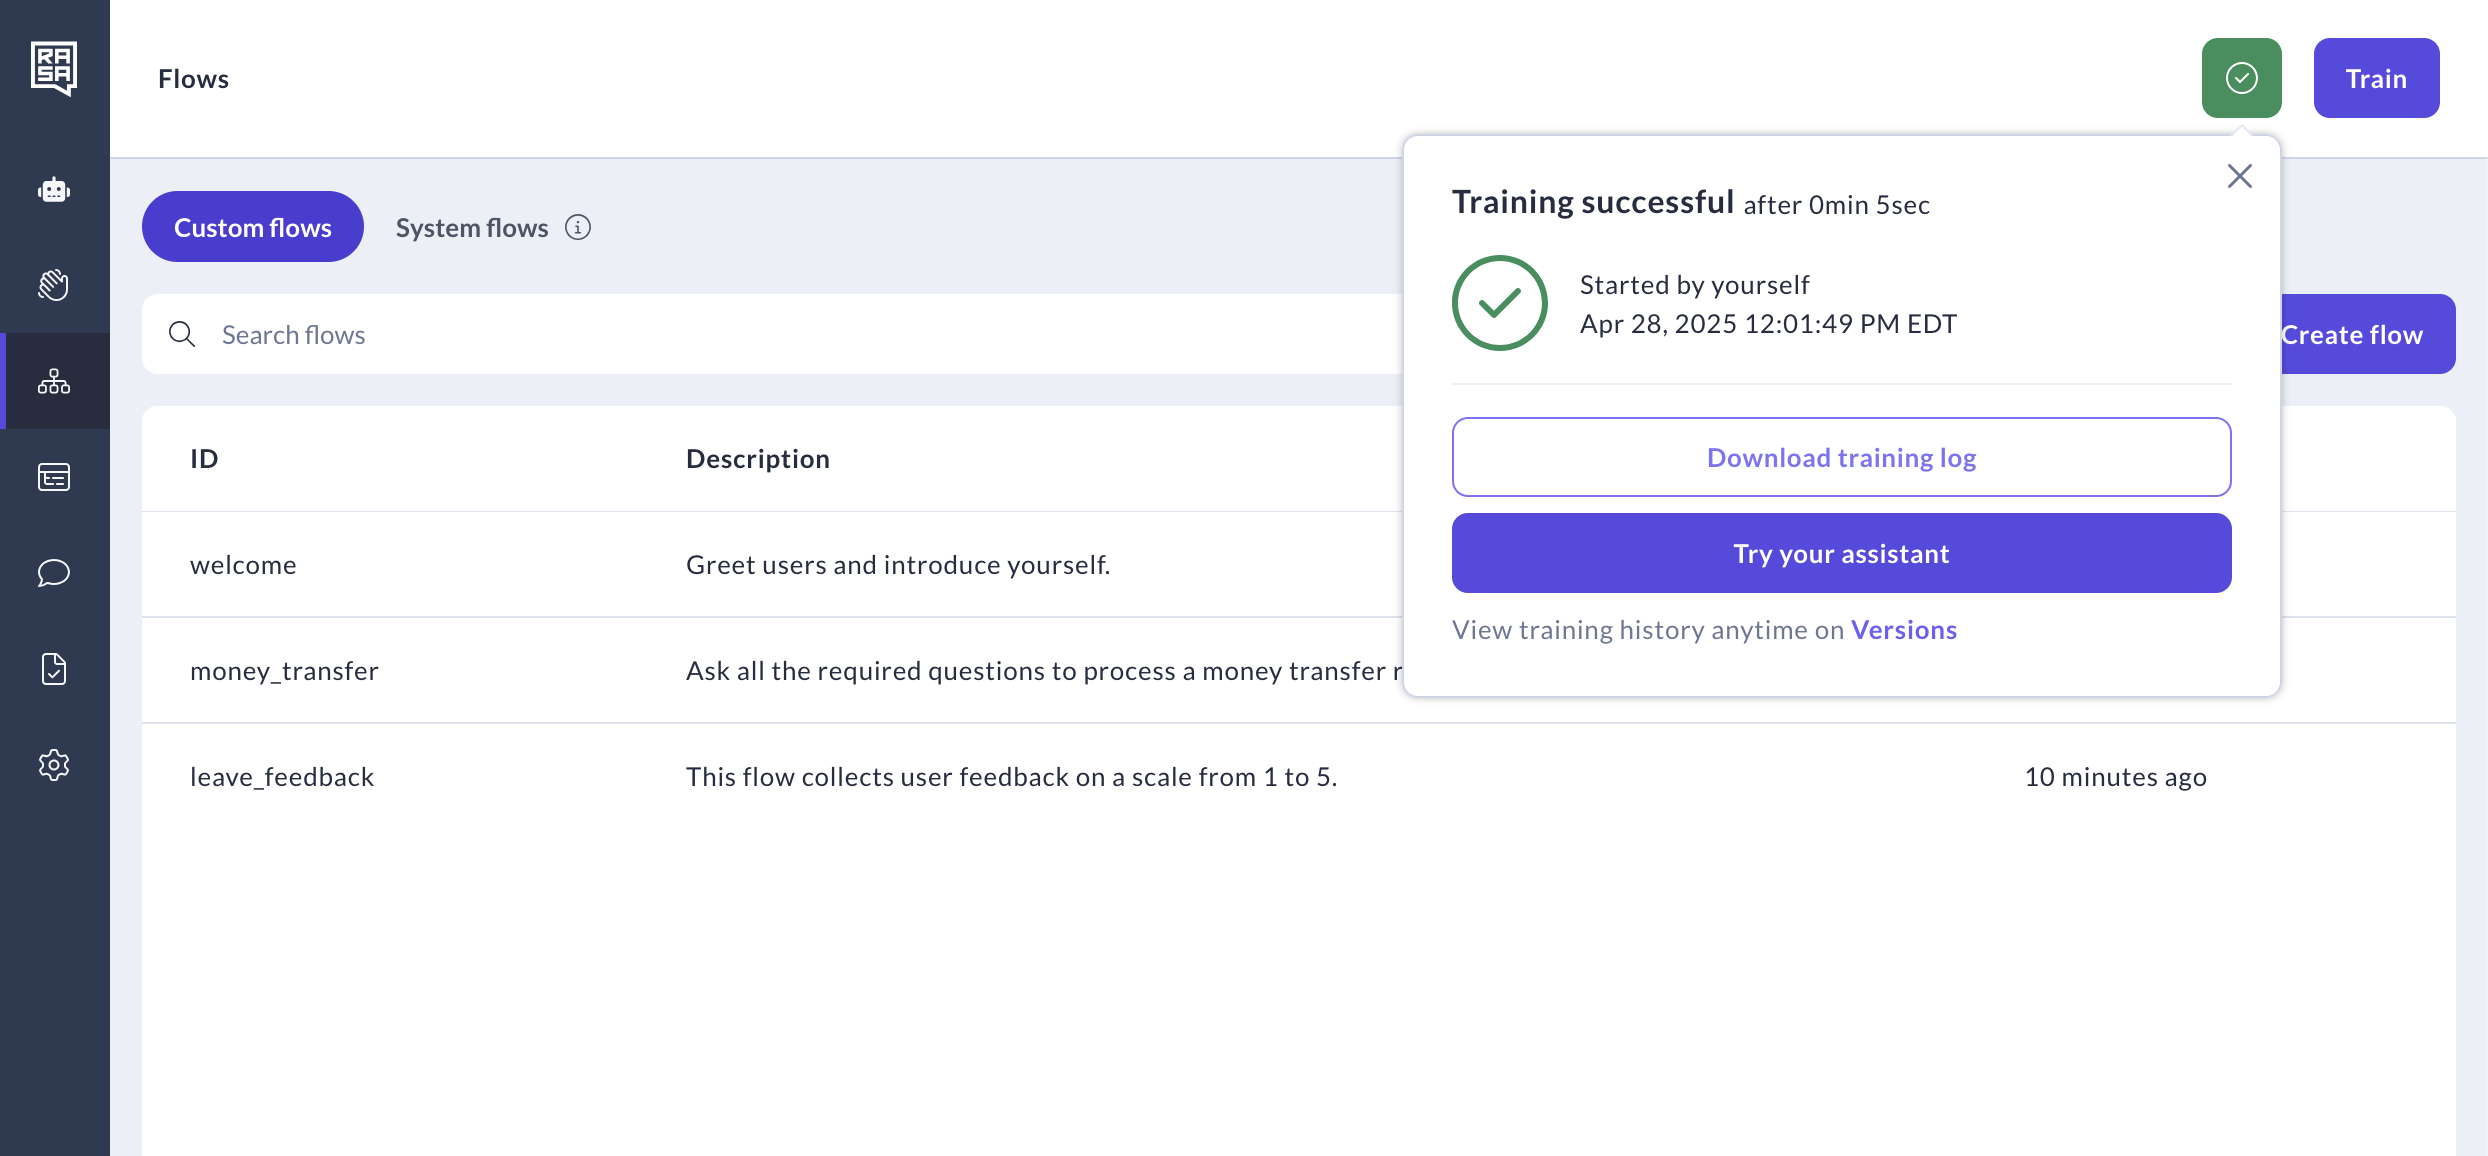
- Handle Training Outcomes
-
Successful Training: A green checkmark and success message indicate the model is ready.
-
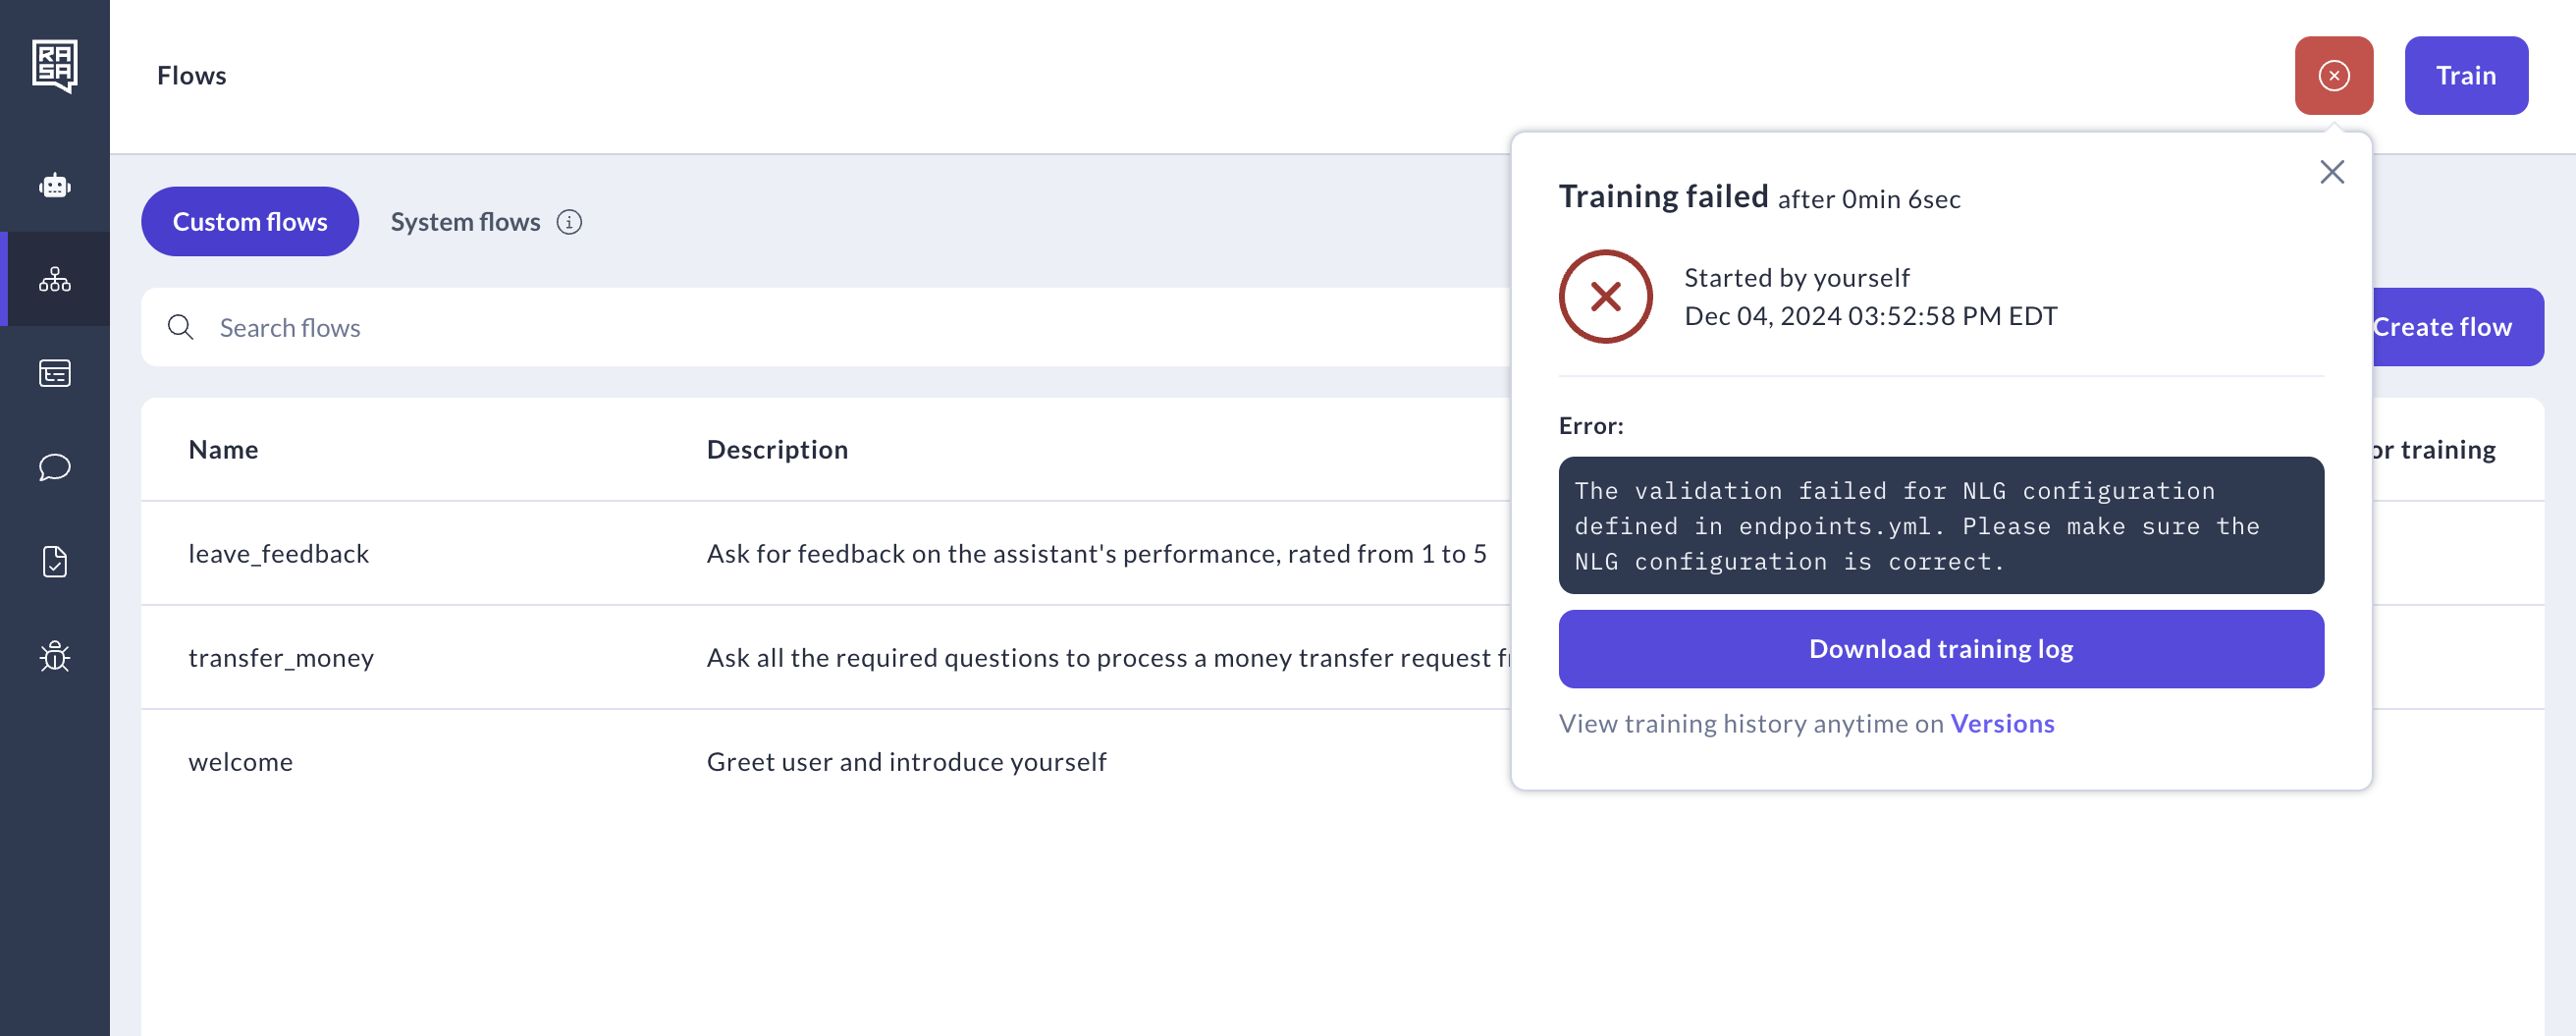
Training Failure: If training fails, download the logs from the Versions page to investigate. Typical causes include invalid training data or conflicting rules.
-
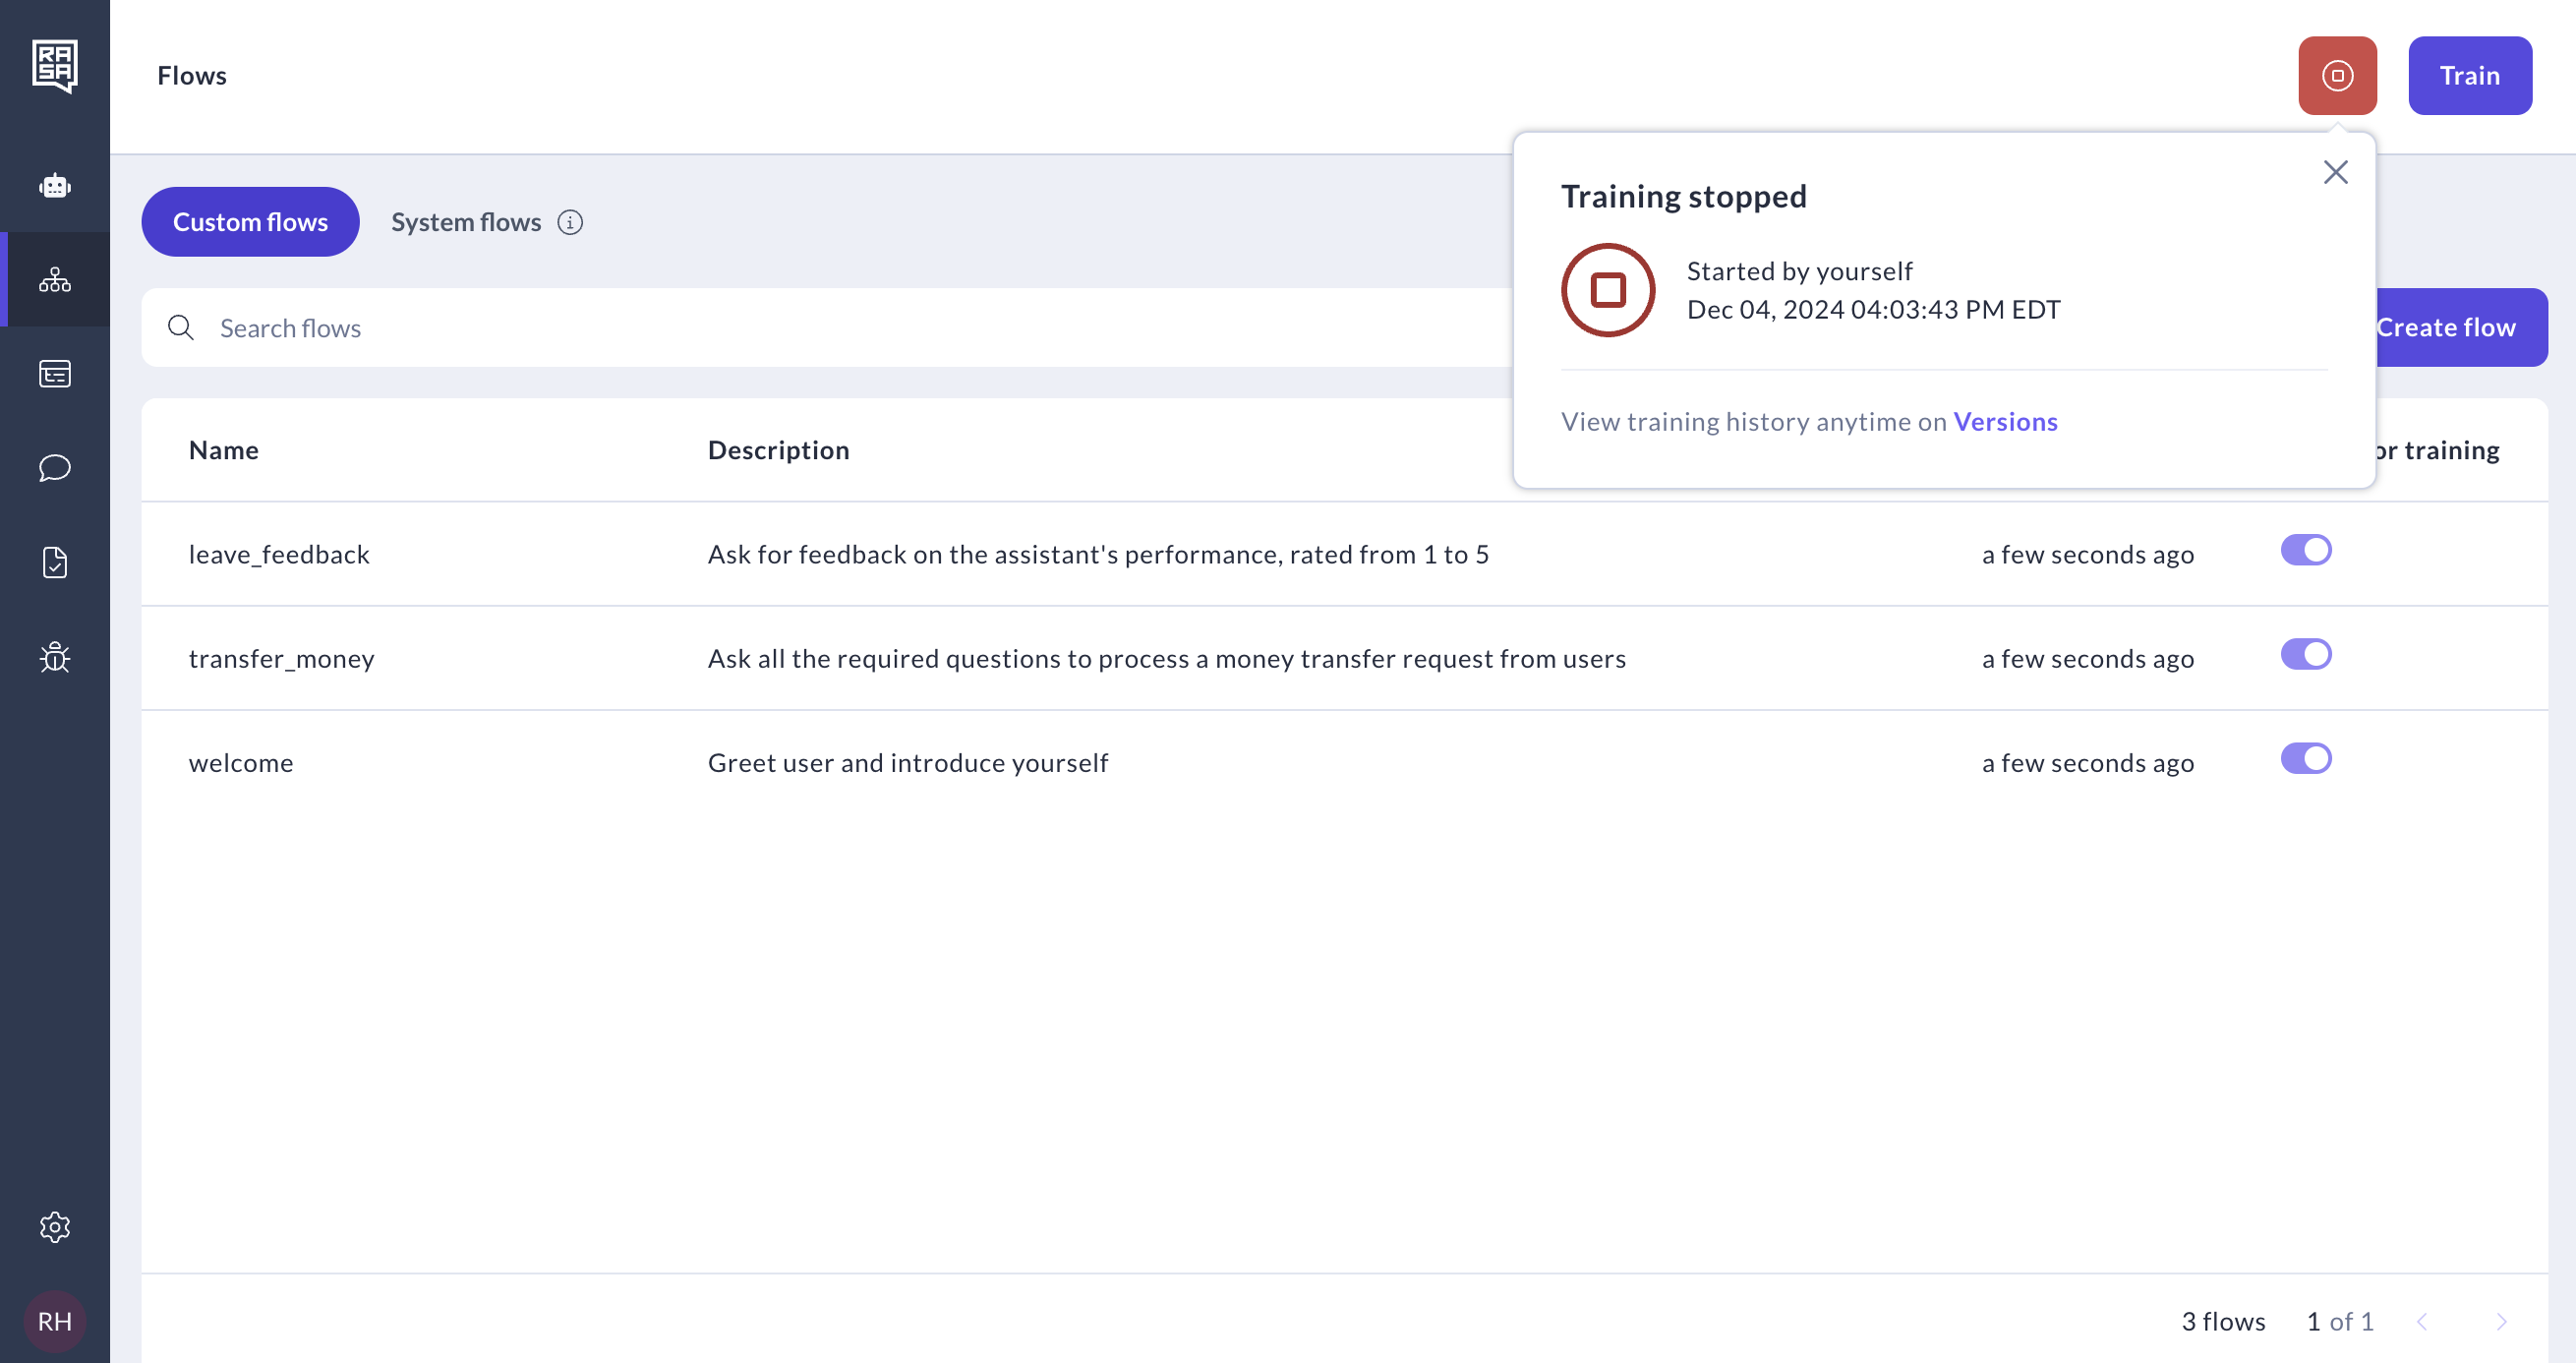
Stop Training (Optional)
If necessary, the user who initiated training can stop it. This will terminate the process and display a status update.
Troubleshooting Tips
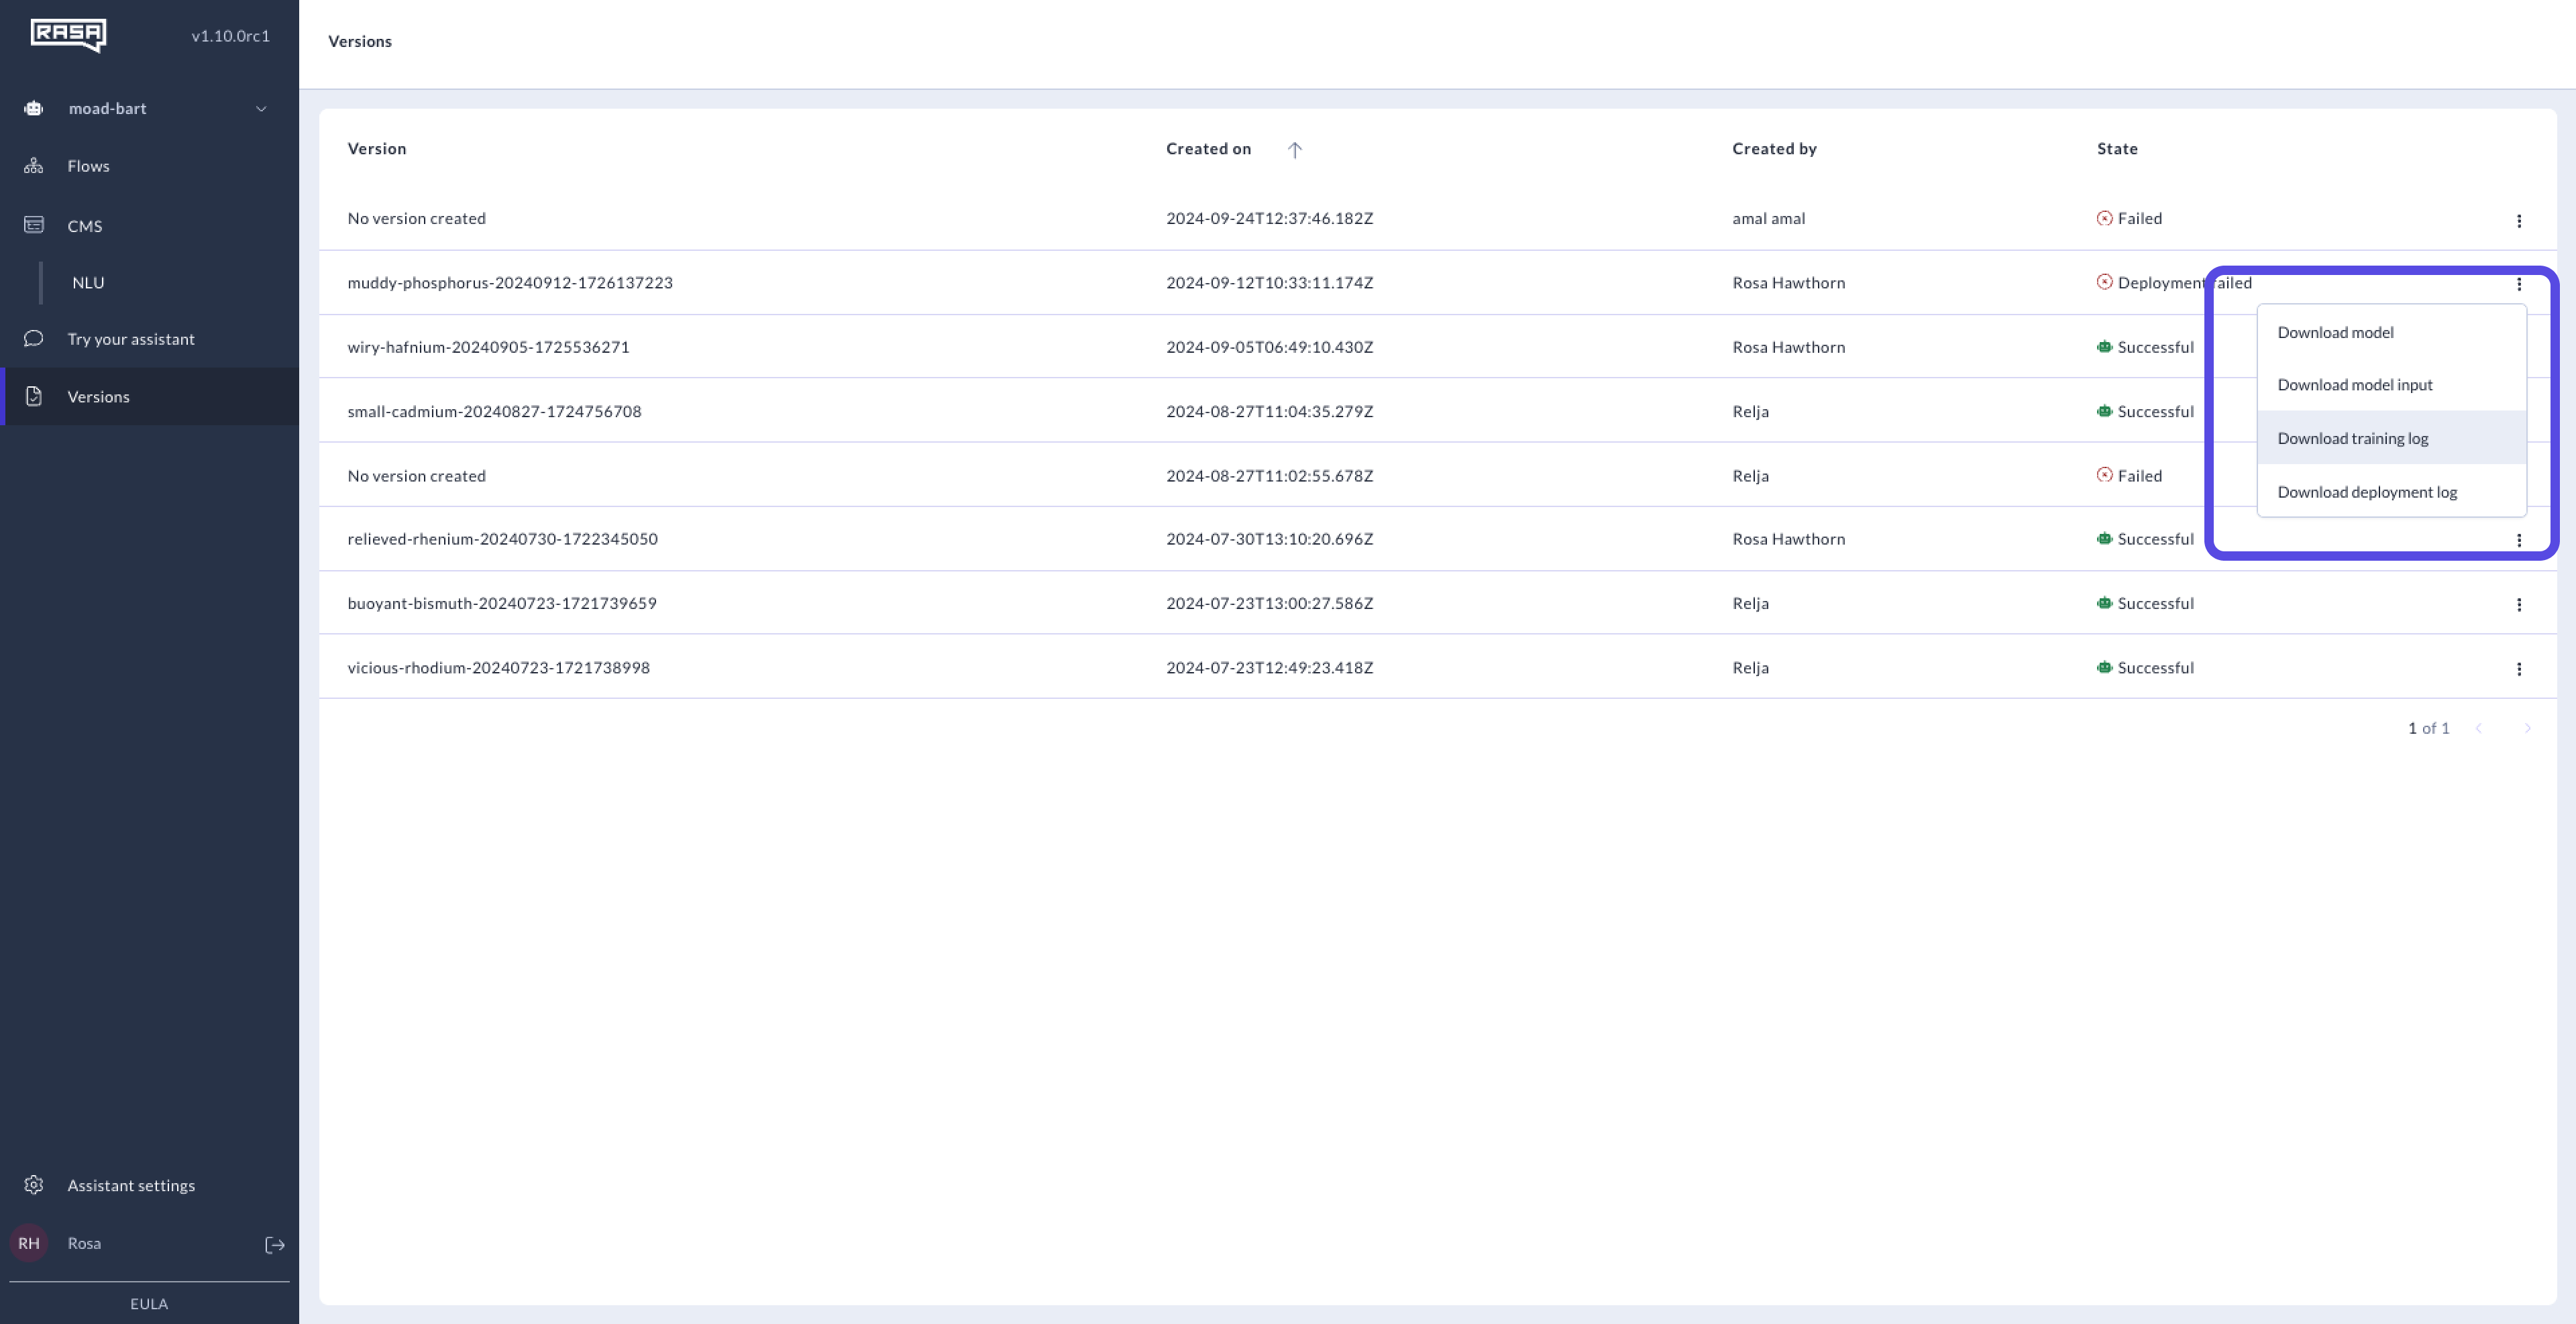
- Access Logs and Versions
Go to the Versions page to view trained versions of your assistant. Use the ellipsis (three dots) next to a version to download the model or training logs for further analysis.
- Reproduce Errors Locally
- Download the model input files from Studio.
- Set up a matching local Rasa Pro environment.
- Run:
rasa train --debug
Training Your Assistant Locally using Rasa Pro
Step One: Download your Assistant Files
Option 1: Downloading via the Studio UI
-
Navigate to the Versions page in Studio, locate the version you want to train, and click the ellipsis (three dots) to download the assistant files.
Option 2: Downloading via the Rasa Pro CLI
Replace [assistant-name] with the name of your assistant.
rasa studio download [assistant-name]
Step Two: Train Your Assistant
Place your assistant files in the working directory and run the following command to start training:
rasa train
For more detailed local training steps using the Rasa Pro you can take a look at the technical reference to train your assistant locally.