notice
This is documentation for Rasa Documentation v2.x, which is no longer actively maintained.
For up-to-date documentation, see the latest version (3.x).
Setting up CI/CD
Even though developing a contextual assistant is different from developing traditional software, you should still follow software development best practices. Setting up a Continuous Integration (CI) and Continuous Deployment (CD) pipeline ensures that incremental updates to your bot are improving it, not harming it.
Overview
Continous Integration (CI) is the practice of merging in code changes frequently and automatically testing changes as they are committed. Continuous Deployment (CD) means automatically deploying integrated changes to a staging or production environment. Together, they allow you to make more frequent improvements to your assistant and efficiently test and deploy those changes.
This guide will cover what should go in a CI/CD pipeline, specific to a Rasa project. How you implement that pipeline is up to you. There are many CI/CD tools out there, such as GitHub Actions, GitLab CI/CD, Jenkins, and CircleCI. We recommend choosing a tool that integrates with whatever Git repository you use.
Continuous Integration (CI)
The best way to improve an assistant is with frequent incremental updates. No matter how small a change is, you want to be sure that it doesn't introduce new problems or negatively impact the performance of your assistant.
It is usually best to run CI checks on merge / pull requests or on commit. Most tests are quick enough to run on every change. However, you can choose to run more resource-intensive tests only when certain files have been changed or when some other indicator is present. For example, if your code is hosted on Github, you can make a test run only if the pull request has a certain label (e.g. “NLU testing required”).
CI Pipeline Overview
Your CI pipeline should include model training and testing as steps to streamline the deployment process. The first step after saving new training data is to kick off the pipeline. This can be initiated manually or when you create or update a pull request.
Next, you need to run various sets of test to see the impact of your changes. This includes running tests for data validation, NLU cross validation, and story testing. For more information about testing, see Testing Your Assistant.
The last step is to review the results of your test and push the changes if the tests are successful. Once the new model is trained and tested, it can be deployed automatically using a Continuous Deployment pipeline.
GitHub Actions CI Pipeline
You can use the Rasa Train-Test Github Action in your CI pipeline to automatically perform data validation, training, and testing.
An example CI pipeline using the Github Action is shown below:
In this pipeline, the Rasa Train-Test Github Action is performing data validation, model training, and story testing in the first step and the model file is uploaded as an artifact in the second step.
The complete list of configurable parameters for the Rasa Train-Test Github Action is available in the repository's README.
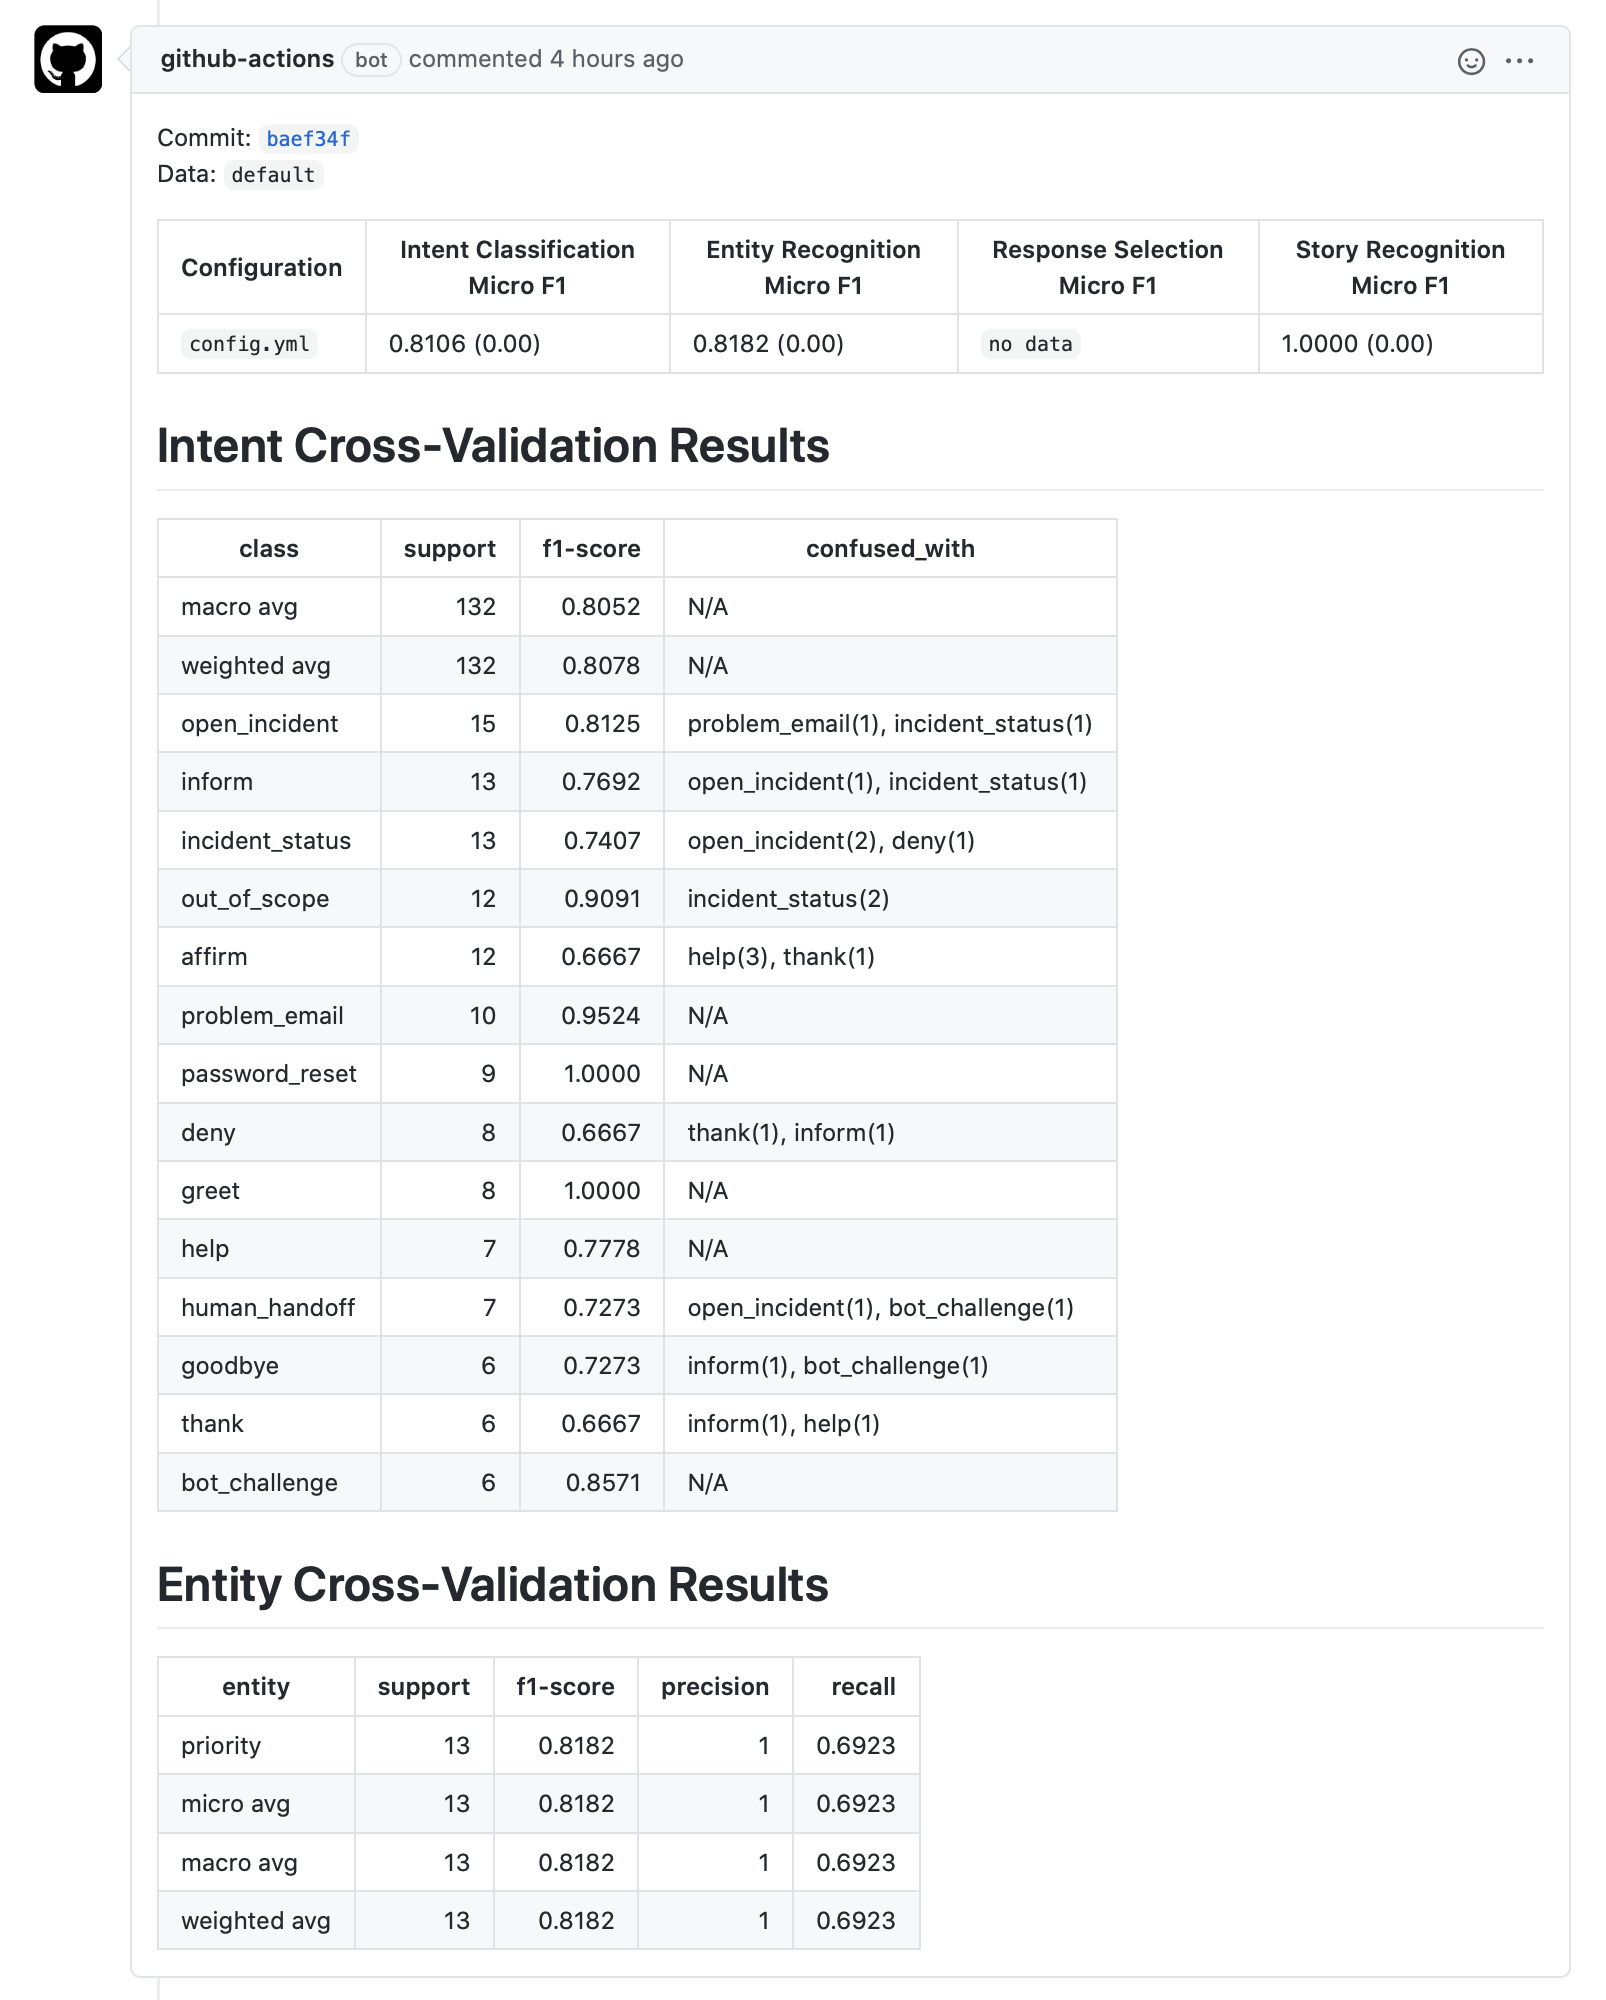
When publish_summary is set to true, this action will automatically publish the model's test results to the associated
Pull Request as a comment:

The pull request can be approved or denied based on the evaluation results and, in many cases, you will want to automate the model's deployment if all CI checks pass. You can continue to the next section to learn more about Continuous Deployment.
Continuous Deployment (CD)
To get improvements out to your users frequently, you will want to automate as much of the deployment process as possible.
CD steps usually run on push or merge to a certain branch, once CI checks have succeeded.
Deploying Your Rasa Model
If you ran test stories in your CI pipeline, you'll already have a trained model. You can set up your CD pipeline to upload the trained model to your Rasa server if the CI results are satisfactory. For example, to upload a model to Rasa X:
If you are using Rasa X, you can also tag the uploaded model as production (or whichever deployment you want to tag if using multiple deployment environments):
updates to action code
If your update includes changes to both your model and your action
code, and these changes depend on each other in any way, you should not
automatically tag the model as production. You will first need to build and
deploy your updated action server, so that the new model won't e.g. call
actions that don't exist in the pre-update action server.
Deploying Your Action Server
You can automate building and uploading a new image for your action server to an image repository for each update to your action code. As noted above, be careful with automatically deploying a new image tag to production if the action server would be incompatible with the current production model.
Example CI/CD pipelines
As examples, see the CI/CD pipelines for Sara, the Rasa assistant that you can talk to in the Rasa Docs, and Carbon Bot. Both use Github Actions as a CI/CD tool.
These examples are just two of many possibilities. If you have a CI/CD setup you like, please share it with the Rasa community on the forum.
