Responses
The responses section of the CMS is a centralised place for content managers and flow builders to create and manage all the responses used in an assistant, including adding specific response variations based on one or more slot values, enhancing personalization and flexibility in replies.
This feature allows users to easily build multi-lingual assistants or add segmentation to their assistants based on different criteria.
Access this feature from Responses navigation item under CMS on the navigation menu.
How to Create a Response
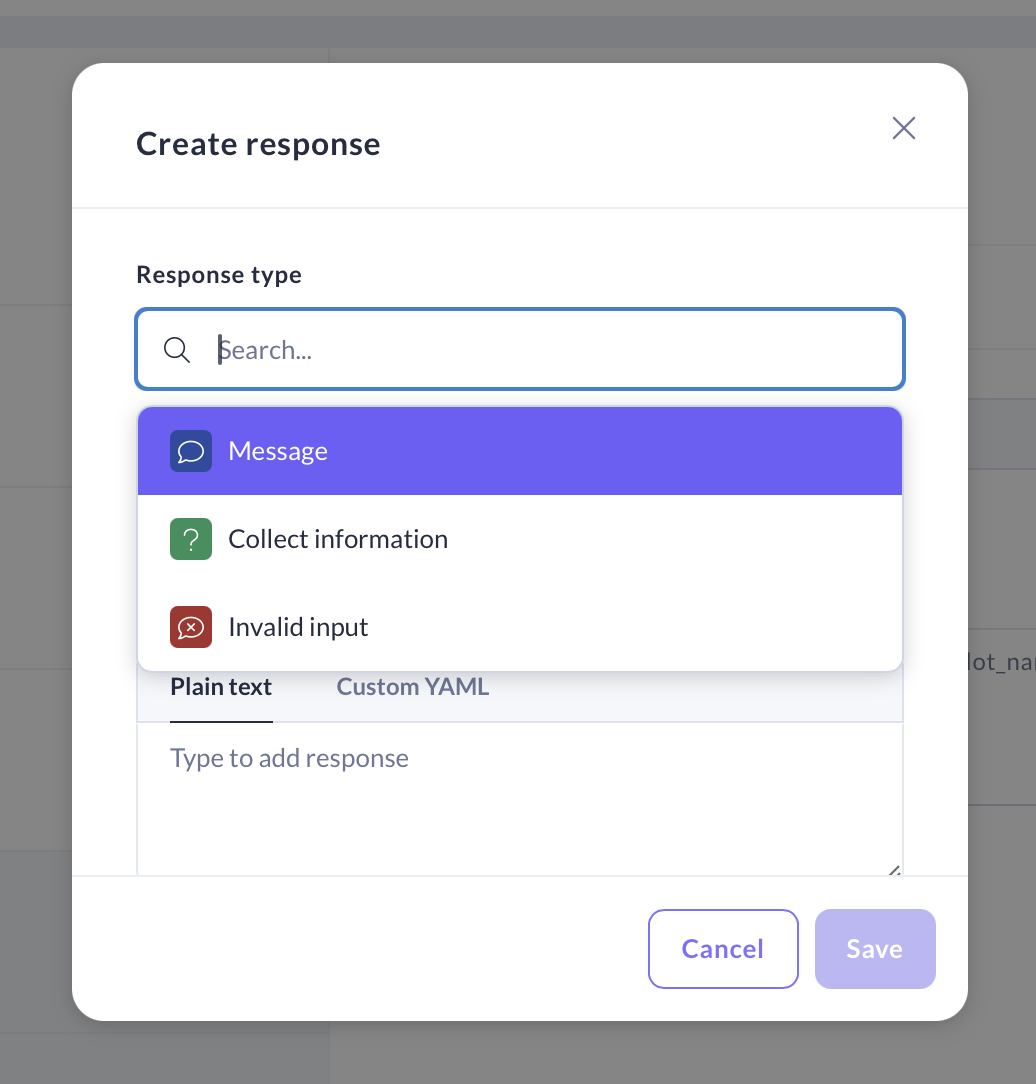
- Click on the “Create response” button on the top right of the screen.

- Select the Response type depending on where it will be used. You can choose from Message, Collect information or Invalid input responses types.
- Type in a name and the standard response text, and buttons if it's a Collect information response.

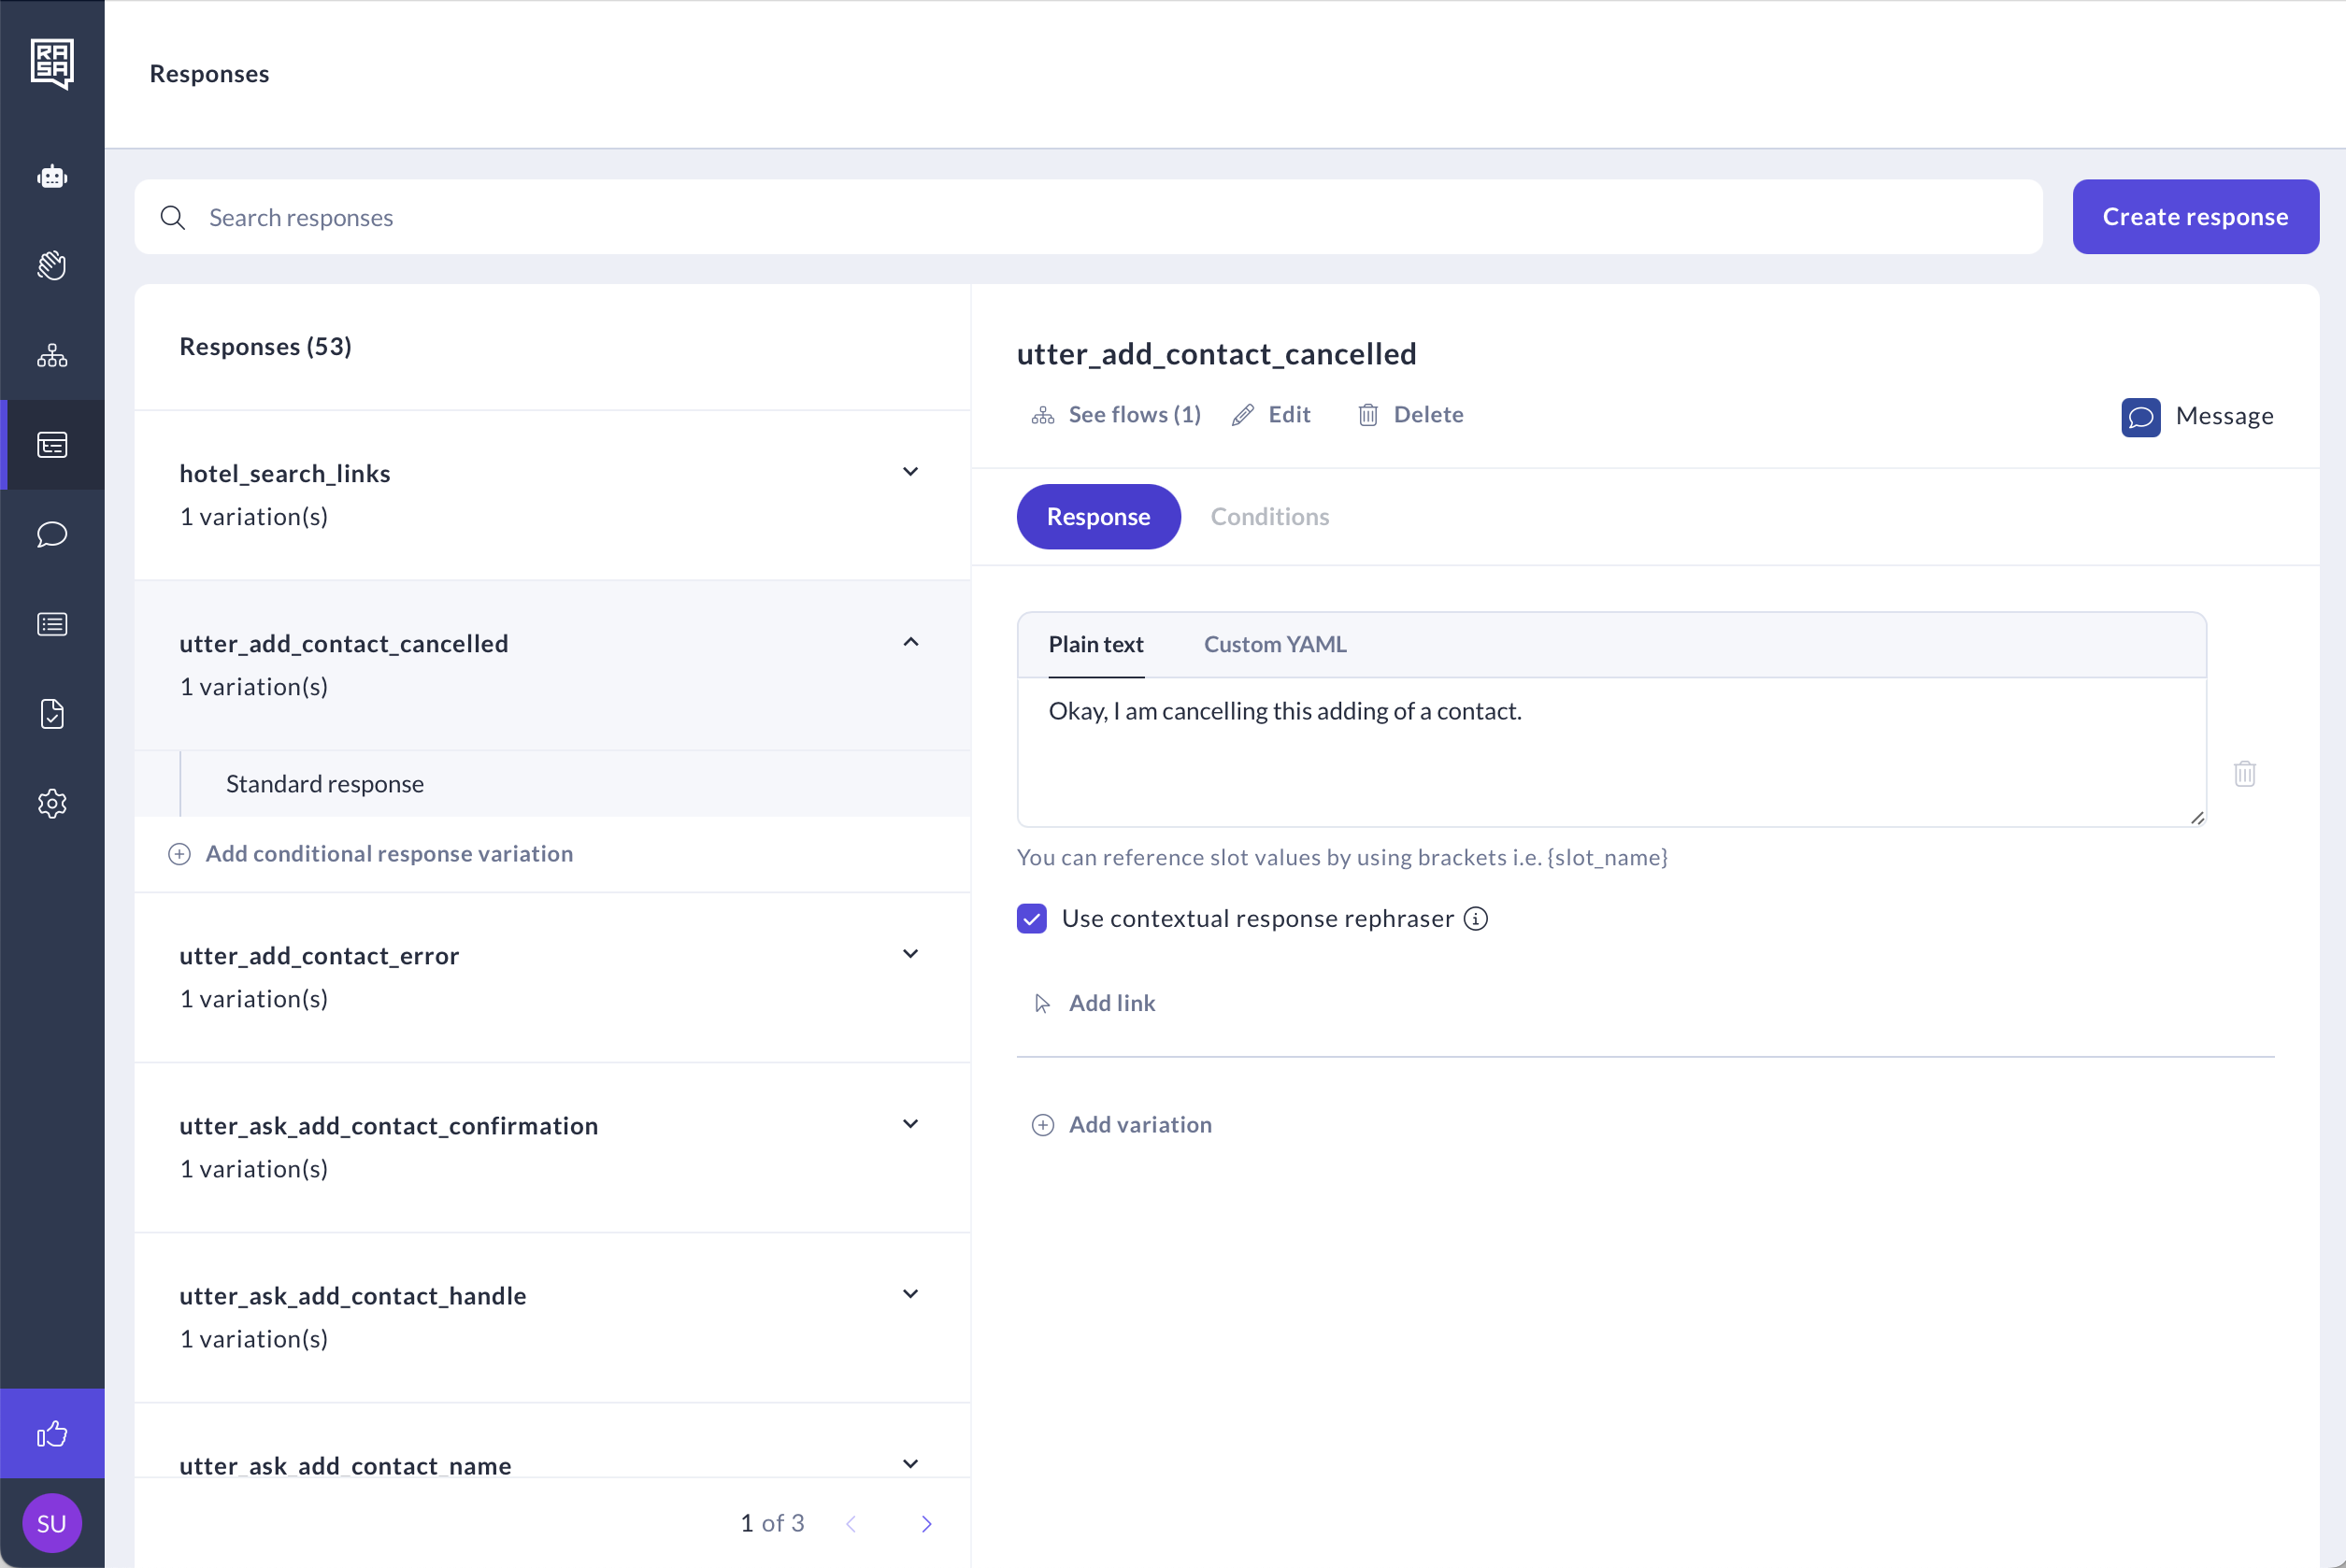
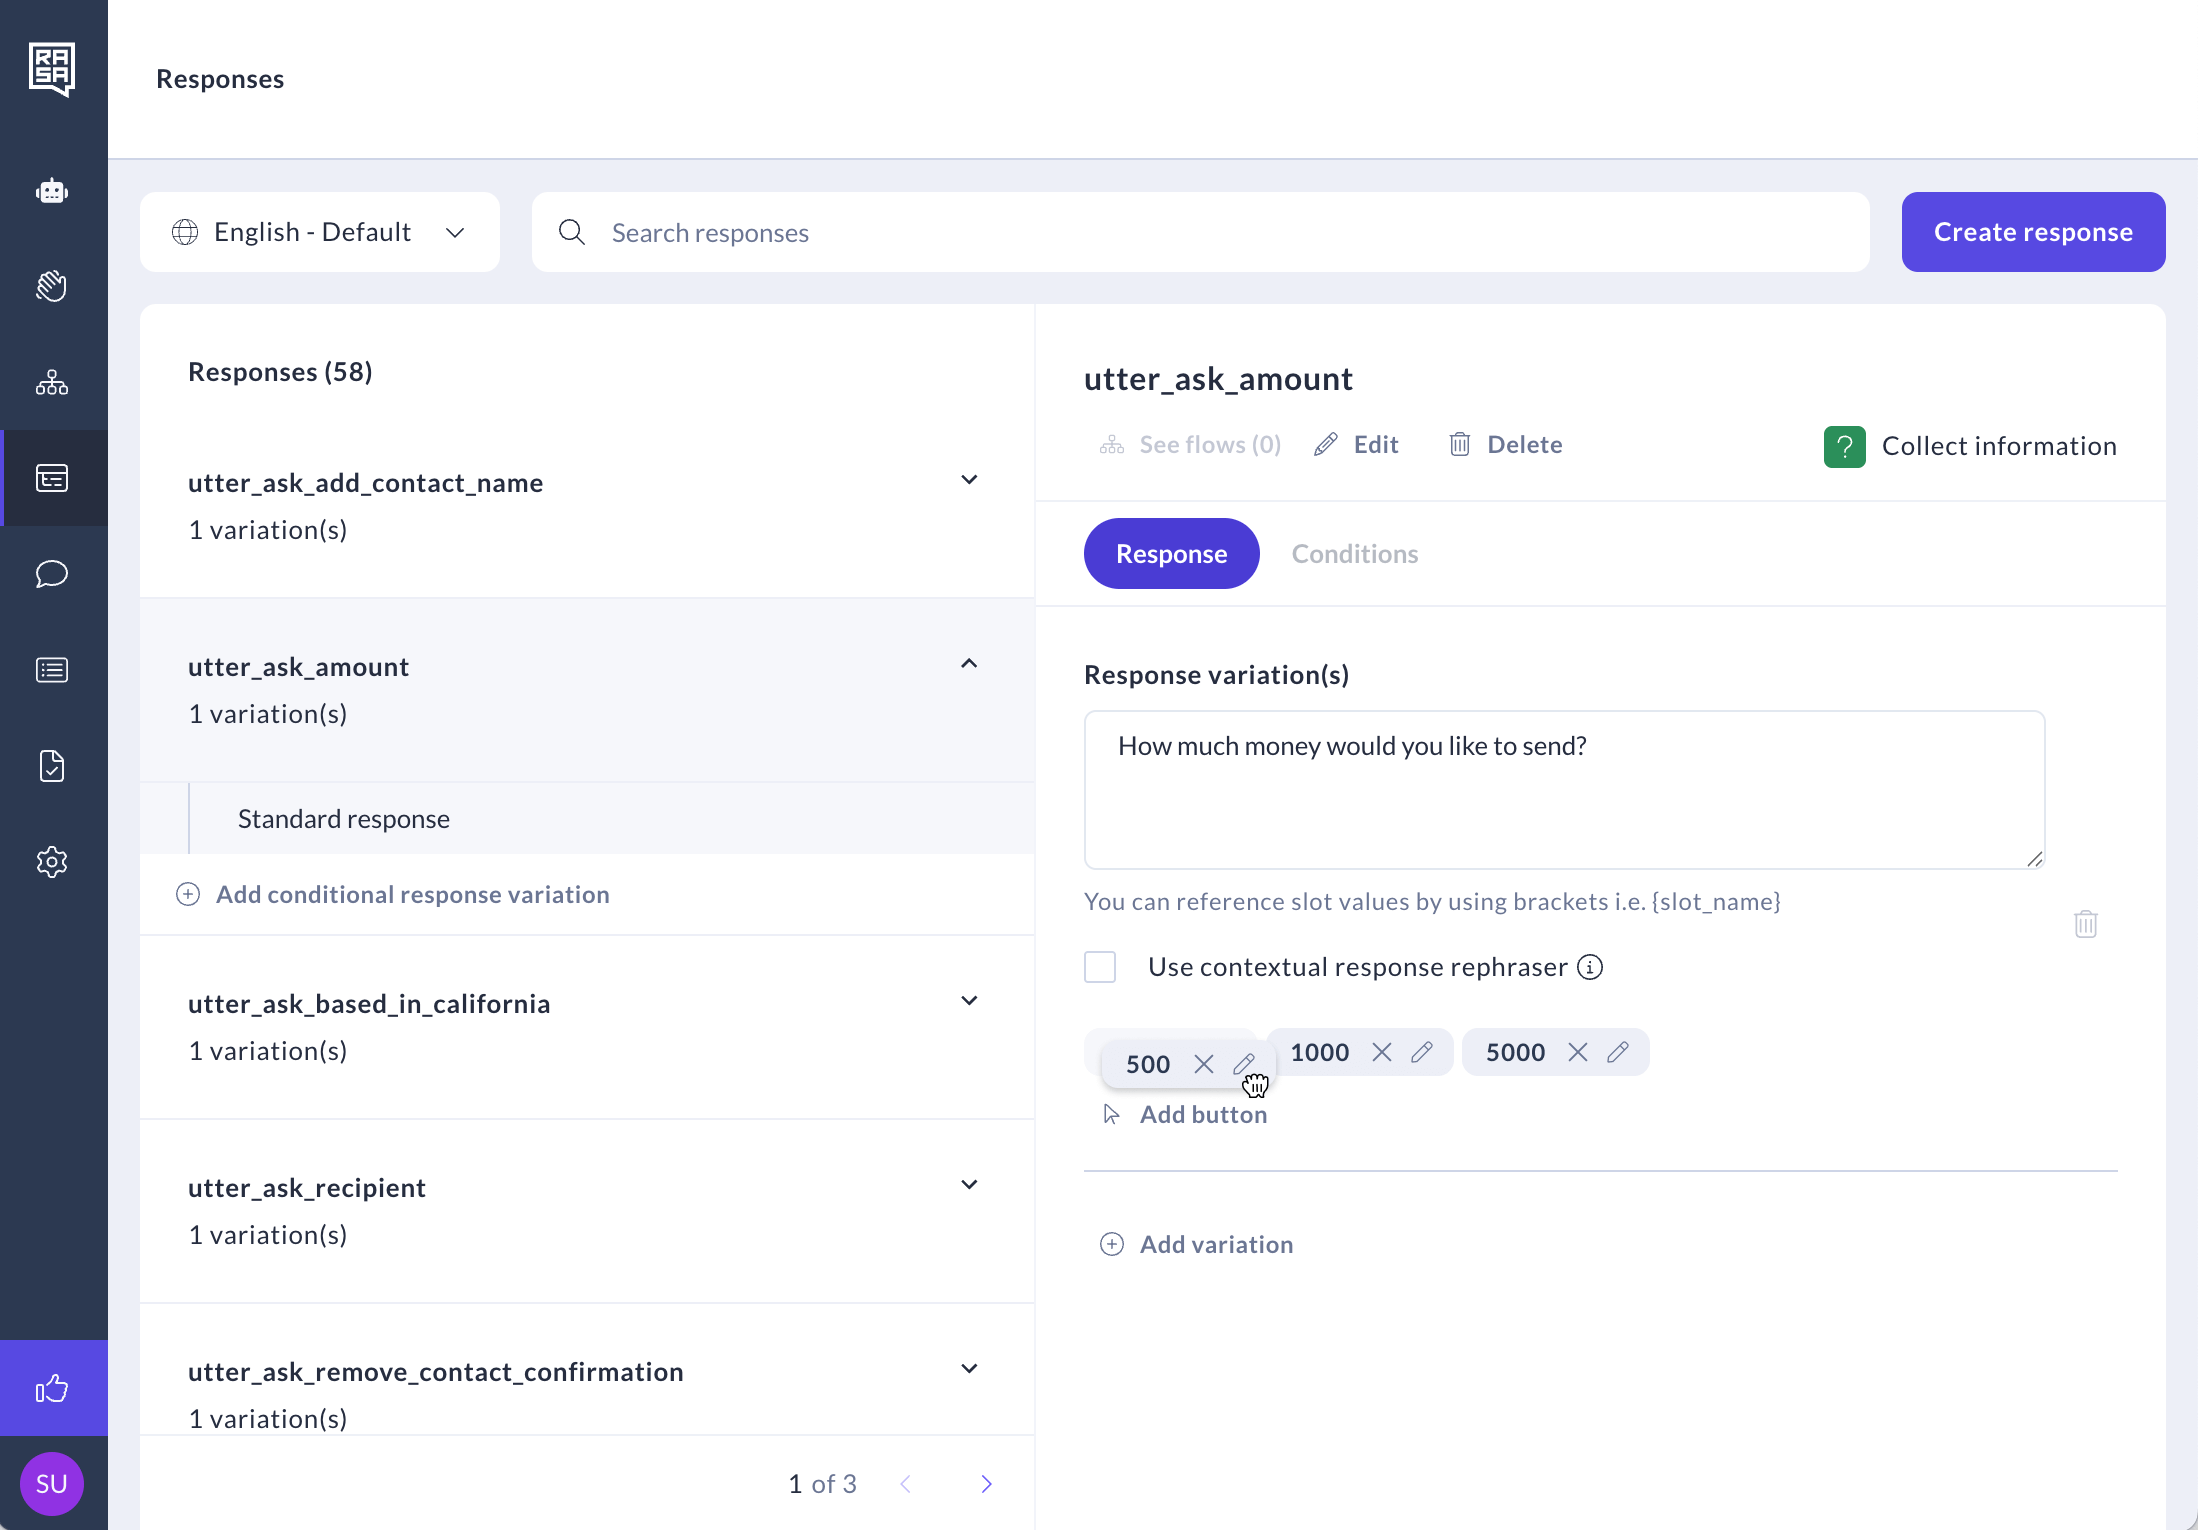
- The "Use Contextual Response Rephraser" option is disabled by default. This feature enables the assistant to rephrase its responses by prompting an LLM, based on the conversation's context. It helps make the assistant's responses feel more organic and conversational.
If you prefer full control over responses, you can uncheck the rephraser and manually add message variations.
When creating a new response, the "Use Contextual Response Rephraser" option defaults to the global rephrase_all value set in the endpoints.yml file.
If you keep this default setting, the per-response rephrasing setting will not be explicitly set for the message.
If you change this option to a different value than the default, the per-response rephrasing setting will be set to your chosen value.
The UI will always display the computed state of rephrasing, taking into account both the per-response setting (if set) and the global rephrase_all value.

Buttons and Links
Each response can include interactive elements: buttons for Collect Information responses and links for Message responses. To add them:
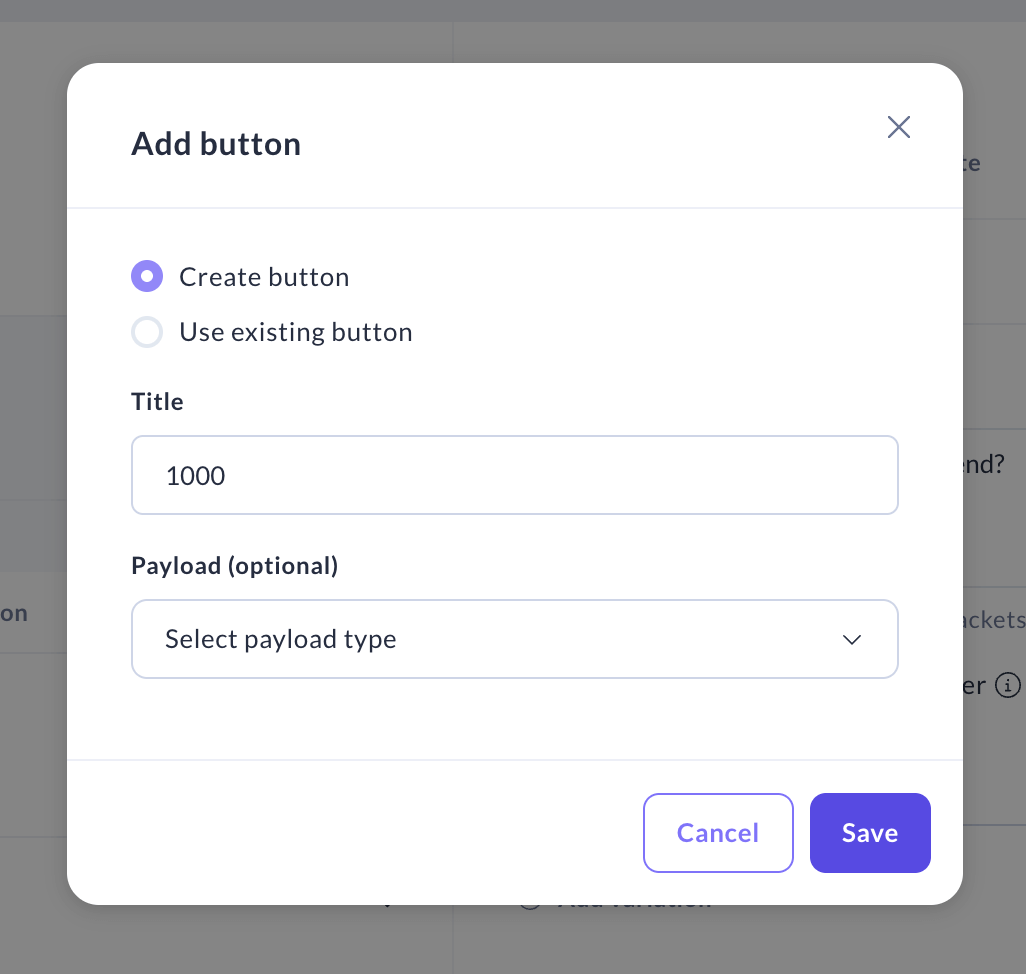
- Click Add button or Add link in your response.

- In the modal that opens, choose to reuse an existing button or link, or create a new one. Learn more about buttons and links.
- Repeat Add button or Add link and fill in the details for as many options as needed.
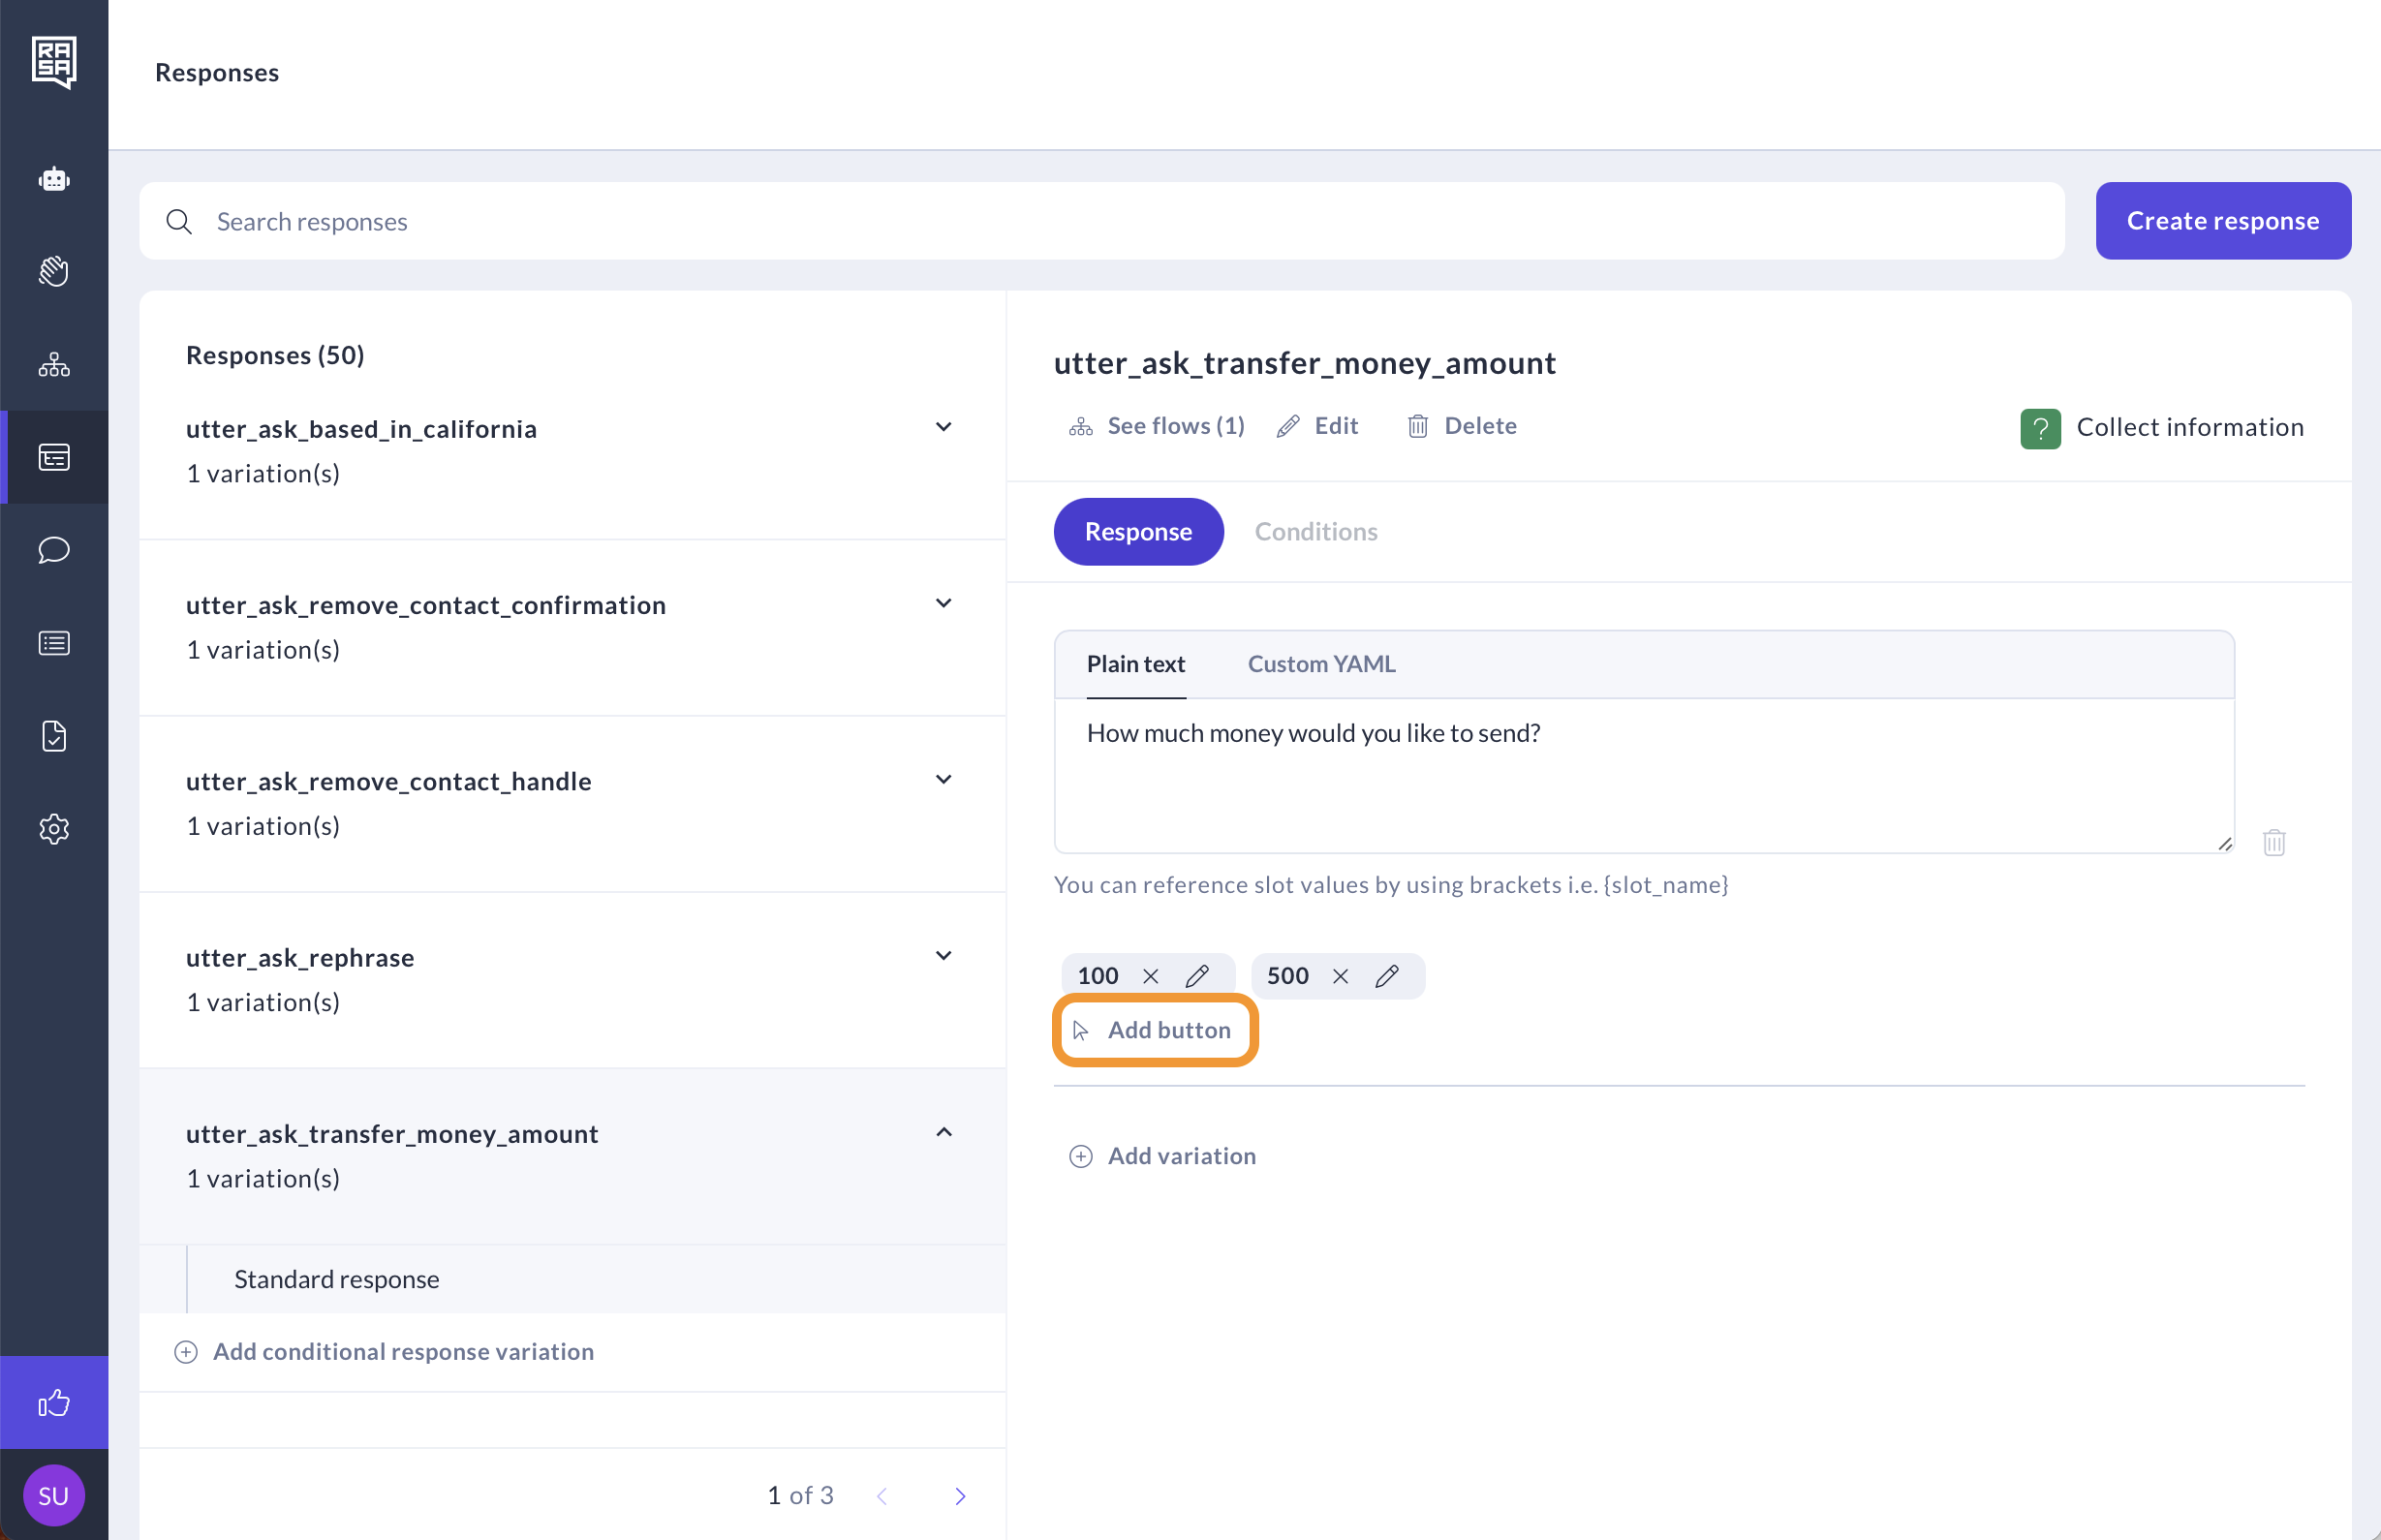
- To reorder the options shown to the user, drag and drop them directly in the response editor.
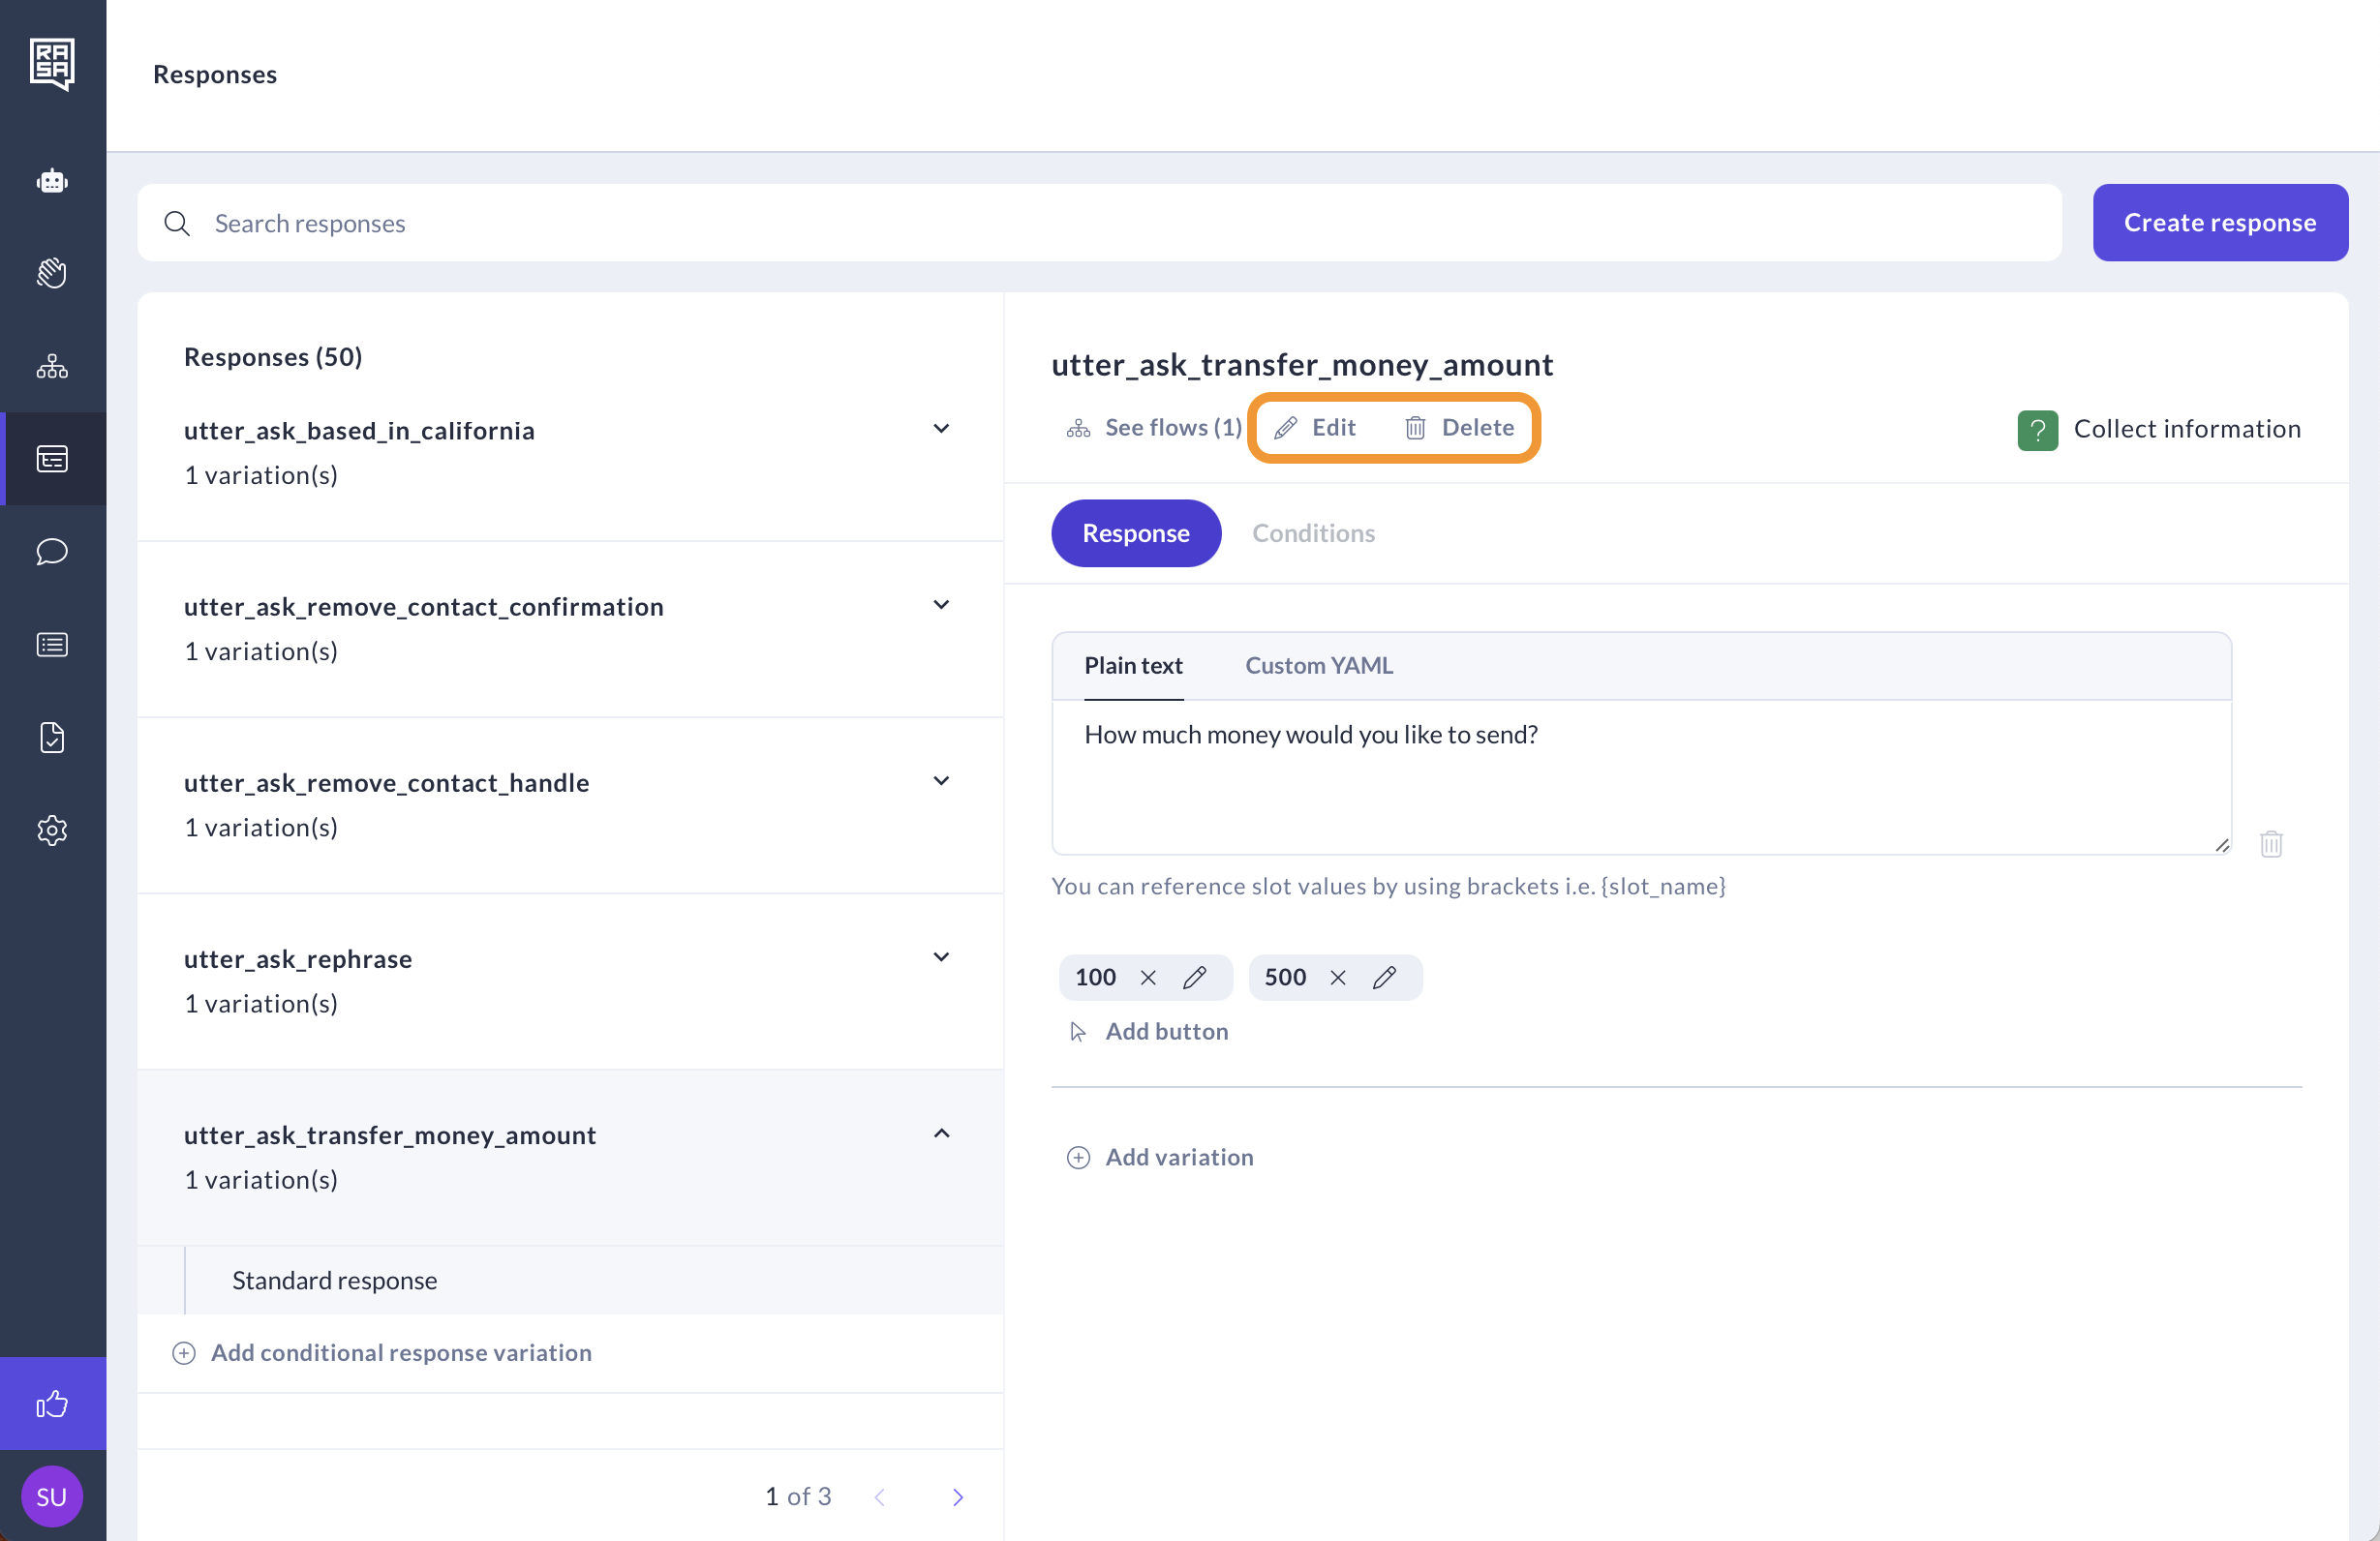
Manage Responses
- Click the Edit button under the response name to edit the name and type of the response. Or the Delete button to delete the response from the assistant.
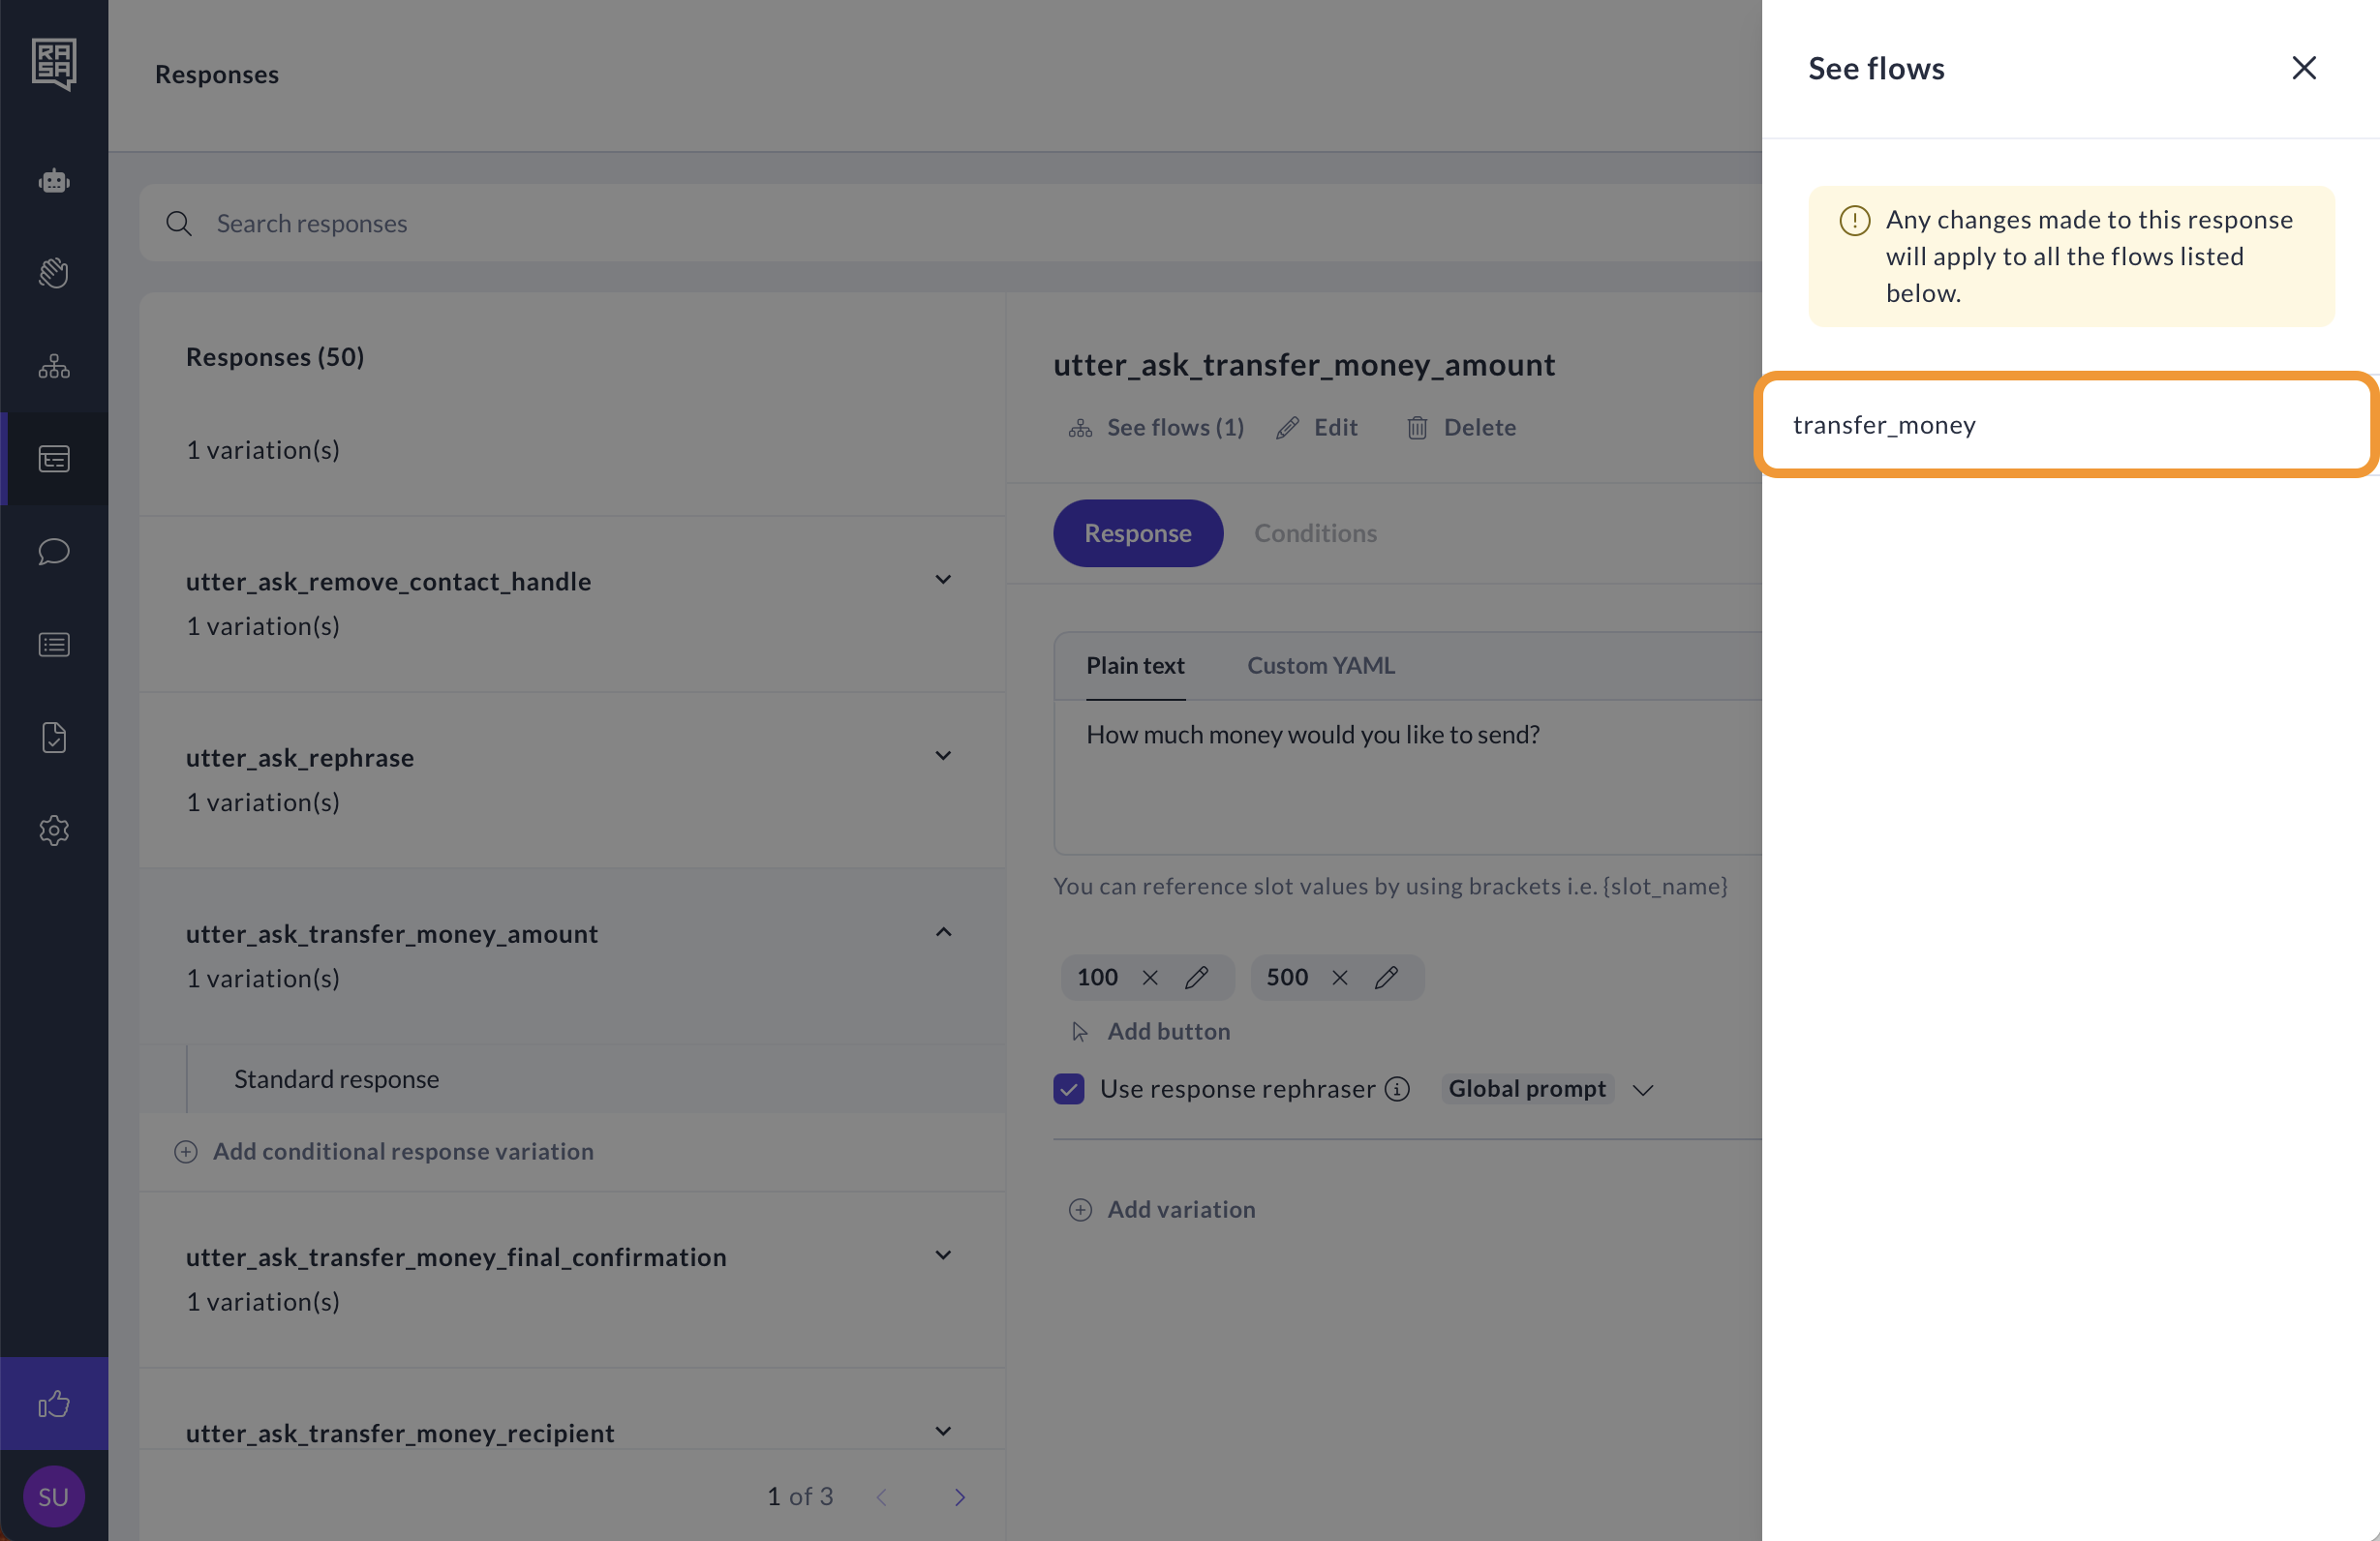
- Click the See flows button to view a list of flows where the response is used.
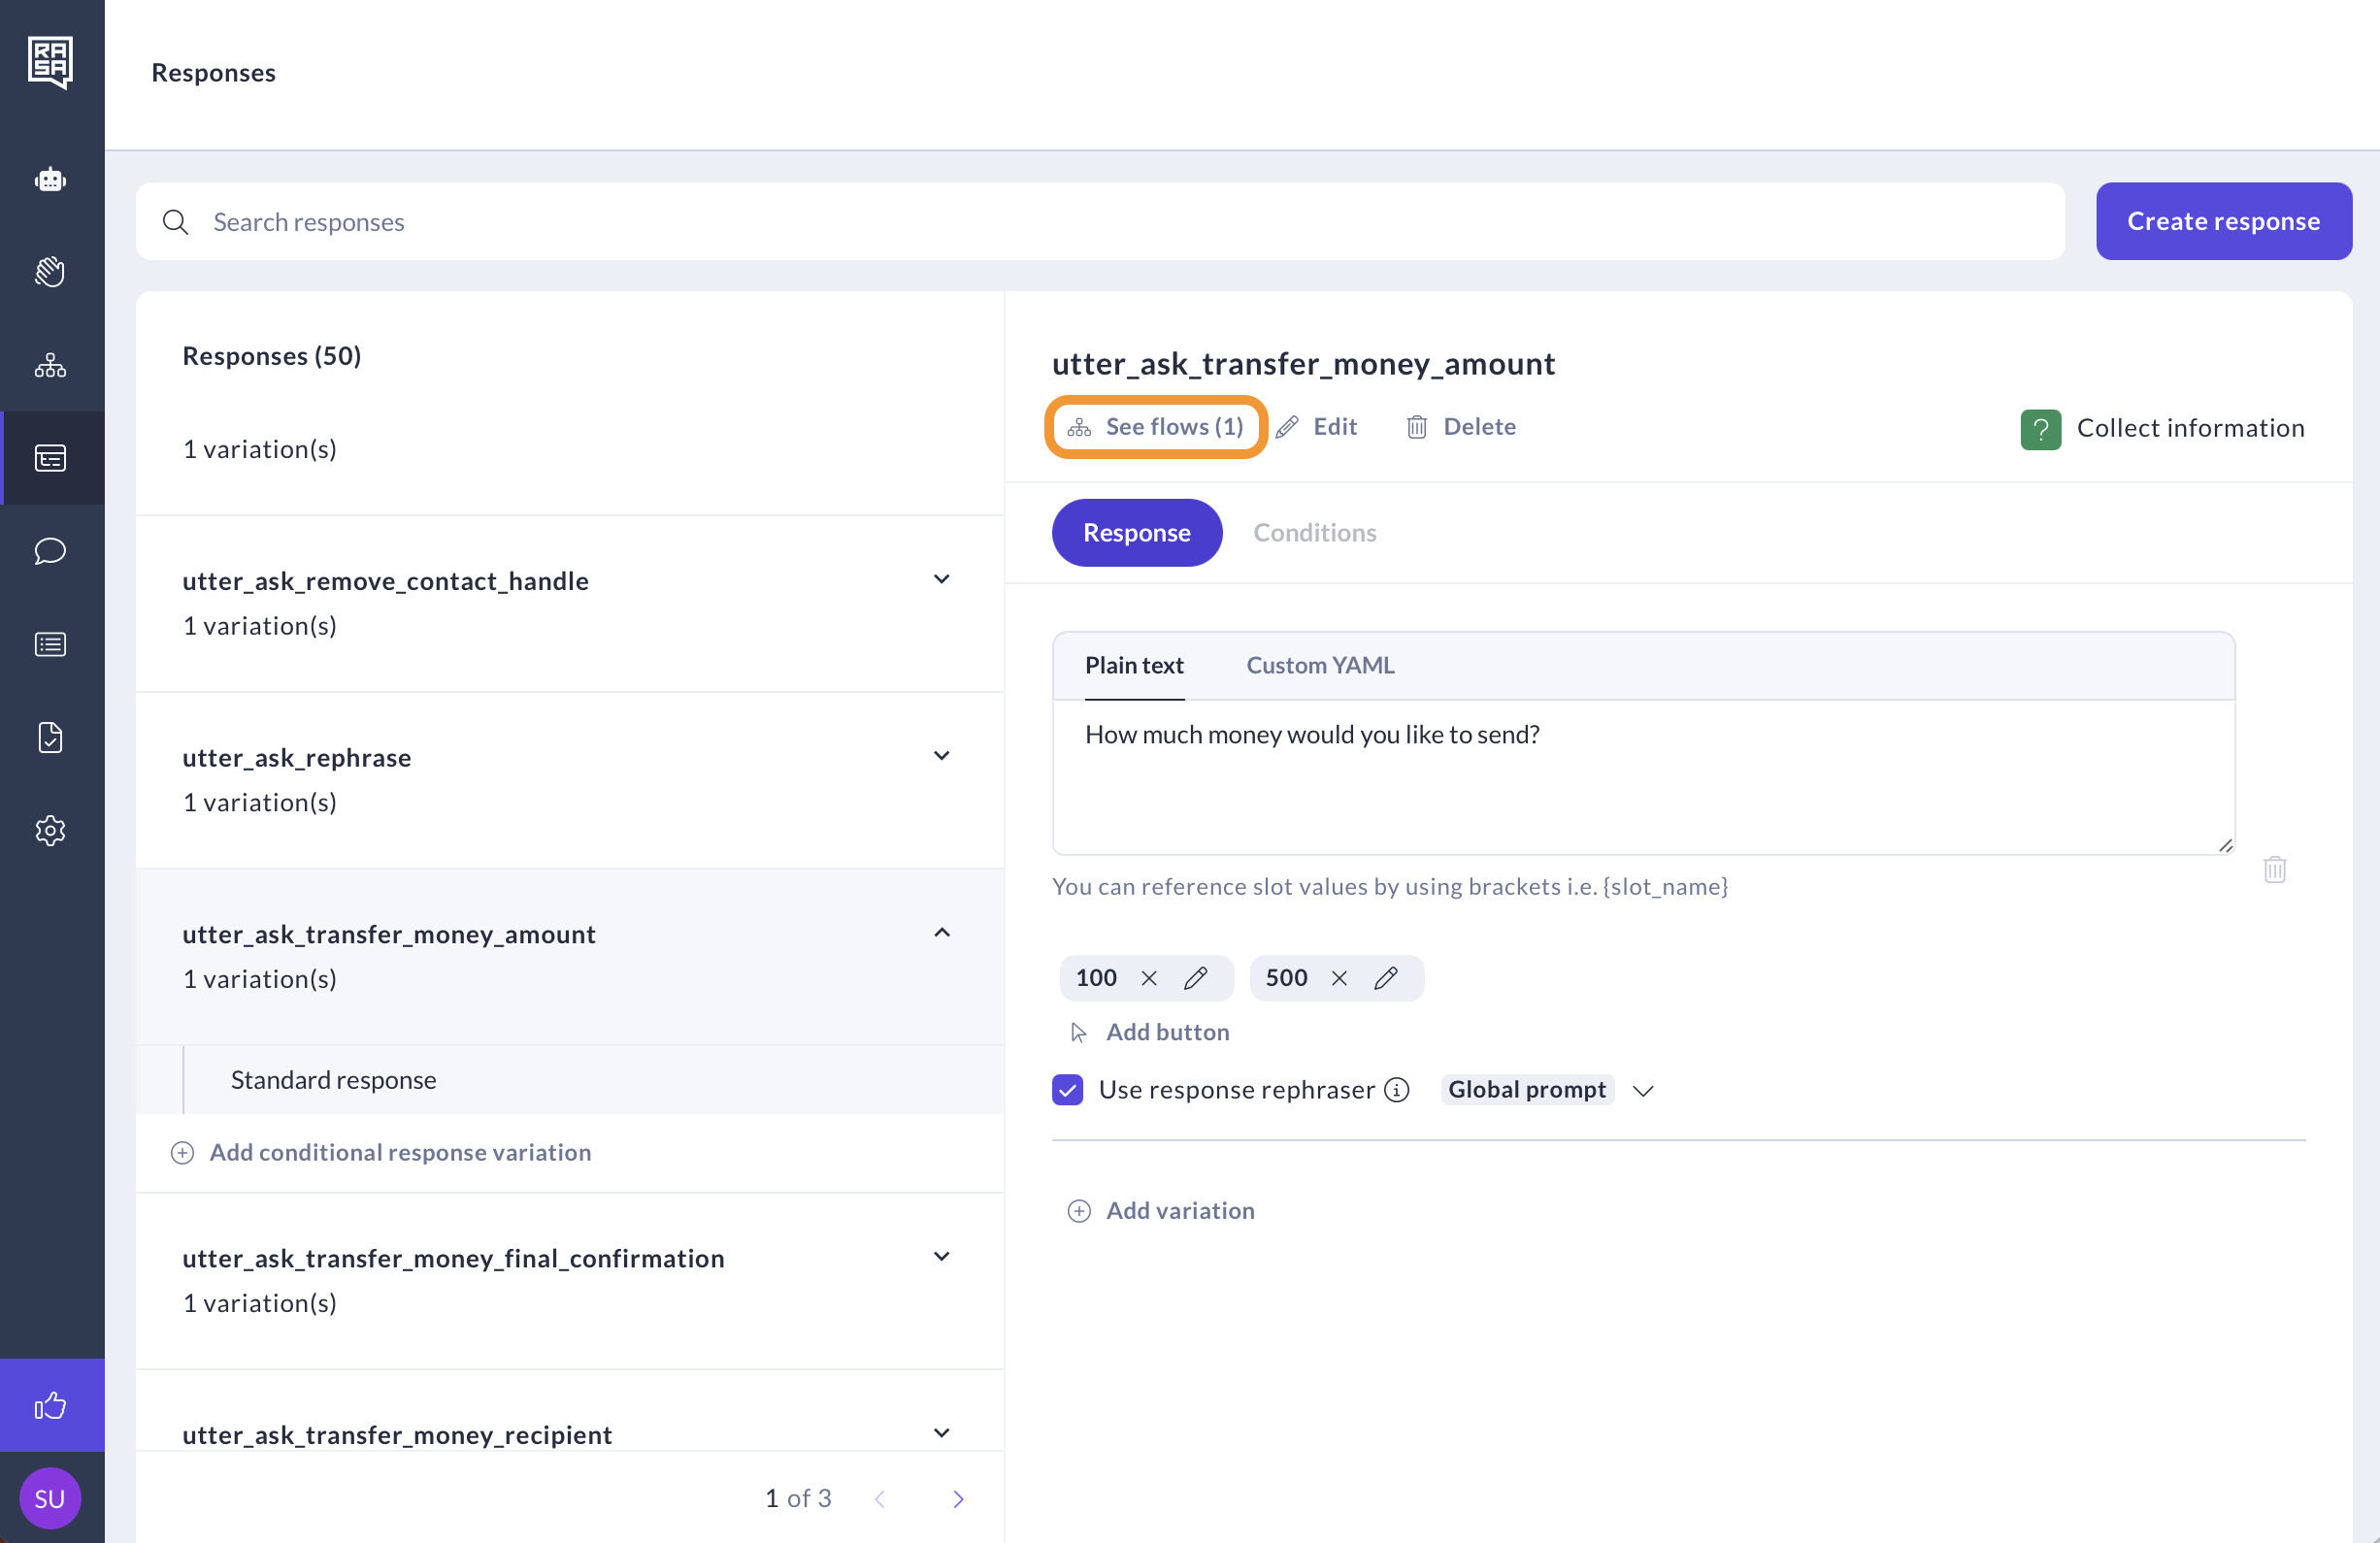
- From the list, you can navigate to a specific flow to view the context in which the response appears.
Conditional Response Variations
Use conditional response variations to customise your assistant. These conditional response variations will only be shown to the user when they meet the conditions set on the Conditions tab.
You can only create and manage conditional response variations from the Responses section on the CMS.
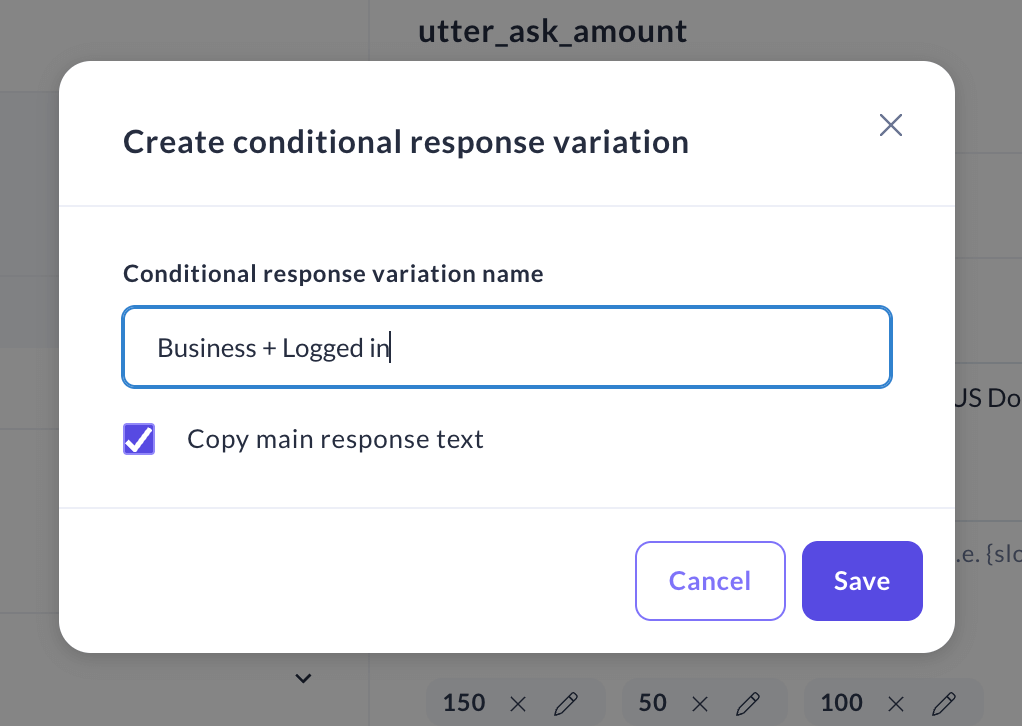
- Click the “Add conditional response variation” button under the response in the navigation panel.

- Add a name for the conditional response variation. You can decide to copy the standard response text to this conditional response variation by checking the checkbox.
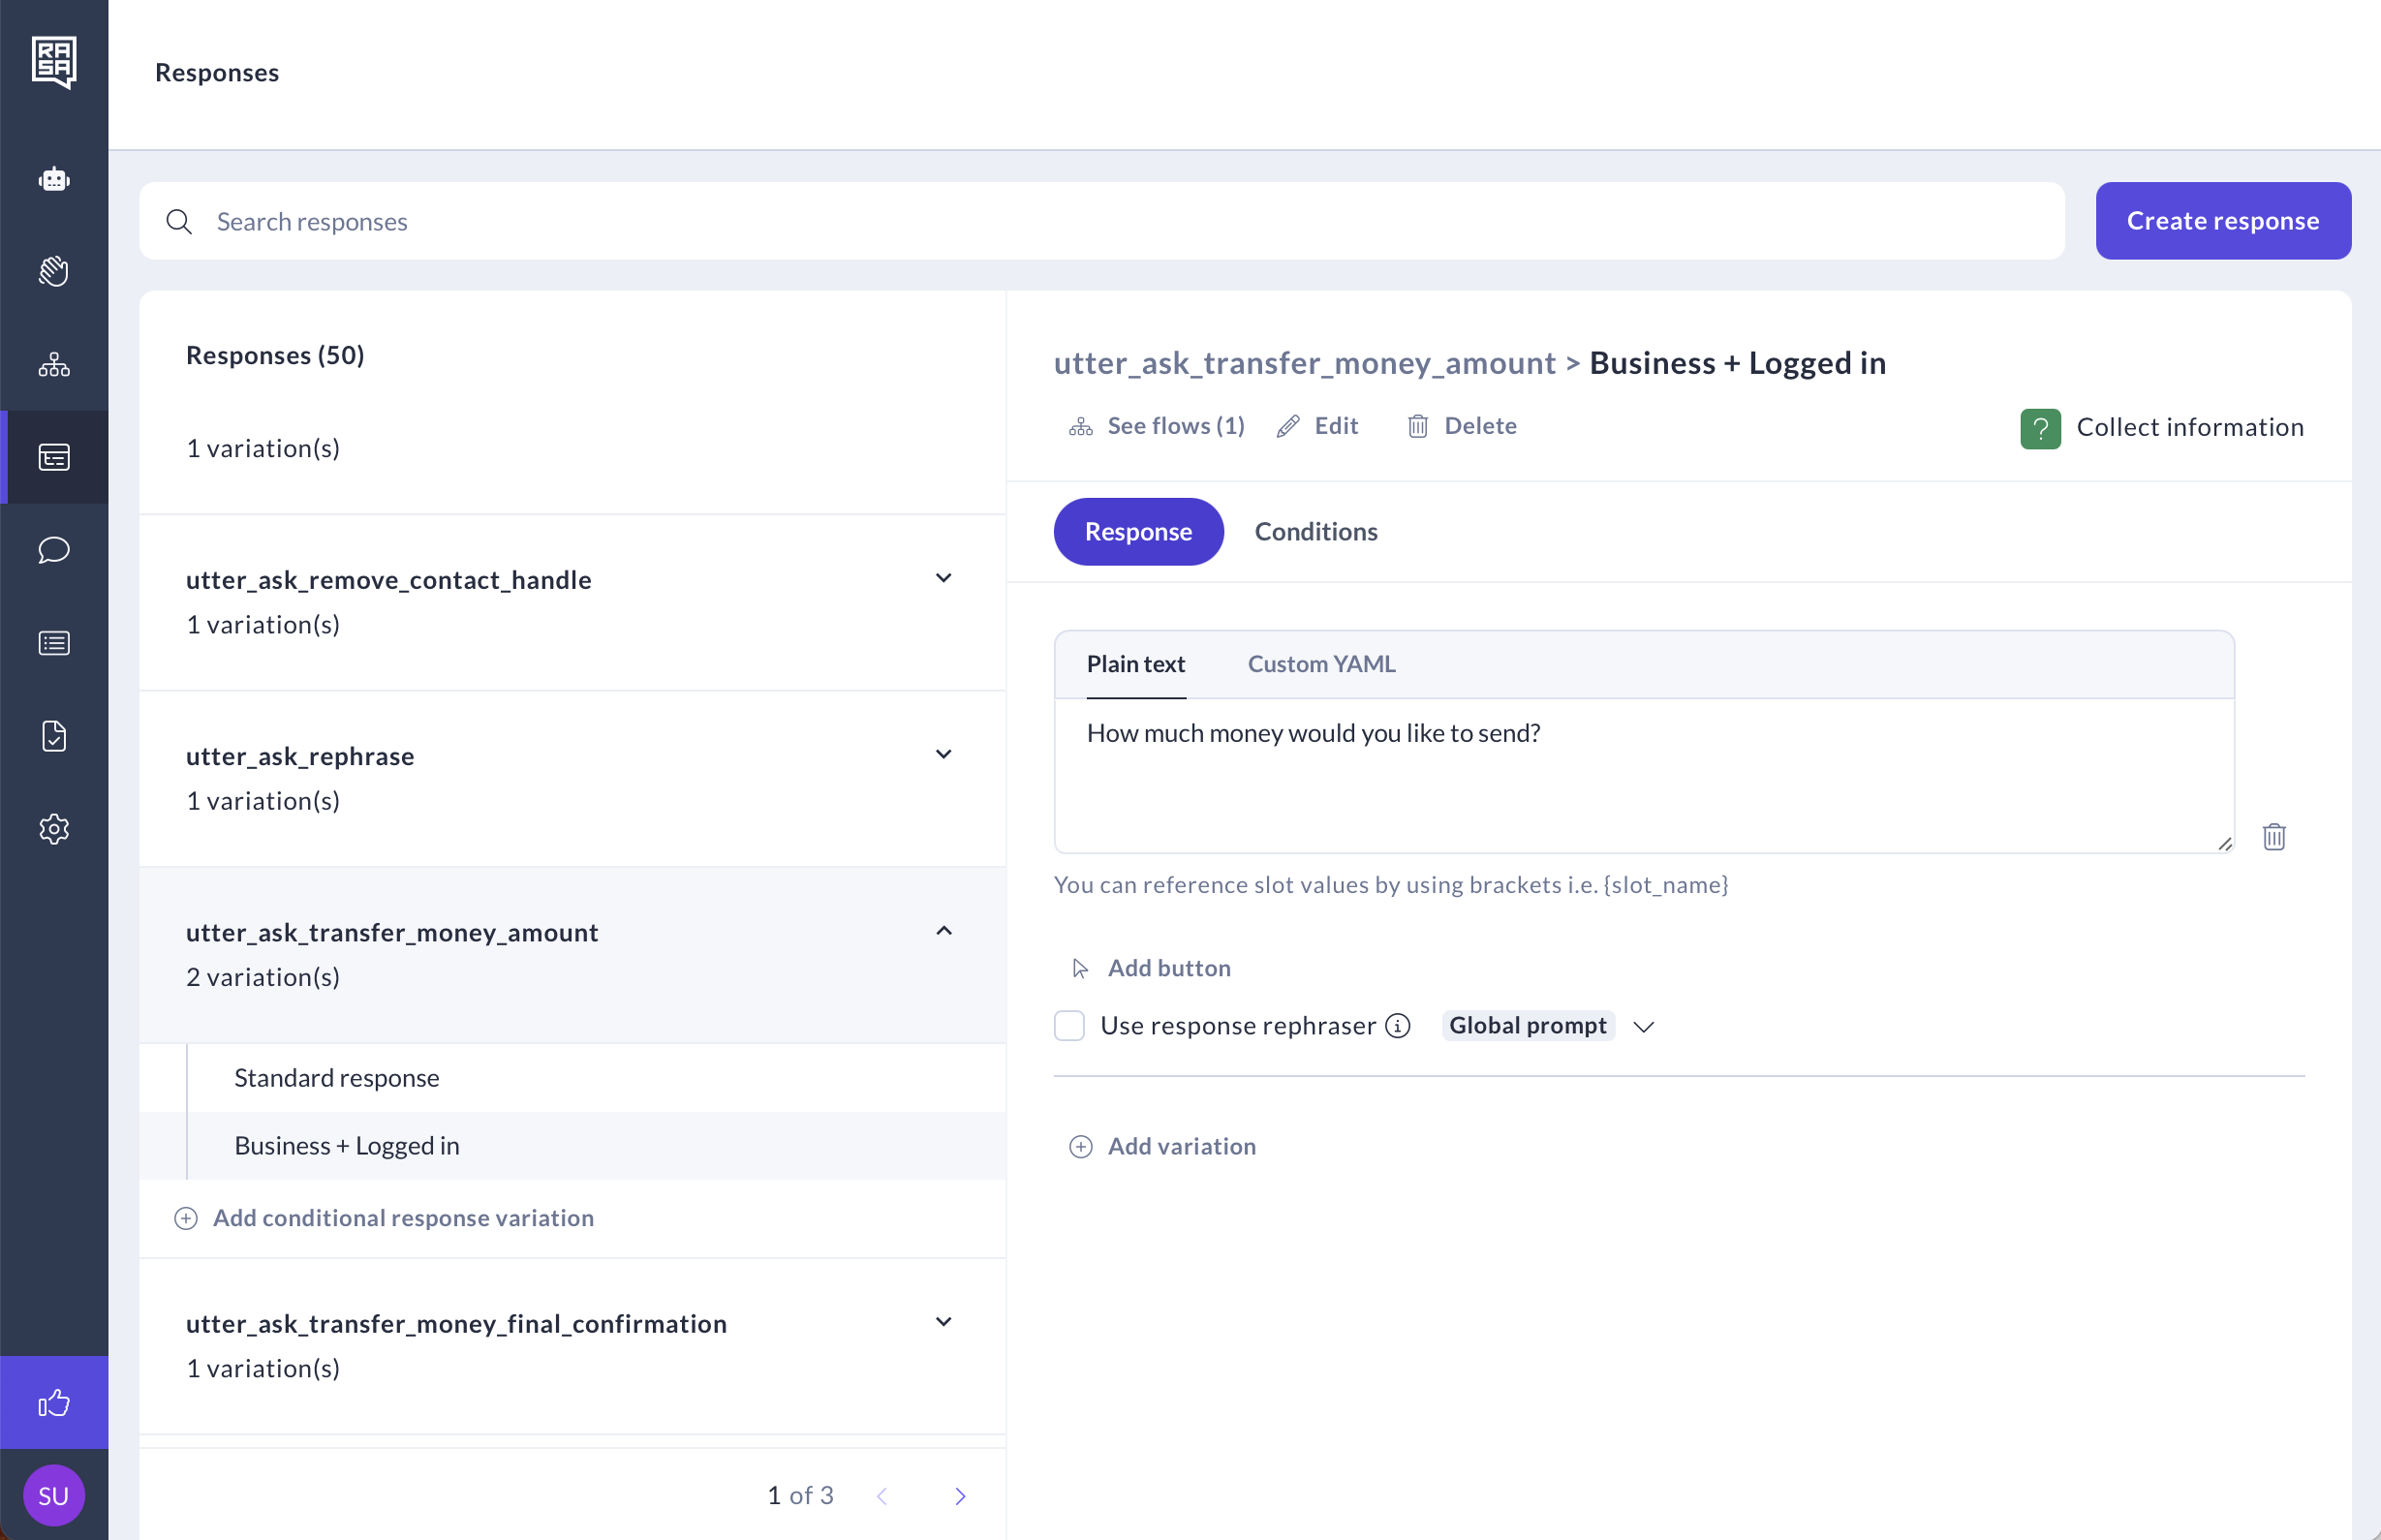
- You are in the “Response” tab, where you can add the response, buttons and any variations to the response.
- Click on the “Conditions” tab, and add as many conditions as you need. Select a slot and the slot value on the dropdowns available.
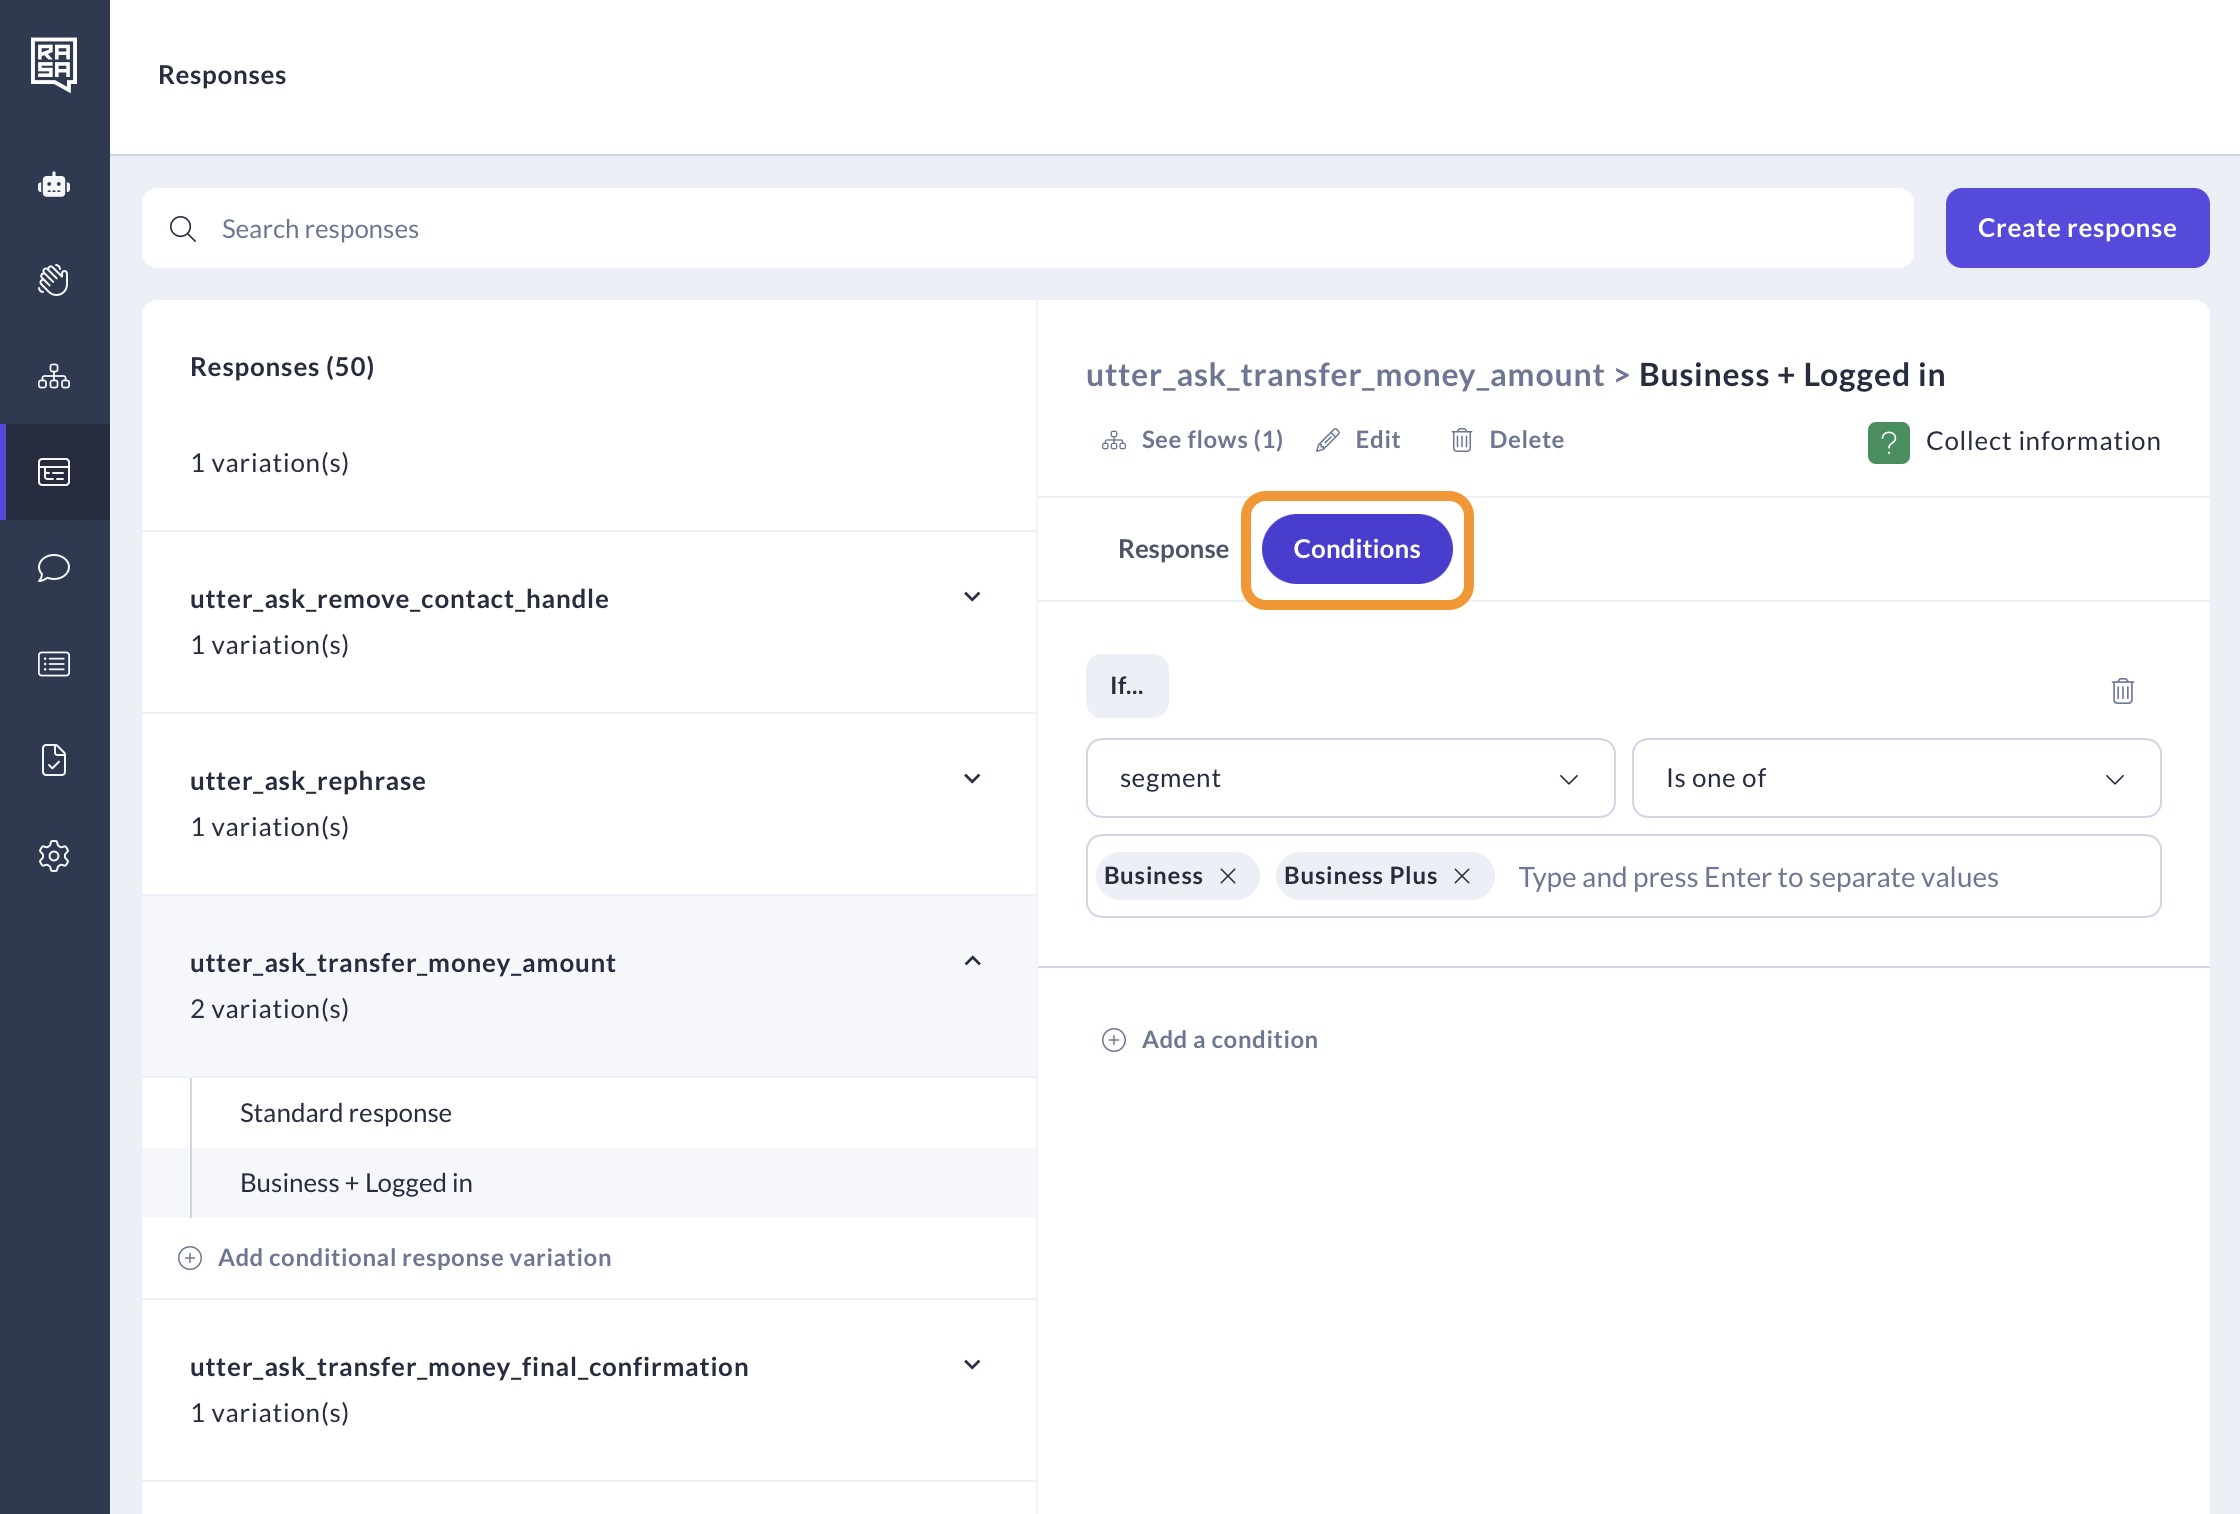
- Click the “Add condition” button to add more conditions.

Custom Responses
Custom responses allow you to go beyond simple text and create rich, interactive experiences tailored to your users and channels. You can use any YAML structure to define a custom response — from carousels and buttons to event triggers or metadata your channel frontend understands.
-
When editing a response, just switch the tab to Custom YAML and add your custom component in YAML. You can combine plain text and custom YAML in the same response if needed.

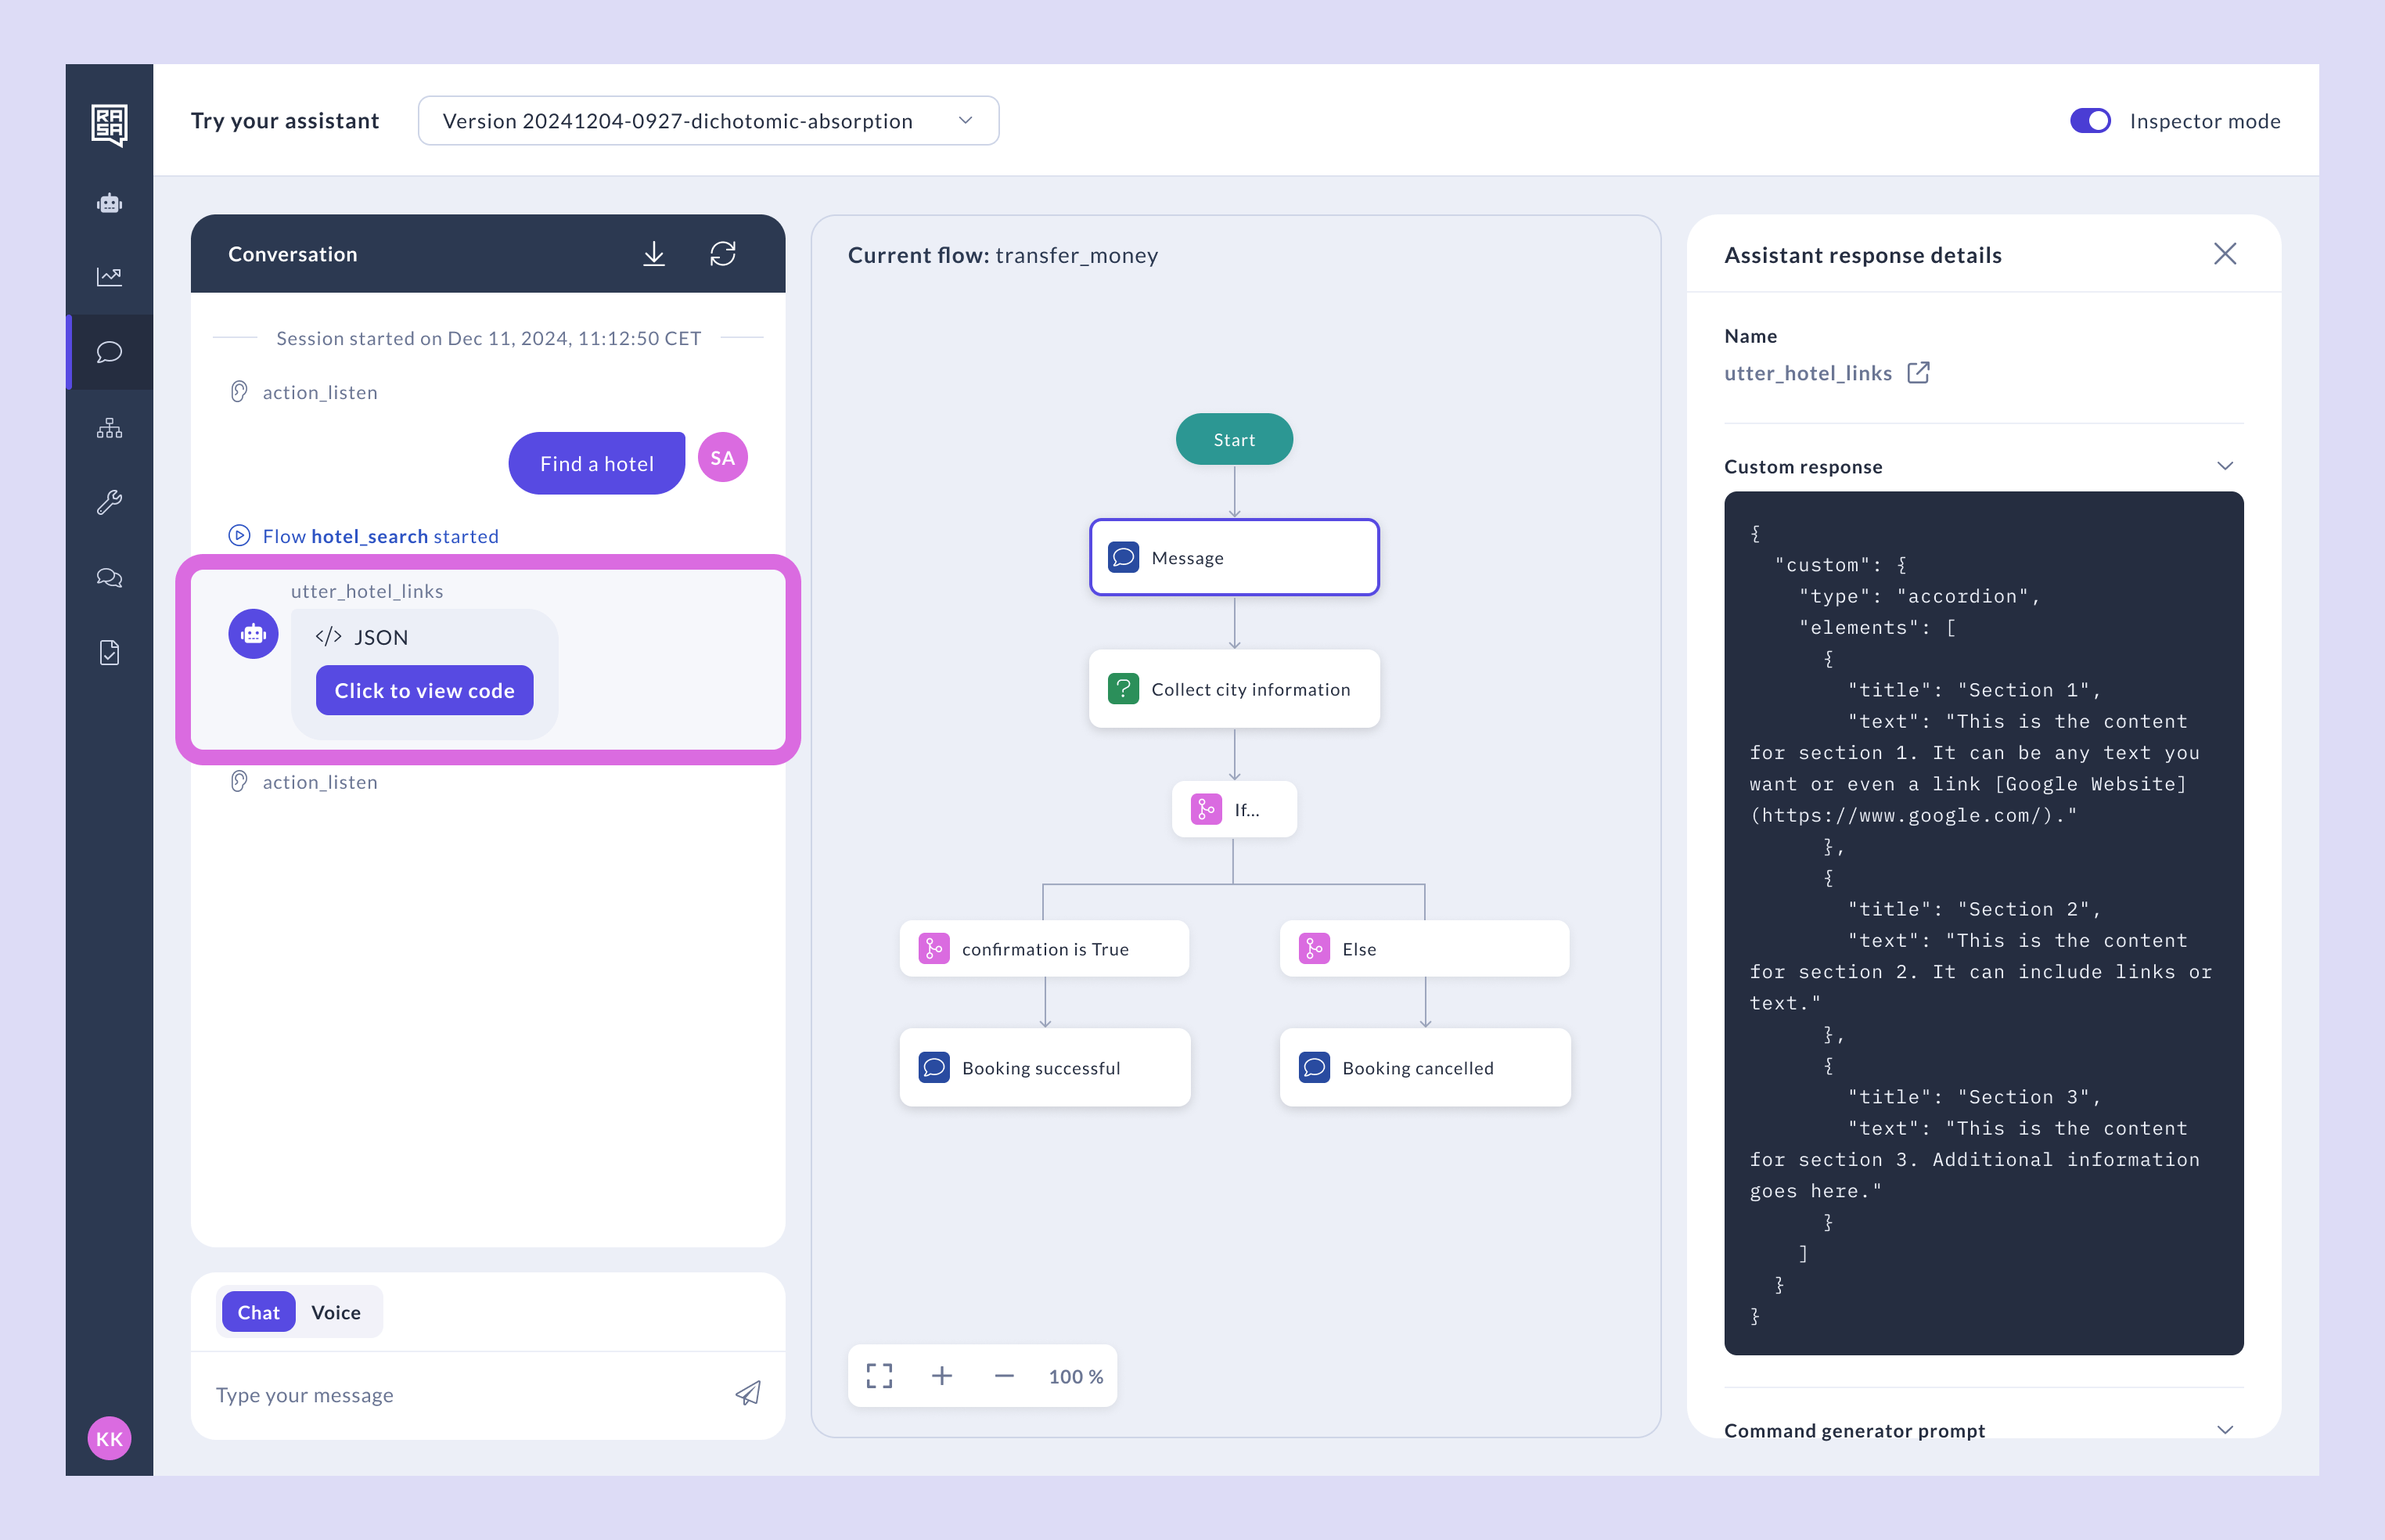
-
When testing in Try your assistant, Rasa sends custom components as JSONs. Styling and rendering are handled entirely by your frontend or messaging channel.