


The Rasa Masterclass is a weekly video series that takes viewers through the process of building an AI assistant, all the way from idea to production. Hosted by Head of Developer Relations Justina Petraityte, each episode focuses on a key concept of building sophisticated AI assistants with Rasa and applies those learnings to a hands-on project. At the end of the series, viewers will have built a fully-functioning AI assistant that can locate medical facilities in US cities.
To supplement the video content, we'll be releasing handbooks to summarize each episode. You can follow along as you watch to reinforce your understanding, or you can use them as a quick reference. We'll also include links to additional resources you can use to help you along your journey.
Introduction
In episode 9 of the Rasa Masterclass, we learned how to deploy Rasa X to a server using the docker-compose quick installation method. In episode 12, we'll cover a more advanced deployment scenario: deploying Rasa X to a cluster environment.
The docker-compose method is a great deployment option if your goal is to get started quickly or build a Rasa assistant for personal use. However, if your goal is to build a high-availability, mission-critical assistant, a scalable cluster architecture is essential.
Rasa supports cluster deployments on both Kubernetes and OpenShift. In this episode, we'll walk through deploying Rasa X to Kubernetes step-by-step, using Helm to configure the deployment.
What is Kubernetes?
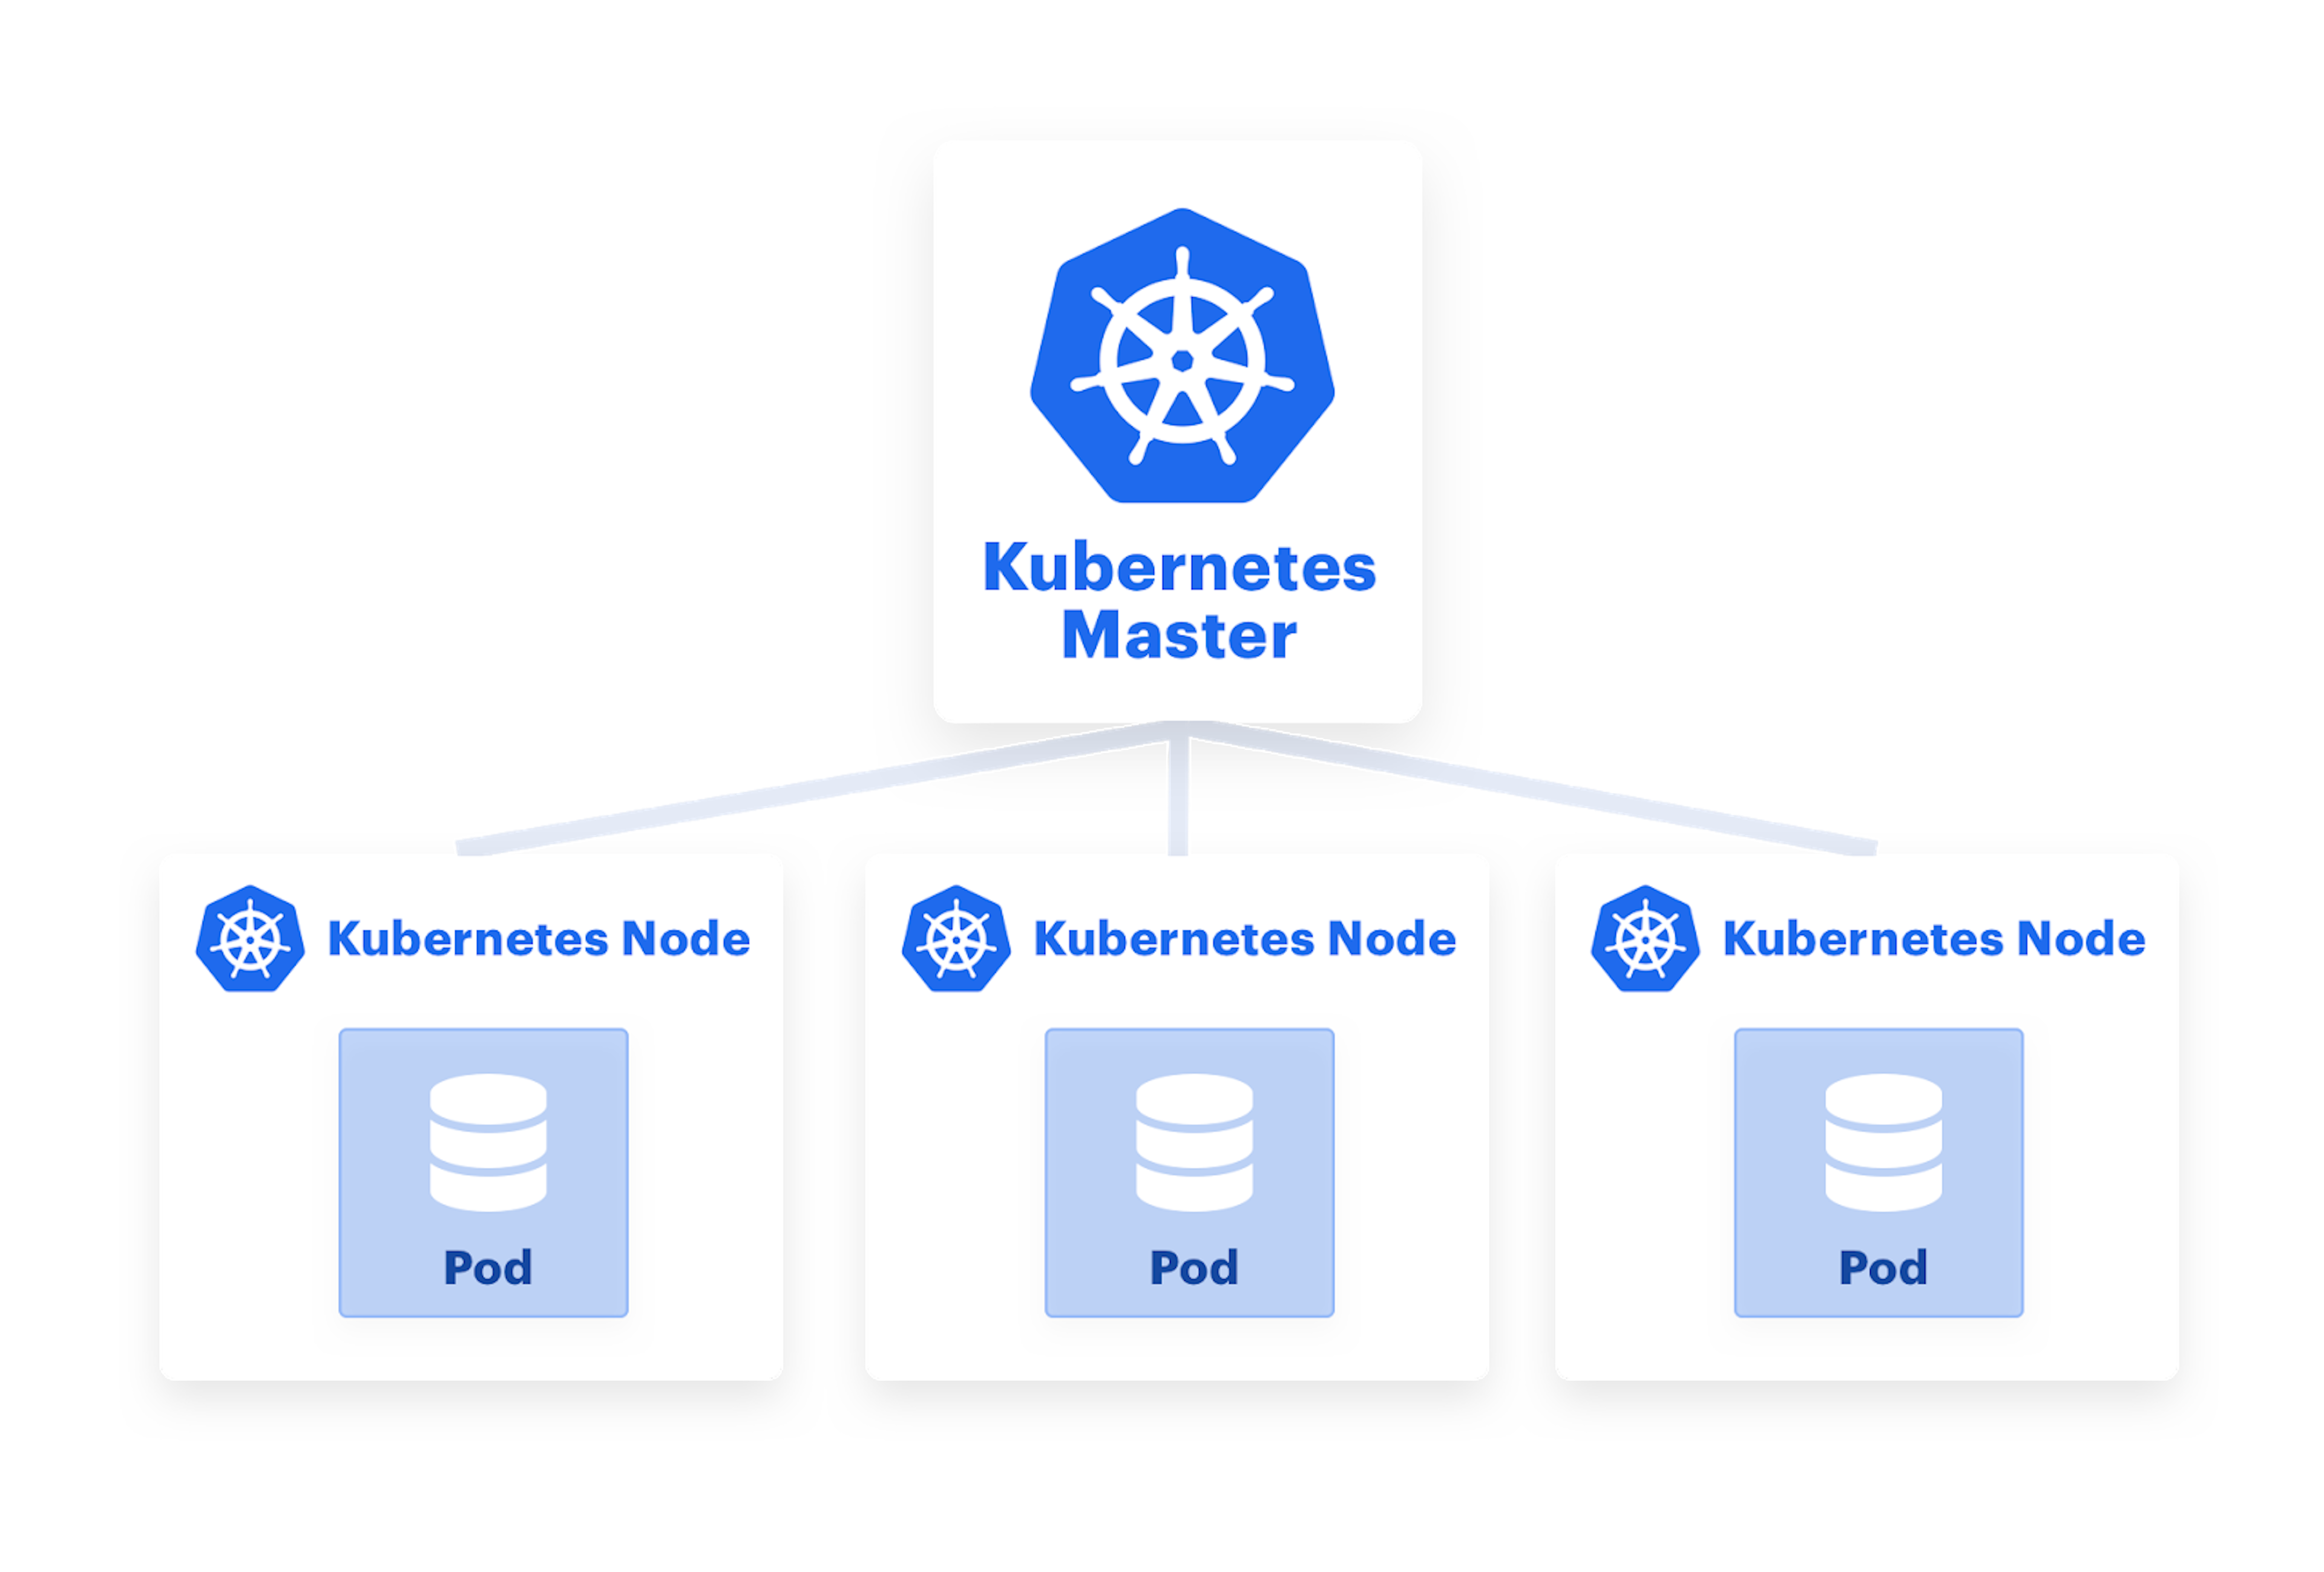
Kubernetes is an open source system for deploying, scaling, and maintaining containerized applications. Whereas the docker-compose method deploys Rasa X to a single container running on a single machine, Kubernetes deploys Rasa X to multiple containers running on multiple host machines, known as nodes. This distributed approach means there's always a backup system in place-if one container in the cluster goes down, another container can start up to take its place.
Let's take a closer look at the Kubernetes architecture. A pod represents either a single container or multiple containers that share resources, and it's the smallest unit of deployment in Kubernetes. Any container runtime can be used with Kubernetes, but the most common choice is Docker.
A Deployment is a YAML file that declares the deployment configuration. For each pod, it specifies the container image(s), and the number of copies, or replicas, that should be running. The configuration laid out in the deployment YAML file is what's considered the "desired state."
The Kubernetes cluster service takes the deployment YAML file and schedules the desired number of pods on the host machines, or nodes. It's the scheduler's job to maintain the desired state even if a host machine goes offline. If one machine goes down, the scheduler spins up new pods and redistributes them on the remaining machines to maintain the number of pods defined in the deployment.
It's this self-healing ability that makes cluster deployments so resilient. Similarly, load balancers distribute traffic across the pods and nodes, to automatically scale in response to increased usage.
Kubectl
Kubectl is a command line tool for interacting with the Kubernetes cluster services. Kubectl works by sending HTTP requests to the Kubernetes API server, allowing the user to control the cluster from the command line. In this episode we'll use kubectl to access and work with our cluster.
Helm
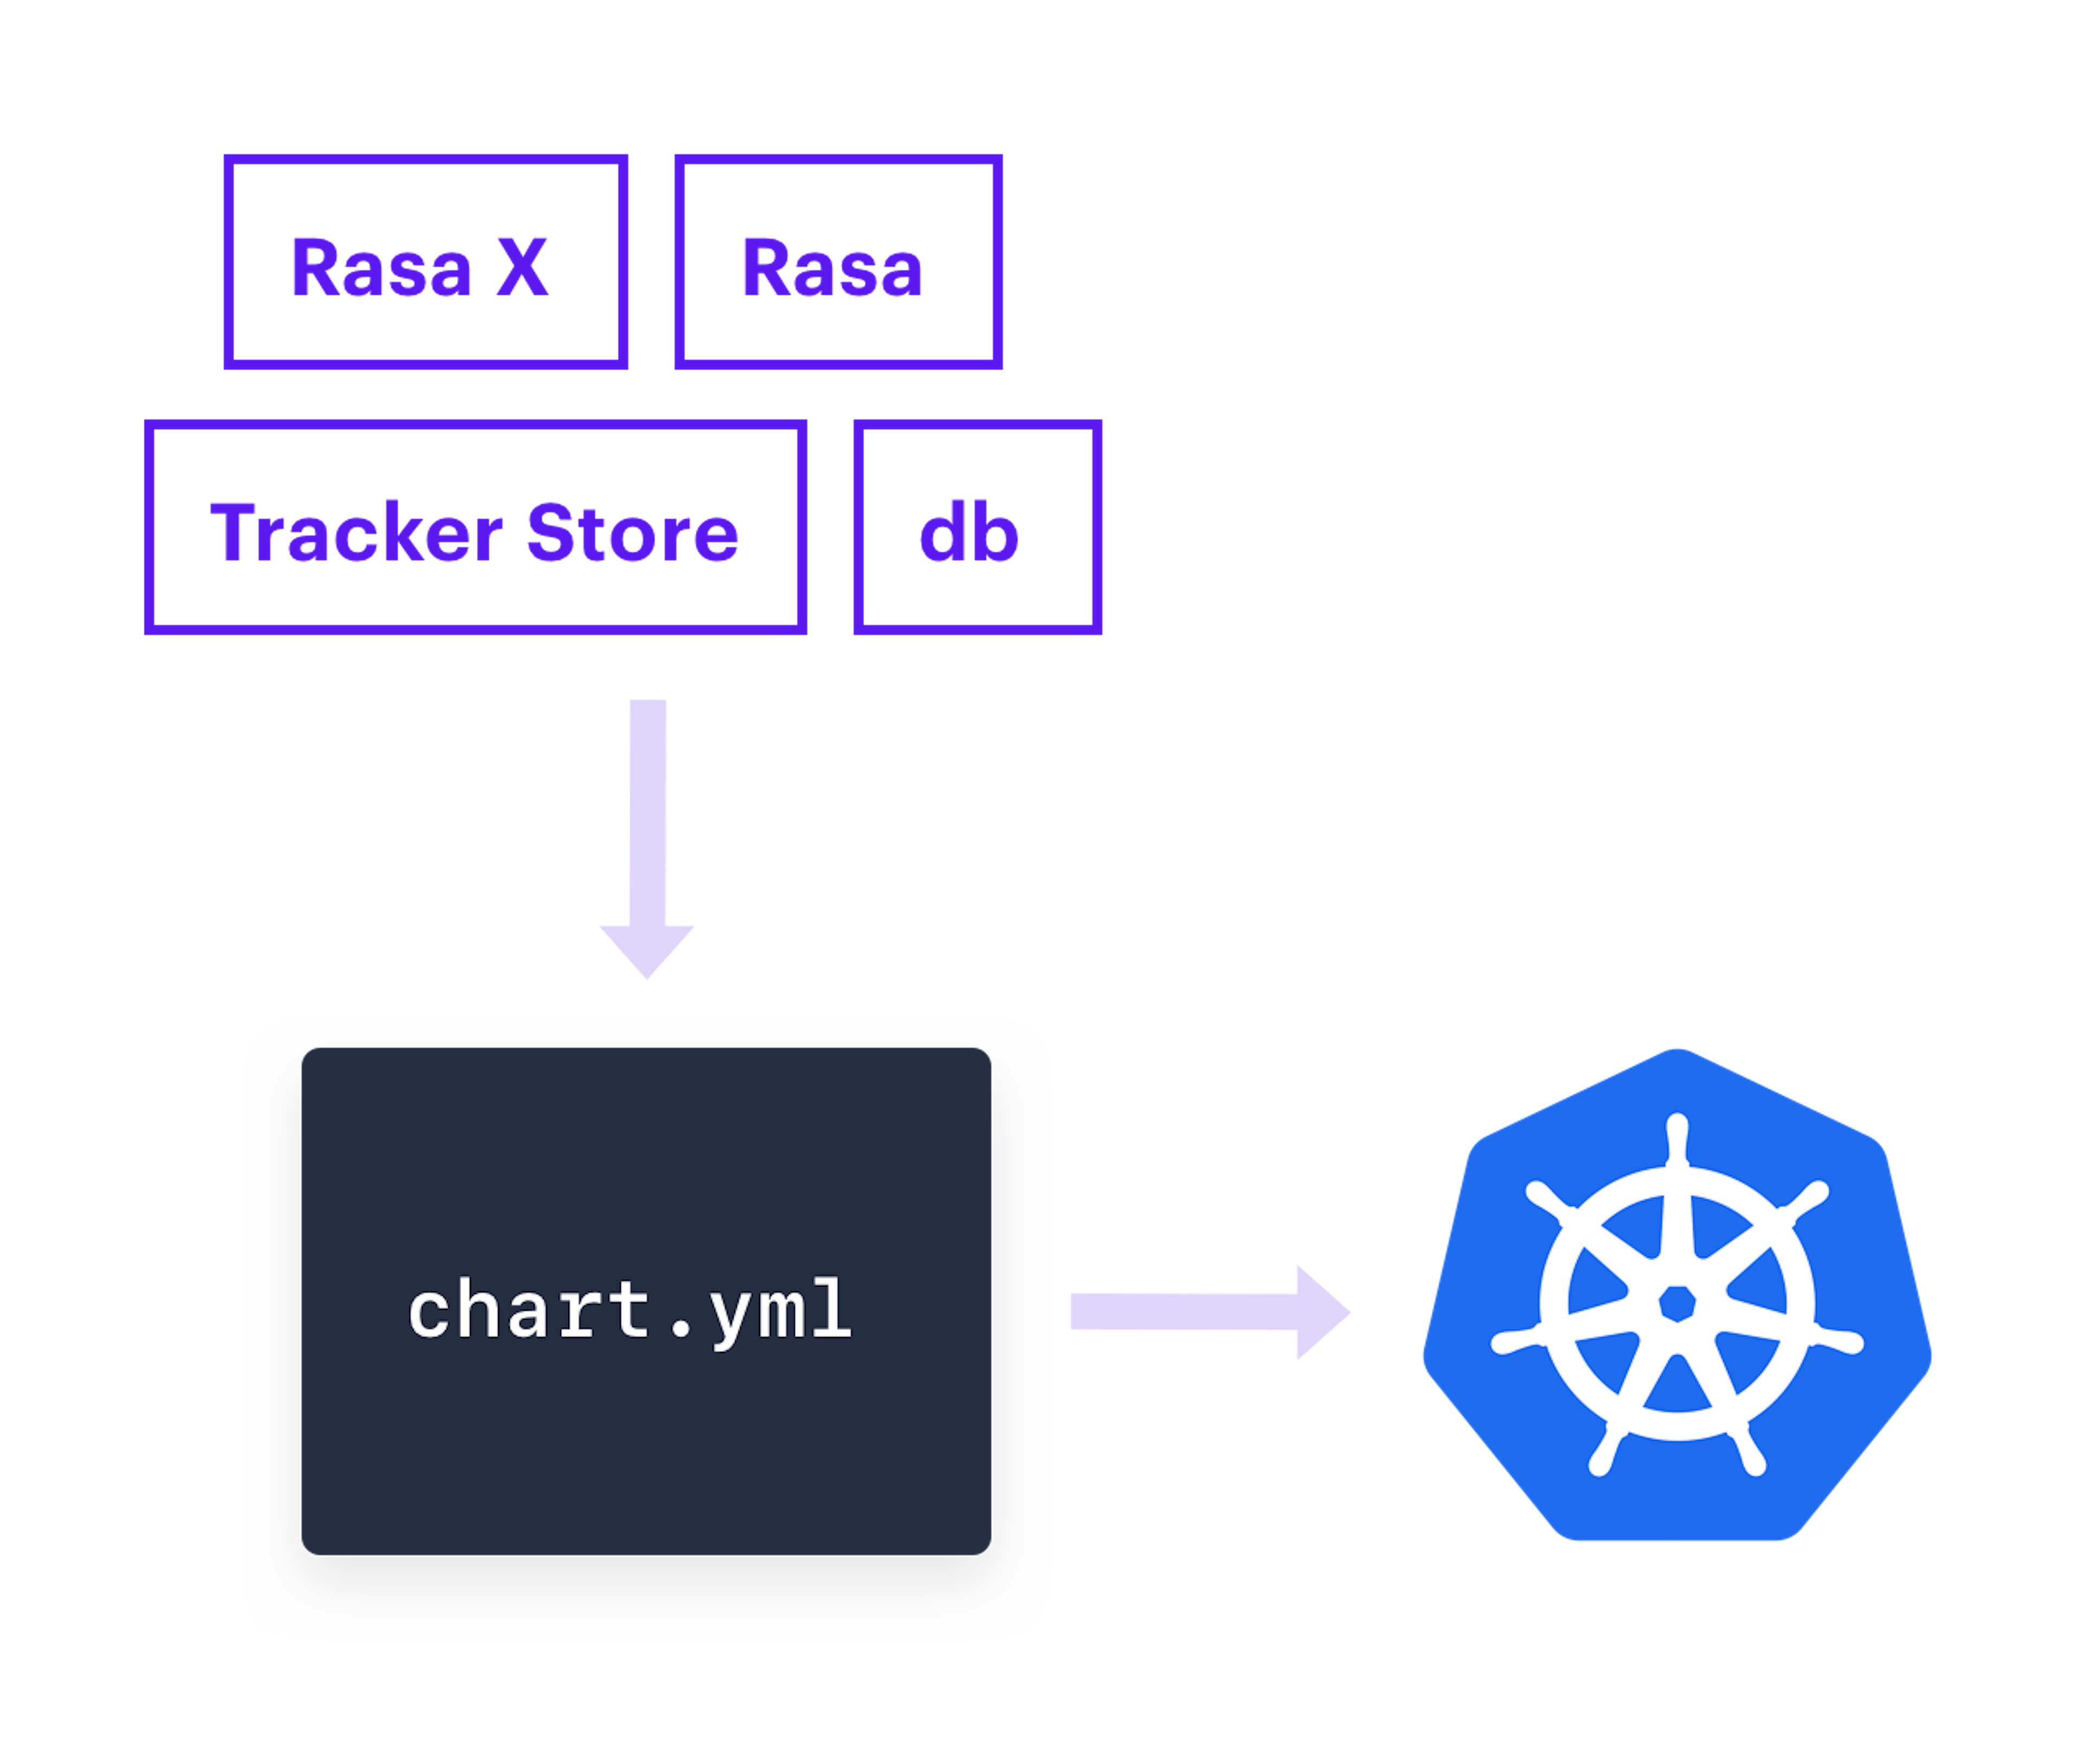
Helm is an application package manager for Kubernetes, and its purpose is to simplify the process of installing an application on a Kubernetes cluster. A Helm chart is a set of instructions for how an application should be installed on a cluster. It describes the application, including the services and packages it needs to run, and its default configuration values.
Rasa provides an open source Helm chart, which we'll use in this episode to install Rasa X on our cluster.
Prerequisites
Before beginning this tutorial, you'll need to install the following prerequisites on your local machine:
Create a new Kubernetes Cluster
In this tutorial, we'll use Google Kubernetes Engine to create a new cluster, but you can install Rasa on a Kubernetes cluster on any host you choose: Digital Ocean, Microsoft Azure, Amazon Elastic Kubernetes Service, or bare metal server.
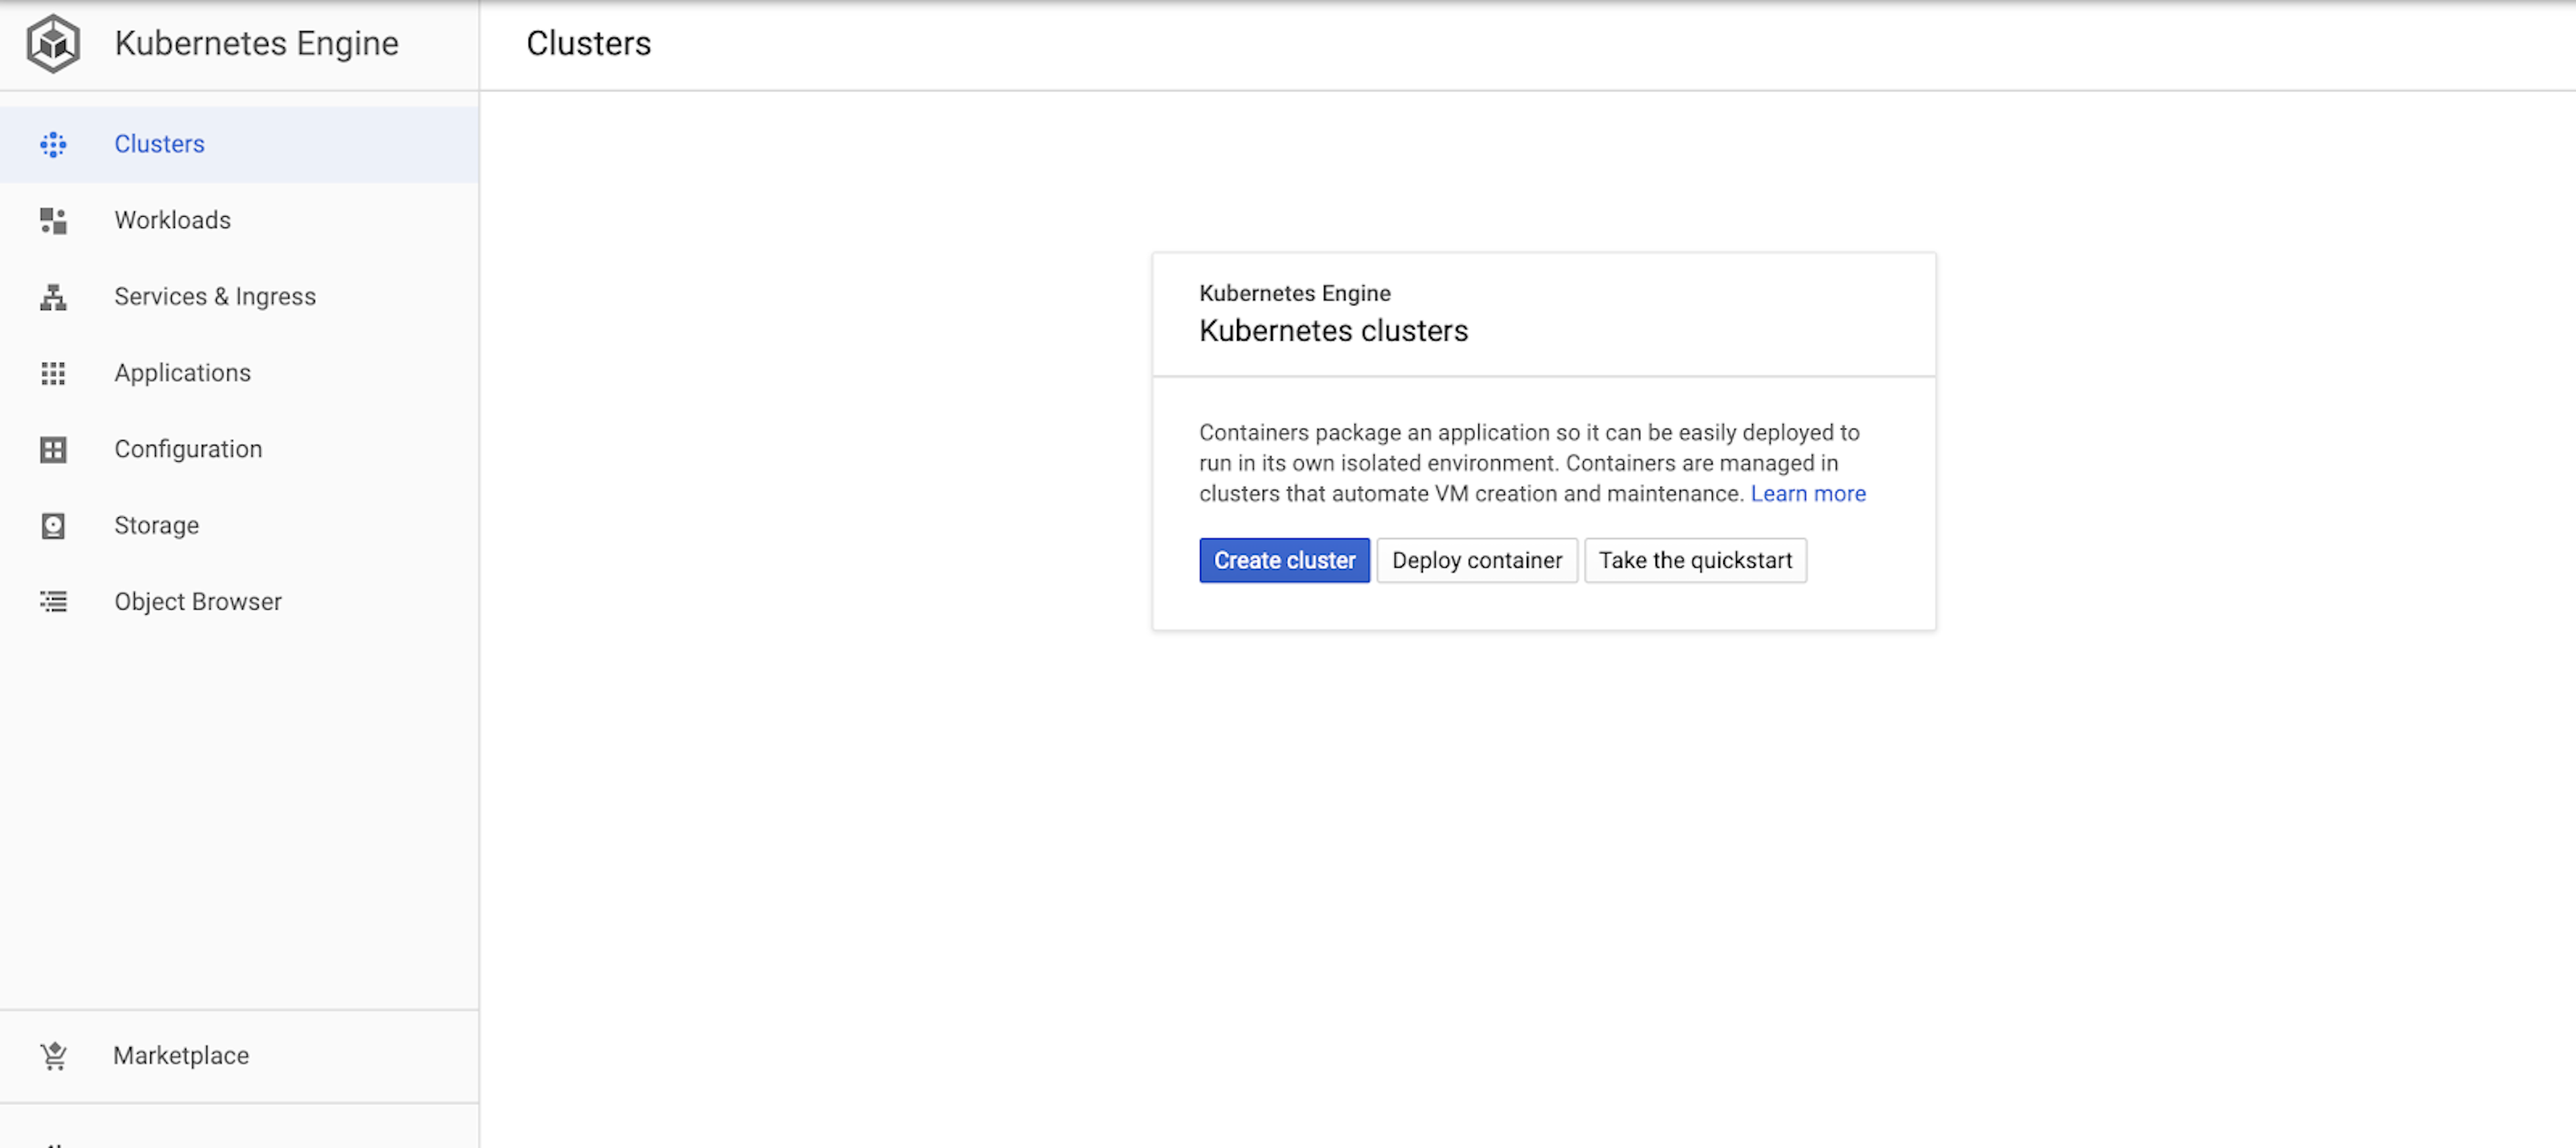
From the Google Cloud Console, navigate to Kubernetes Engine>Clusters. Click the button to create a new cluster.
You can change the location zone and the machine type if you wish, but in our case, we'll use the standard template configuration to create our cluster.
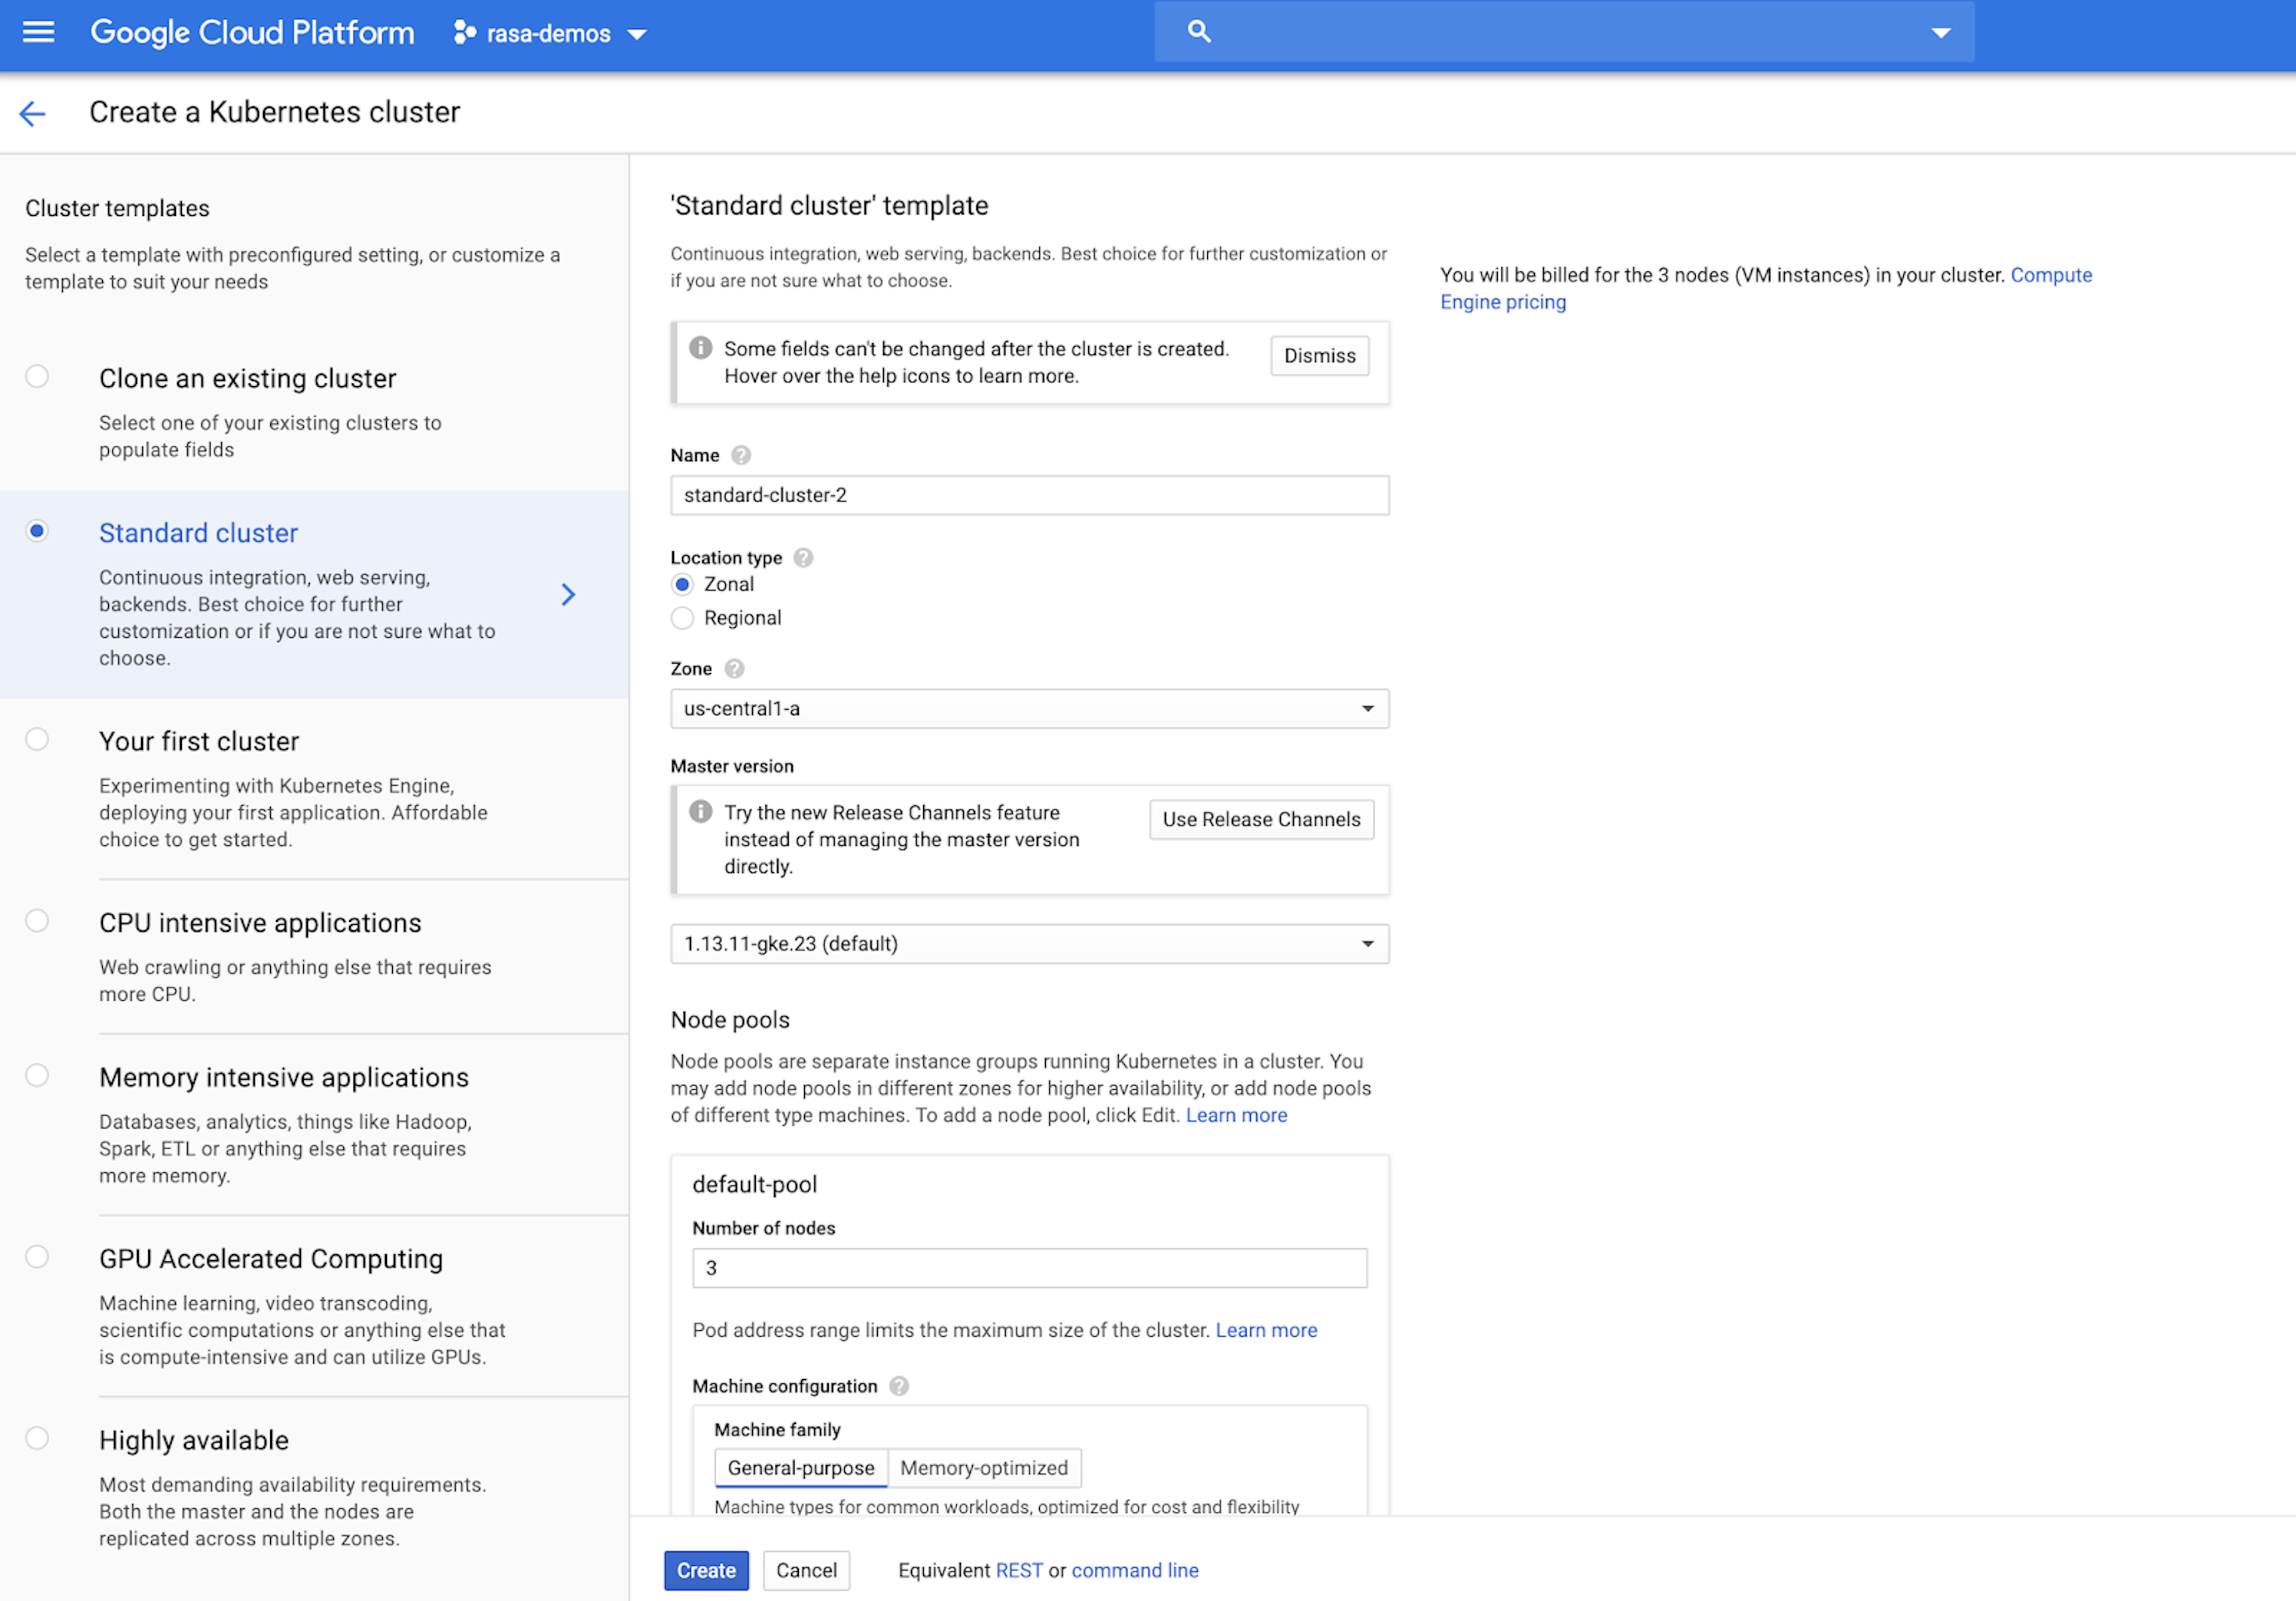
Click Create to spin up the cluster.
Connect to the cluster
To connect to the cluster, we'll run a gcloud SDK command in the terminal. Note that we'll be using the terminal on your local machine, although you can use the cloud terminal embedded in the browser if you wish.
Before running this command be sure to install the gcloud SDK on your computer. See the Prerequisites section for a quick link to the installation instructions.
Click the Connect button for your cluster and copy the gcloud command.
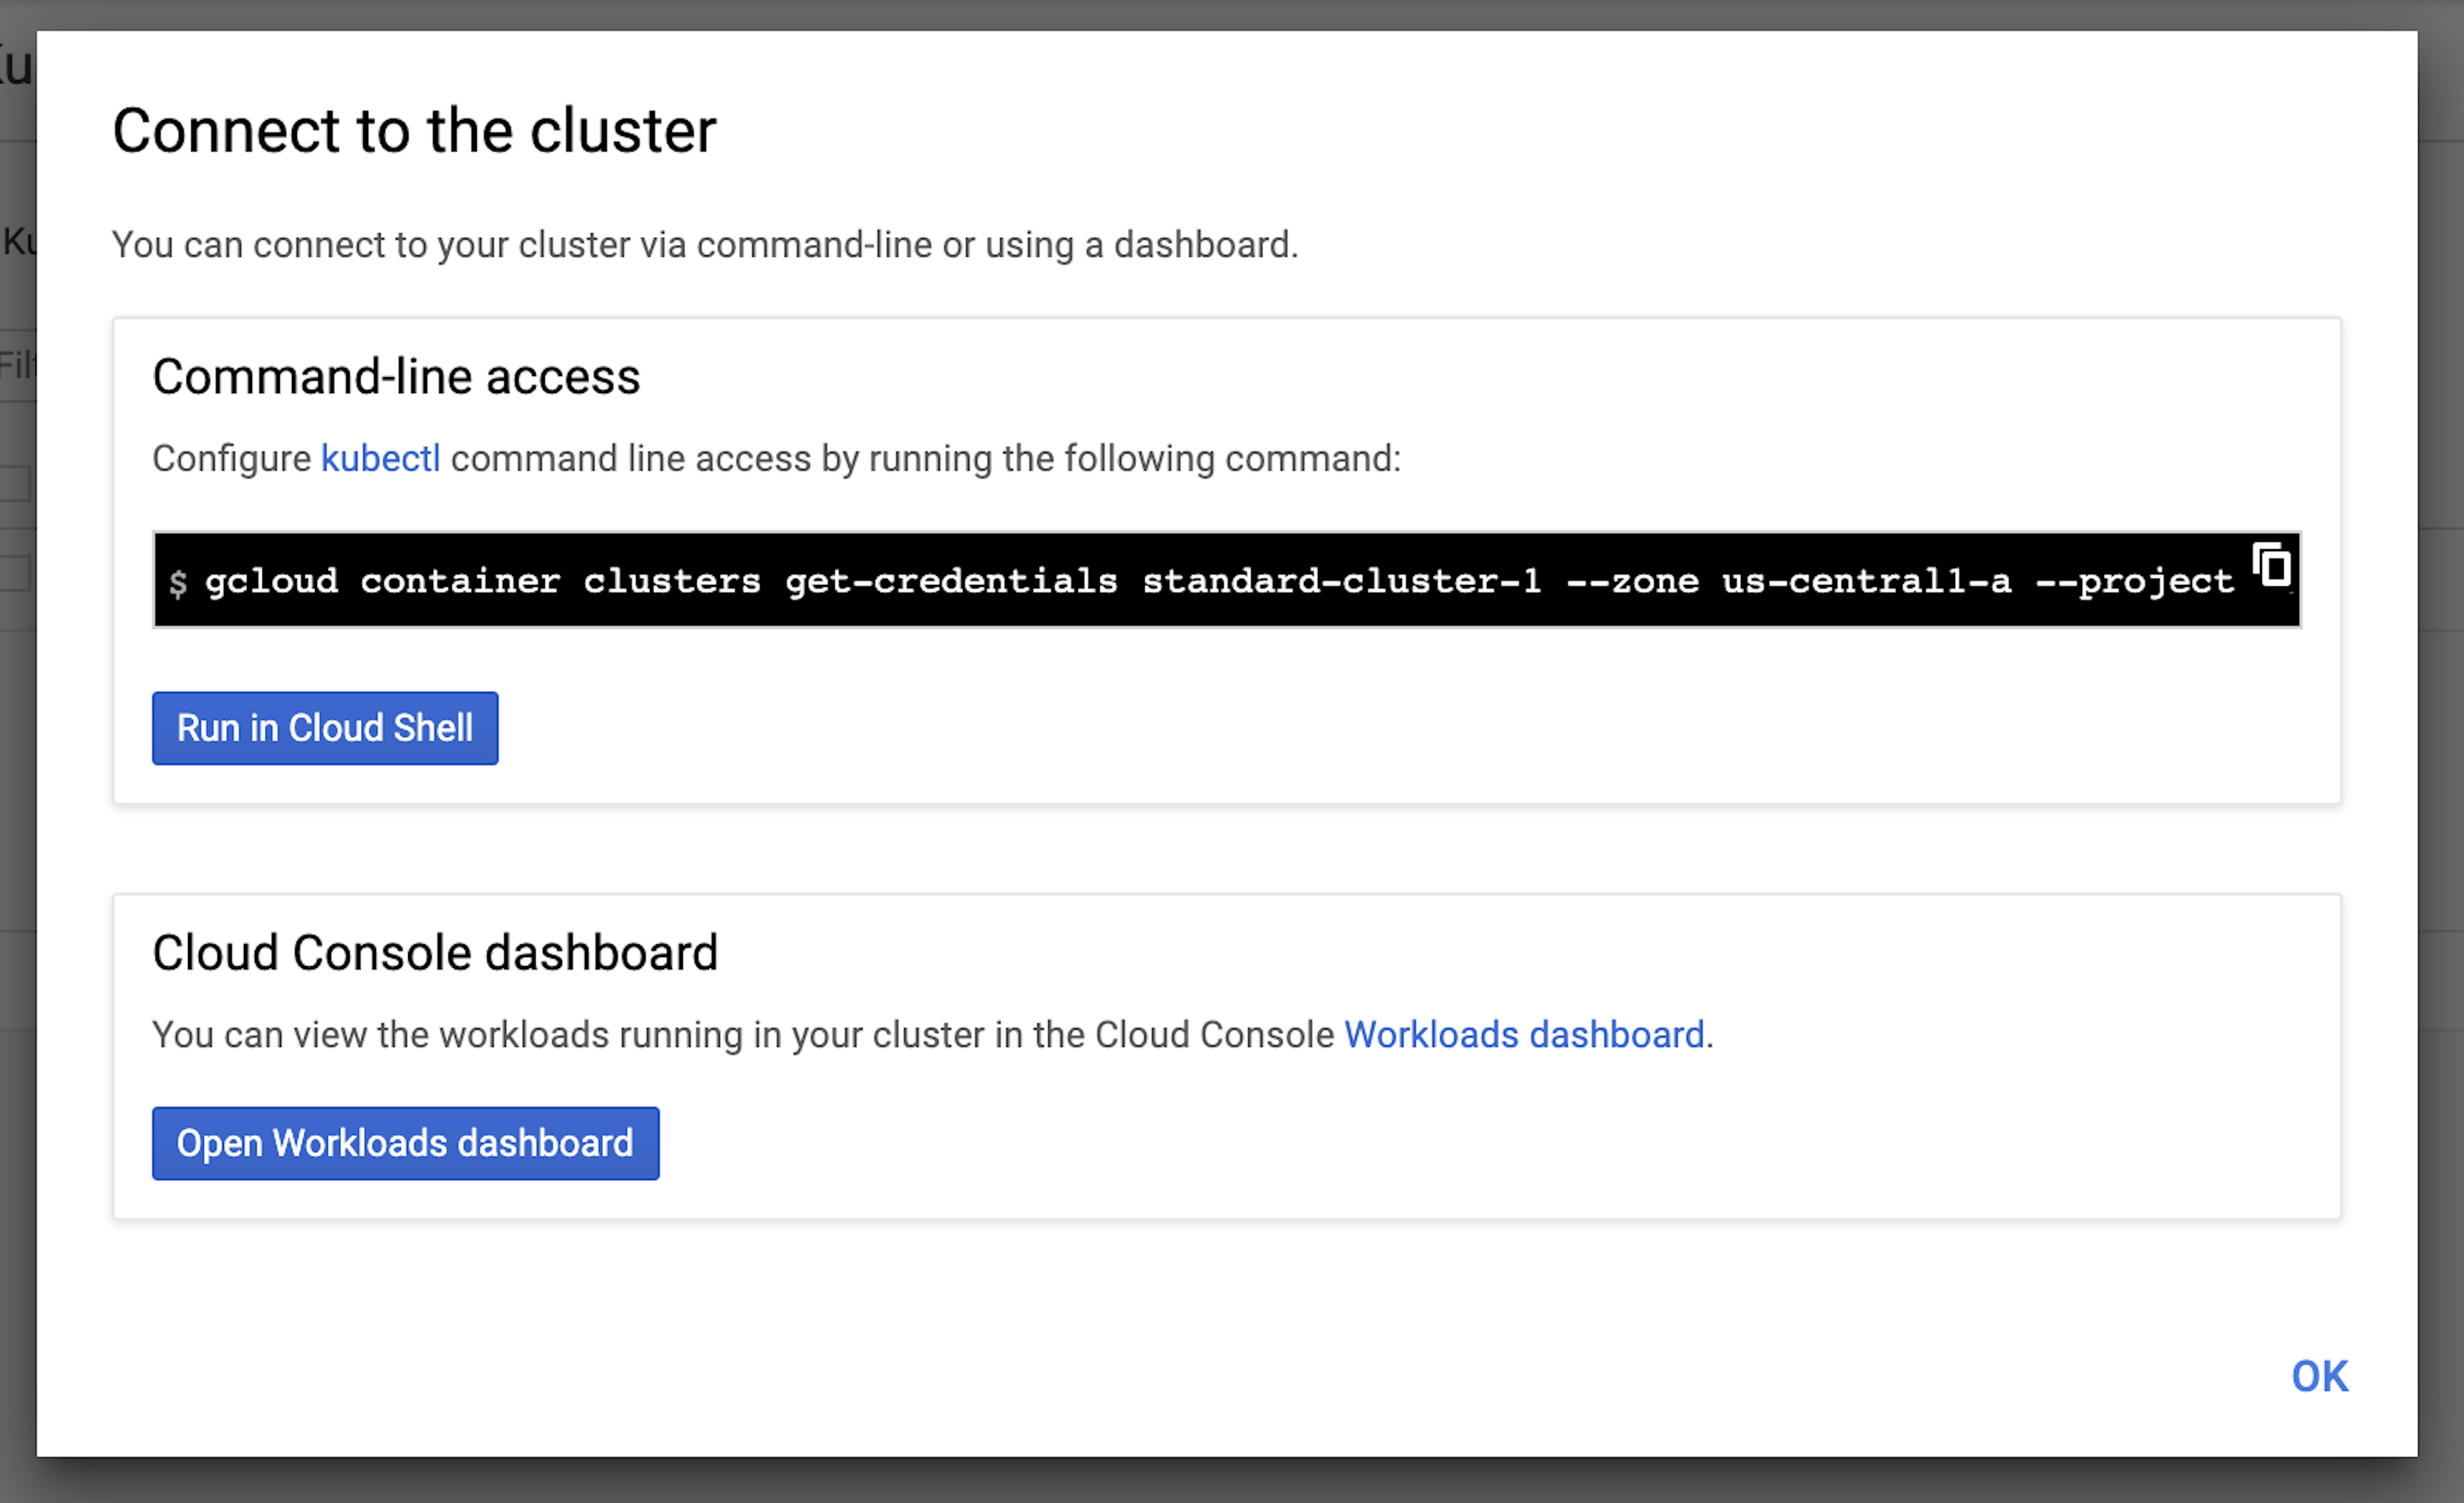
Run the gcloud command in your terminal, e.g.:
gcloud container clusters get-credentials standard-cluster-1 --zone us-central1-a --project replicated-test
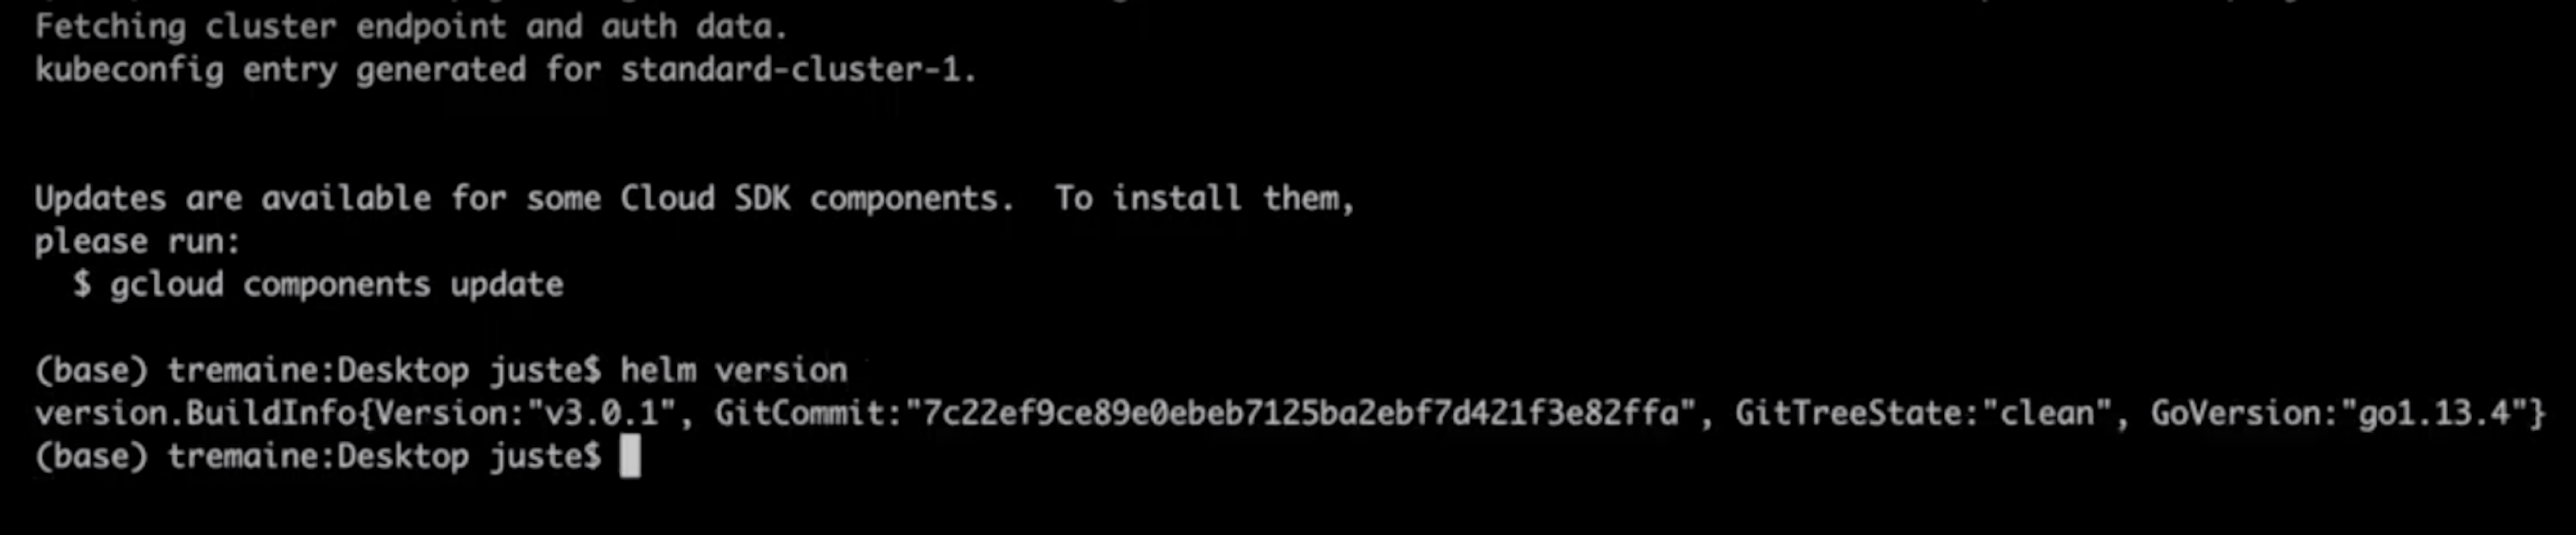
Once you've connected, check that Helm is installed by running the following command:
helm version
The minimum required version for this tutorial is 3.0.
Note: Received an error message saying helm is not a recognized command? Check the Prerequisites section of this tutorial for a link to installation instructions, or Mac users can run the brew install helm command.
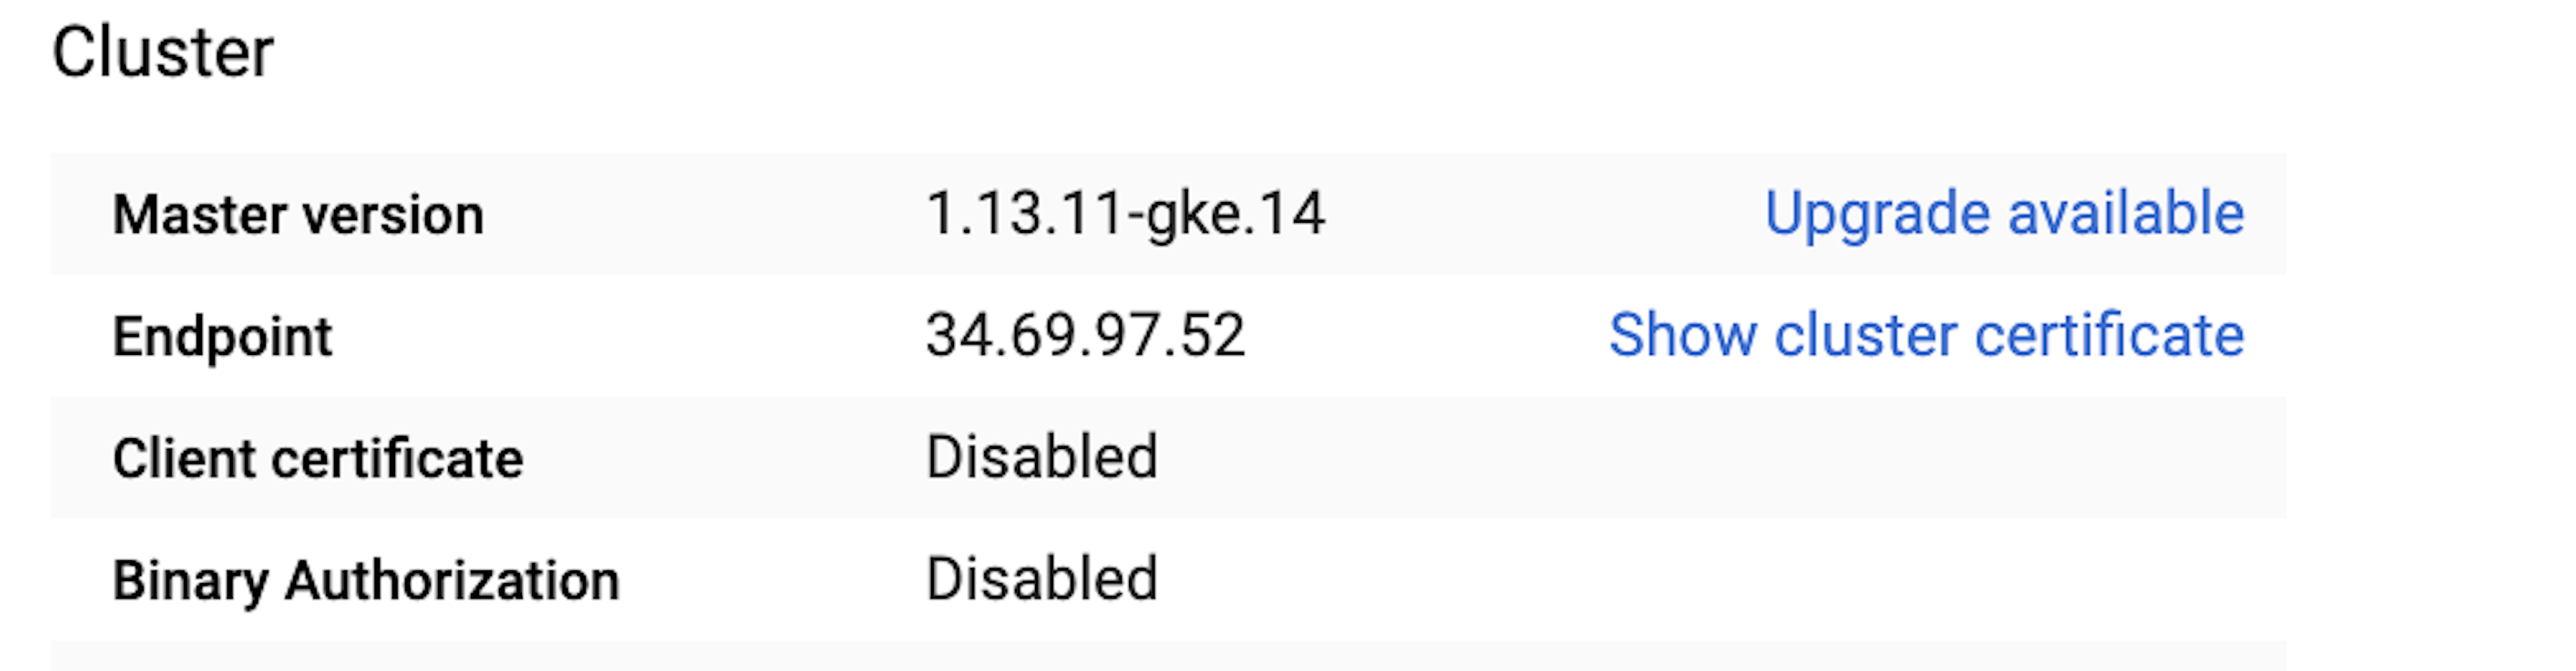
Next, check to make sure kubectl is connected to the cluster by running:
kubectl cluster-info
The IP address of the Kubernetes master should match the IP address in the cluster configuration in Google Kubernetes Engine.

Configure the Helm Chart
Run the following command to add the Rasa Helm Chart to your cluster. This prepares us to fetch the chart when we run the command to install later on in this tutorial.
helm repo add rasa-x https://rasahq.github.io/rasa-x-helm
Let's inspect the list of values you can configure in your deployment. Run this command:
helm inspect values rasa-x/rasa-x
Configuration is optional, and we'll go with the default values for most of these. However, for values you do want to change, you'll need to create an override file with a .yml extension. We'll do just that to set the username and password for Rasa X. Create a new file in the directory of your choice and call it values.yml:
touch values.yml
Open the file in the editor:
nano values.yml
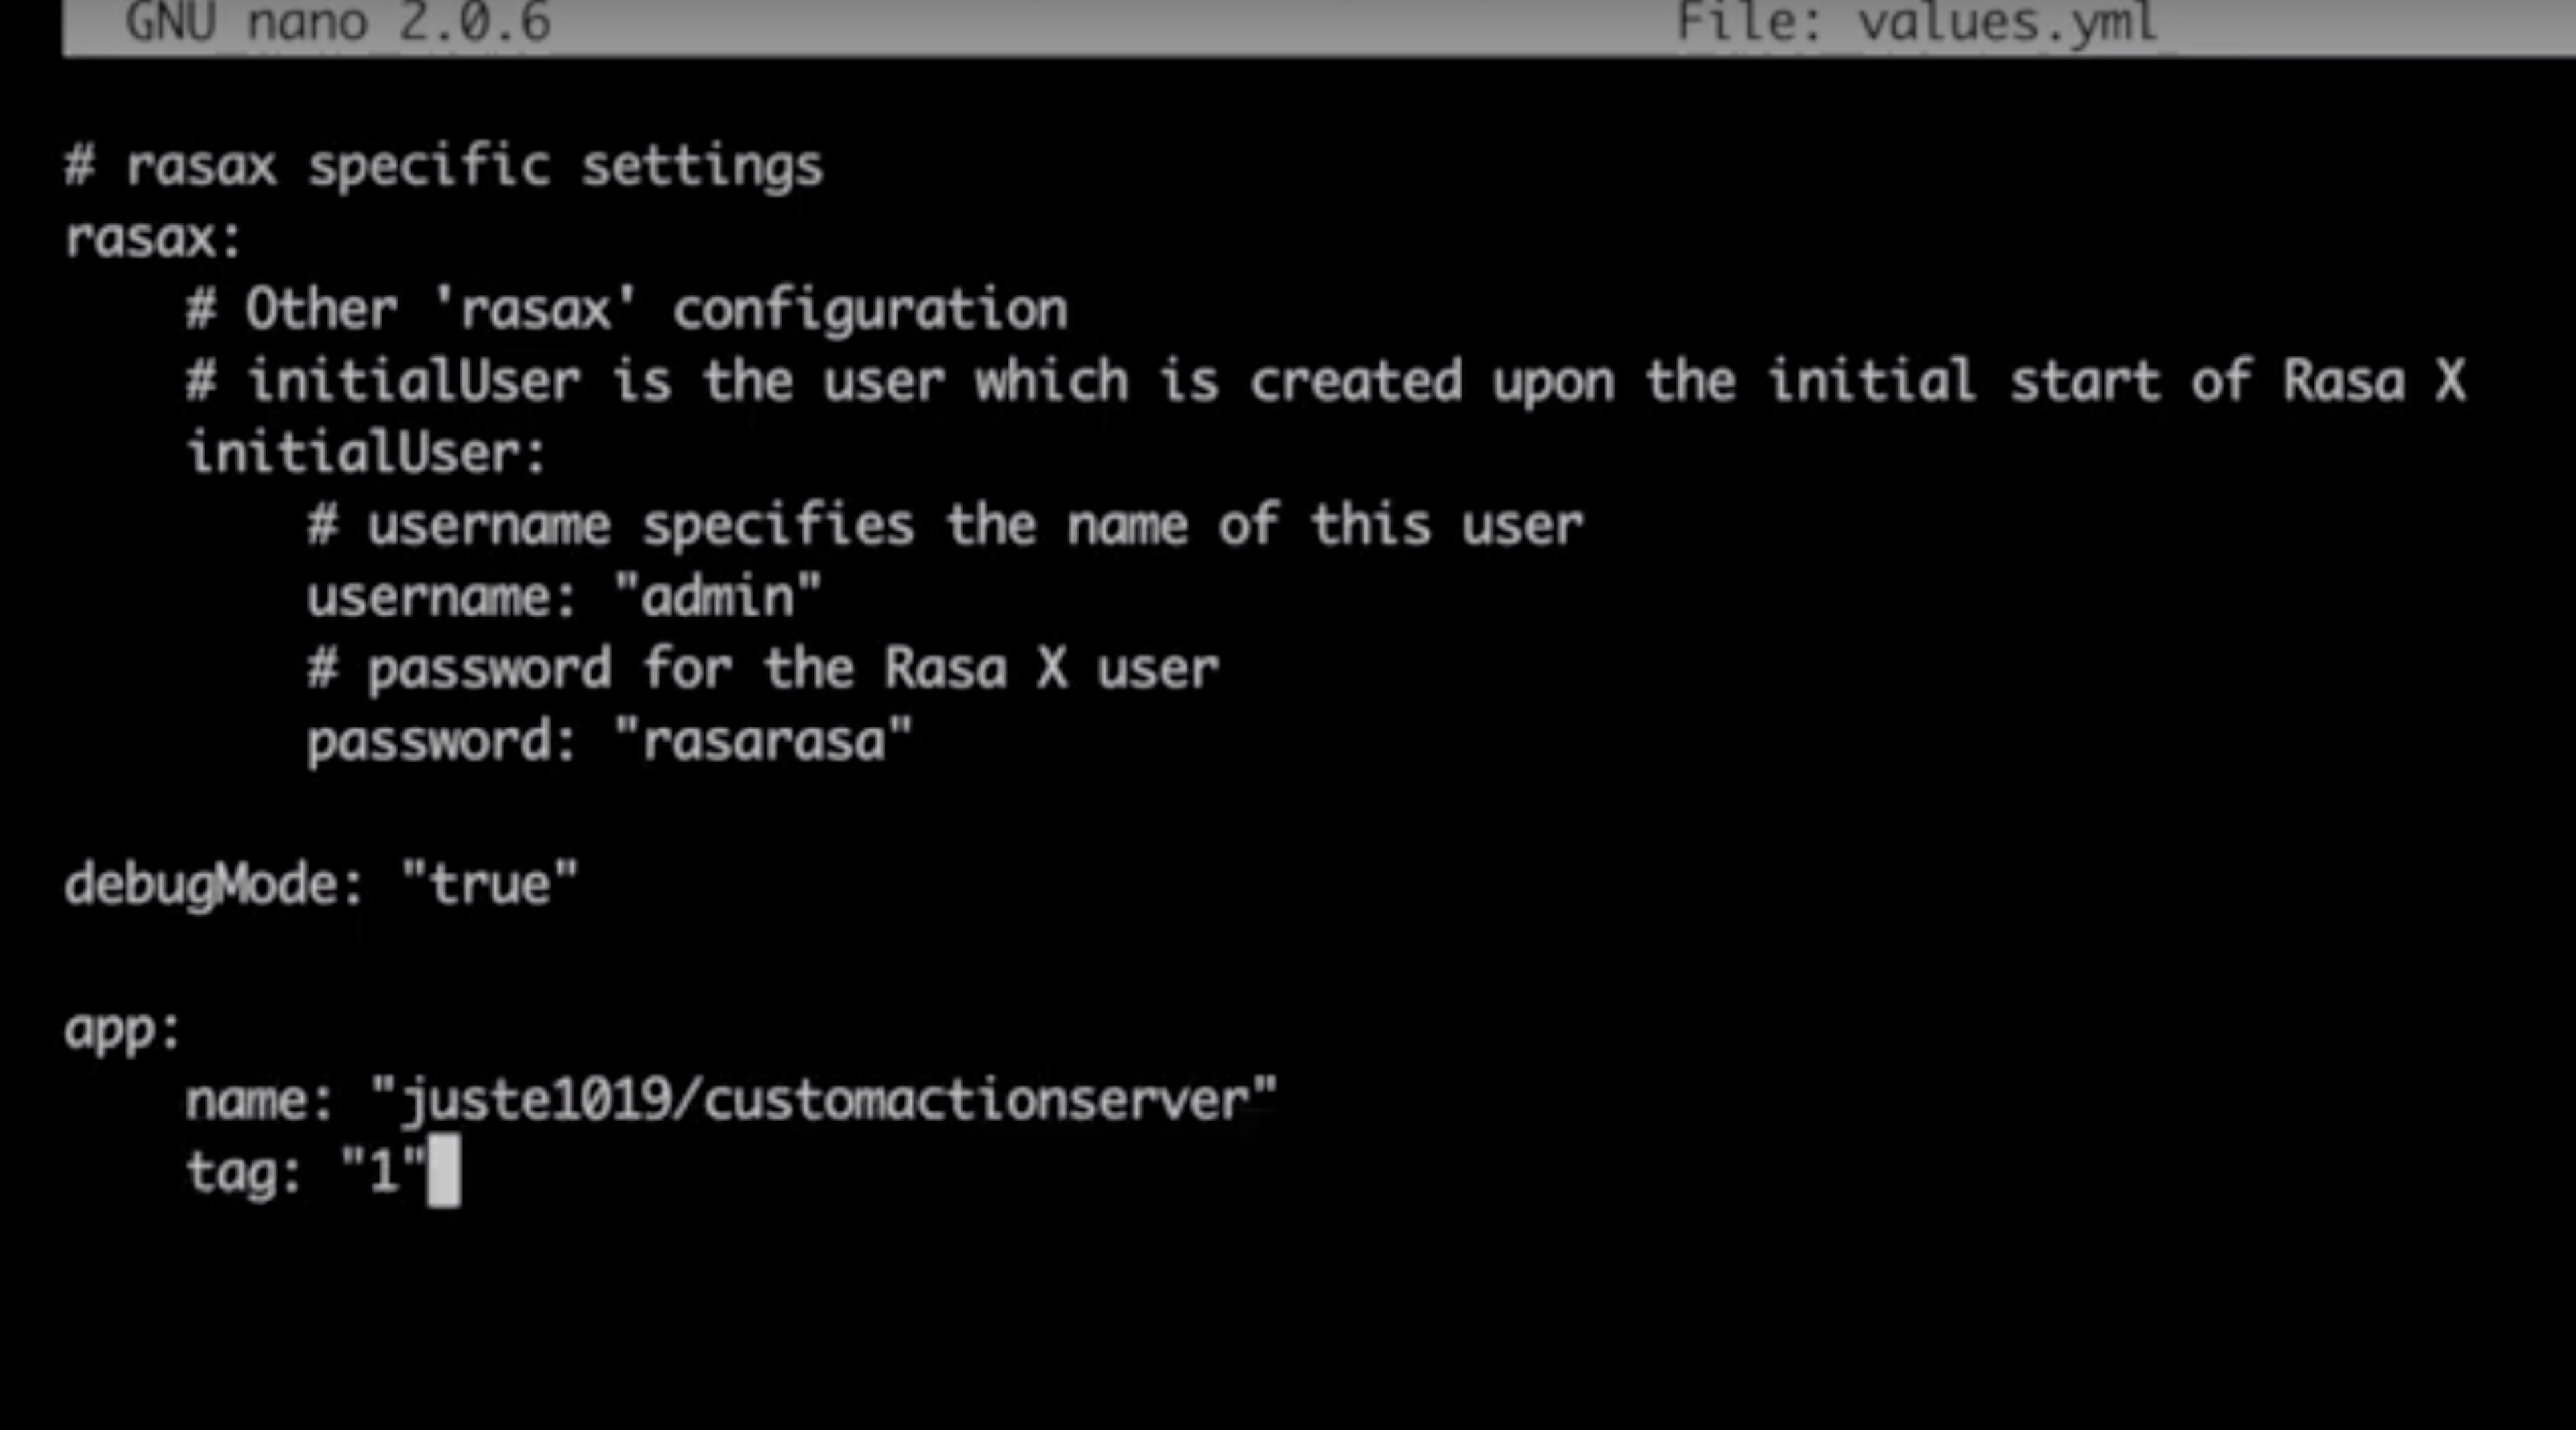
Paste the following into the file contents, replacing the <password> placeholder with an 8-character password of your choice.
# rasax specific settings
rasax:
    # Other 'rasax' configuration
    # initialUser is the user which is created upon the initial start of Rasa X
    initialUser:
        # username specifies the name of this user
        username: "admin"
        # password for the Rasa X user
        password: "<safe credential>"
On a new line, add the following to enable error logging:
debugMode: "true"

Save and close the file.
Set up the custom action server
Our medicare locator assistant requires a custom action server, so our next step will be to set up a container to run custom actions. We'll do that by creating a custom Docker image and referencing it in our cluster configuration.
Create a directory for your action server, anywhere on your local machine:
mkdir action_server
cd action_server
Inside the directory, create an init.py file and an actions.py file:
touch __init__.py
touch actions.py
nano actions.py
Paste the code from your assistant's actions.py file into the actions.py file that you just created, save, and close the file.
Create the Dockerfile
If your custom actions require any libraries that aren't included in the rasa-sdk image, you'll need to include them in a requirements.txt file. The medicare locator uses the requests library, so we'll need to specify that as a dependency in the image. Create the requirements.txt file:
touch requirements.txt
Open it in the editor:
nano requirements.txt
And paste the following into the contents:
requests~=2.21.0
Save and close the file.
Finally, we'll create a Dockerfile. The Dockerfile contains the commands needed to build the Docker image to our specifications.
Create a new file called Dockerfile and open it in the editor:
touch Dockerfile
nano Dockerfile
Paste the following into the file contents:
FROM rasa/rasa-sdk:latest

USER root

WORKDIR /app

COPY actions.py /app

COPY requirements.txt /app

RUN pip3 install -r requirements.txt

CMD ["start", "--actions", "actions"]

USER 1001
Let's break down what's happening in the Dockerfile. The first thing we do is specify the parent image. This is the image we'll use as a starting point, before adding the specifications custom to our application on top. In this case, we'll use the latest version of the rasa/rasa-sdk image as the parent.
Next, we'll set the user group permissions. If your custom action contains any external libraries, like ours does, you may need to set the USER group to root.
Then, we specify the working directory, which we'll set to app. The lines that follow add the necessary files to the directory: requirements.txt and actions.py. We install the necessary dependencies, and then run the command to spin up the custom action server, referencing the module of our custom action as a parameter. Since we have actions.py in our working directory, all we have to do is reference the module name actions. Lastly, we re-set the user group to default permissions.
Save and close the file.
Build and push the image
Now, we're ready to build the image and push it to a container registry. We'll use Docker Hub in this tutorial, but you can use the image registry of your choice.
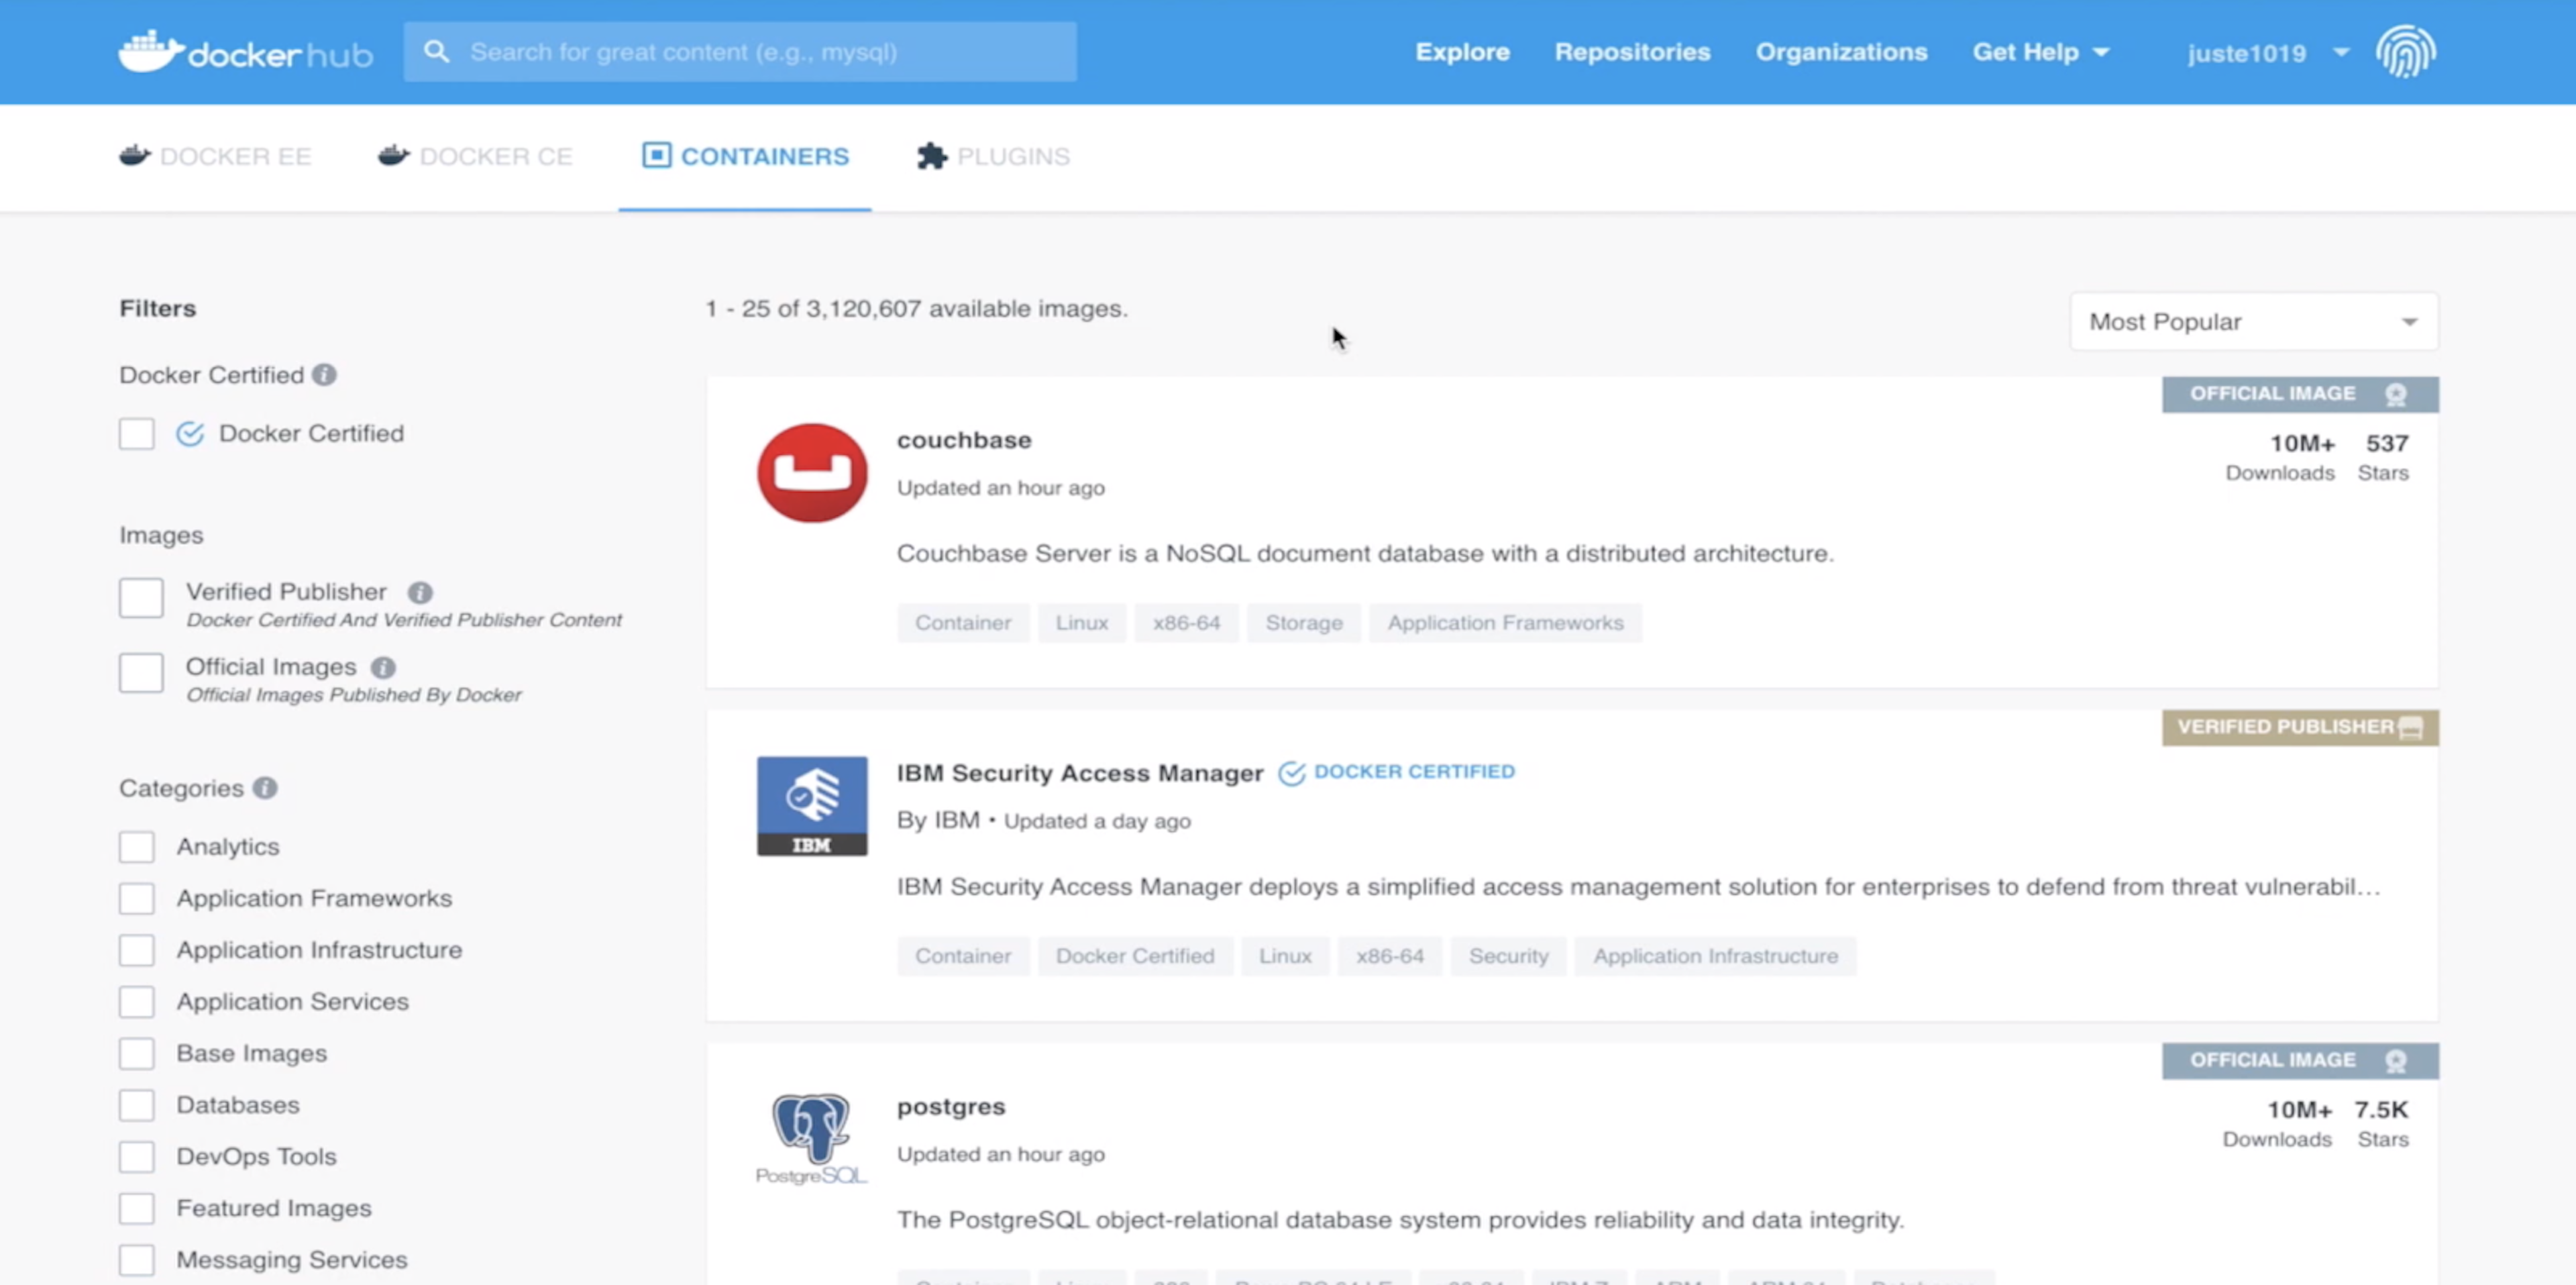
Make sure you're logged into your Docker Hub account (see Prerequisites for a quick link to set this up) and run the following command to build the image:
docker build . -t <dockerusername>/<imagename>:<tag>
The period in the command means that the Dockerfile is in our current directory. Be sure to replace the <dockerusername> placeholder with your Docker Hub username and <imagename>:<tag> with a name and tag, something like customactionserver:1
Once the build finishes, we can test it by running:
docker images
docker run <image ID>
Once we've confirmed it's running, we're good to push the image to Docker Hub with the following command:
docker push <dockerusername>/<imagename>:<tag>
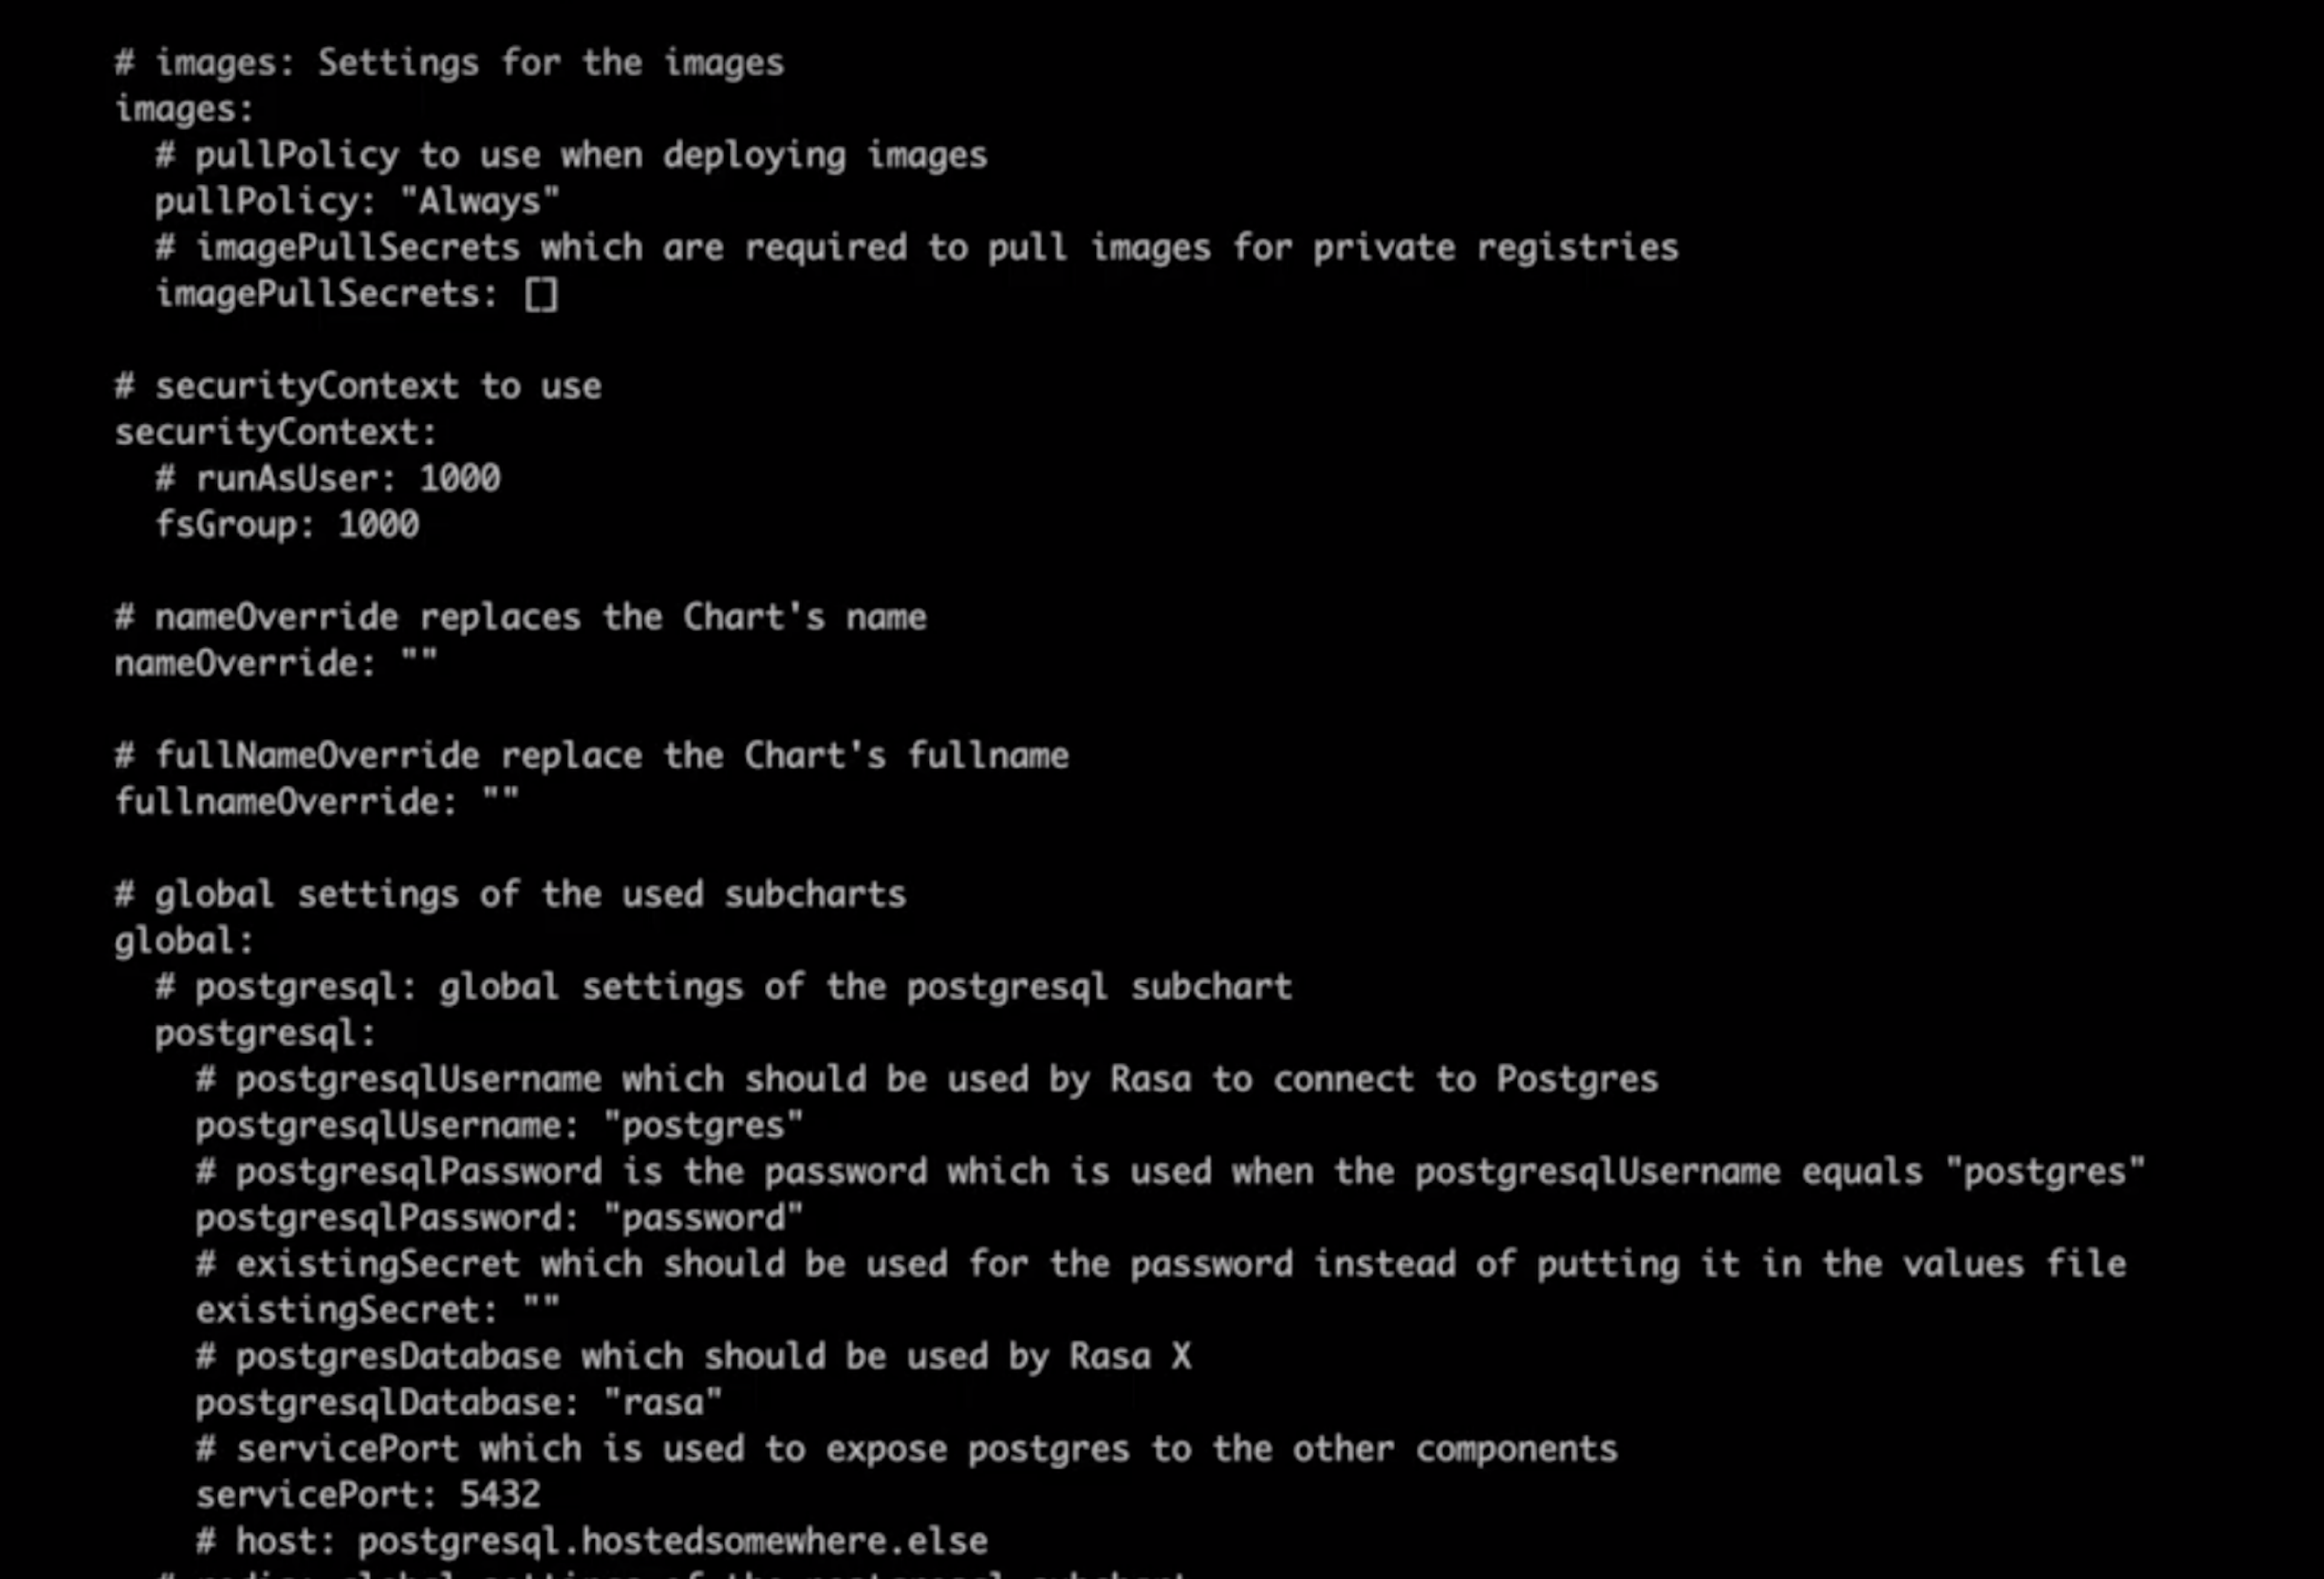
Pushing the image to the registry makes the image available to reference in our values.yml file. Here, we're making the image publicly available on Docker Hub, but you also have the option to make the image private. To access a private image, you'll need to configure an image pull secret, following the Kubernetes guide. You can then add the secret to your values.yml file:
# images: Settings for the images
images:
  # imagePullSecrets which are required to pull images for private registries
  imagePullSecrets:
  - <name of your pull secret>
Since we're using a public image, we can skip creating the image pull secret and simply reference the image using this configuration in the values.yml file:
app:
  name: "name of your image"
  tag: "tag you want to use"
Deploy Rasa X
We recommend installing Rasa X in a separate namespace on your Kubernetes cluster. Namespaces are a way to divide a cluster among multiple users.
Create a new namespace called rasaxkube with this command:
kubectl create ns rasaxkube
Then, install Rasa X with these two commands:
helm repo update
helm install --generate-name --namespace rasaxkube --values values.yml rasa-x/rasa-x
Here, we're pointing to the override YAML file, values.yml, which is in our current directory.
Once the installation is complete, you can check the status of the pods by running:
kubectl get pods --namespace=rasaxkube
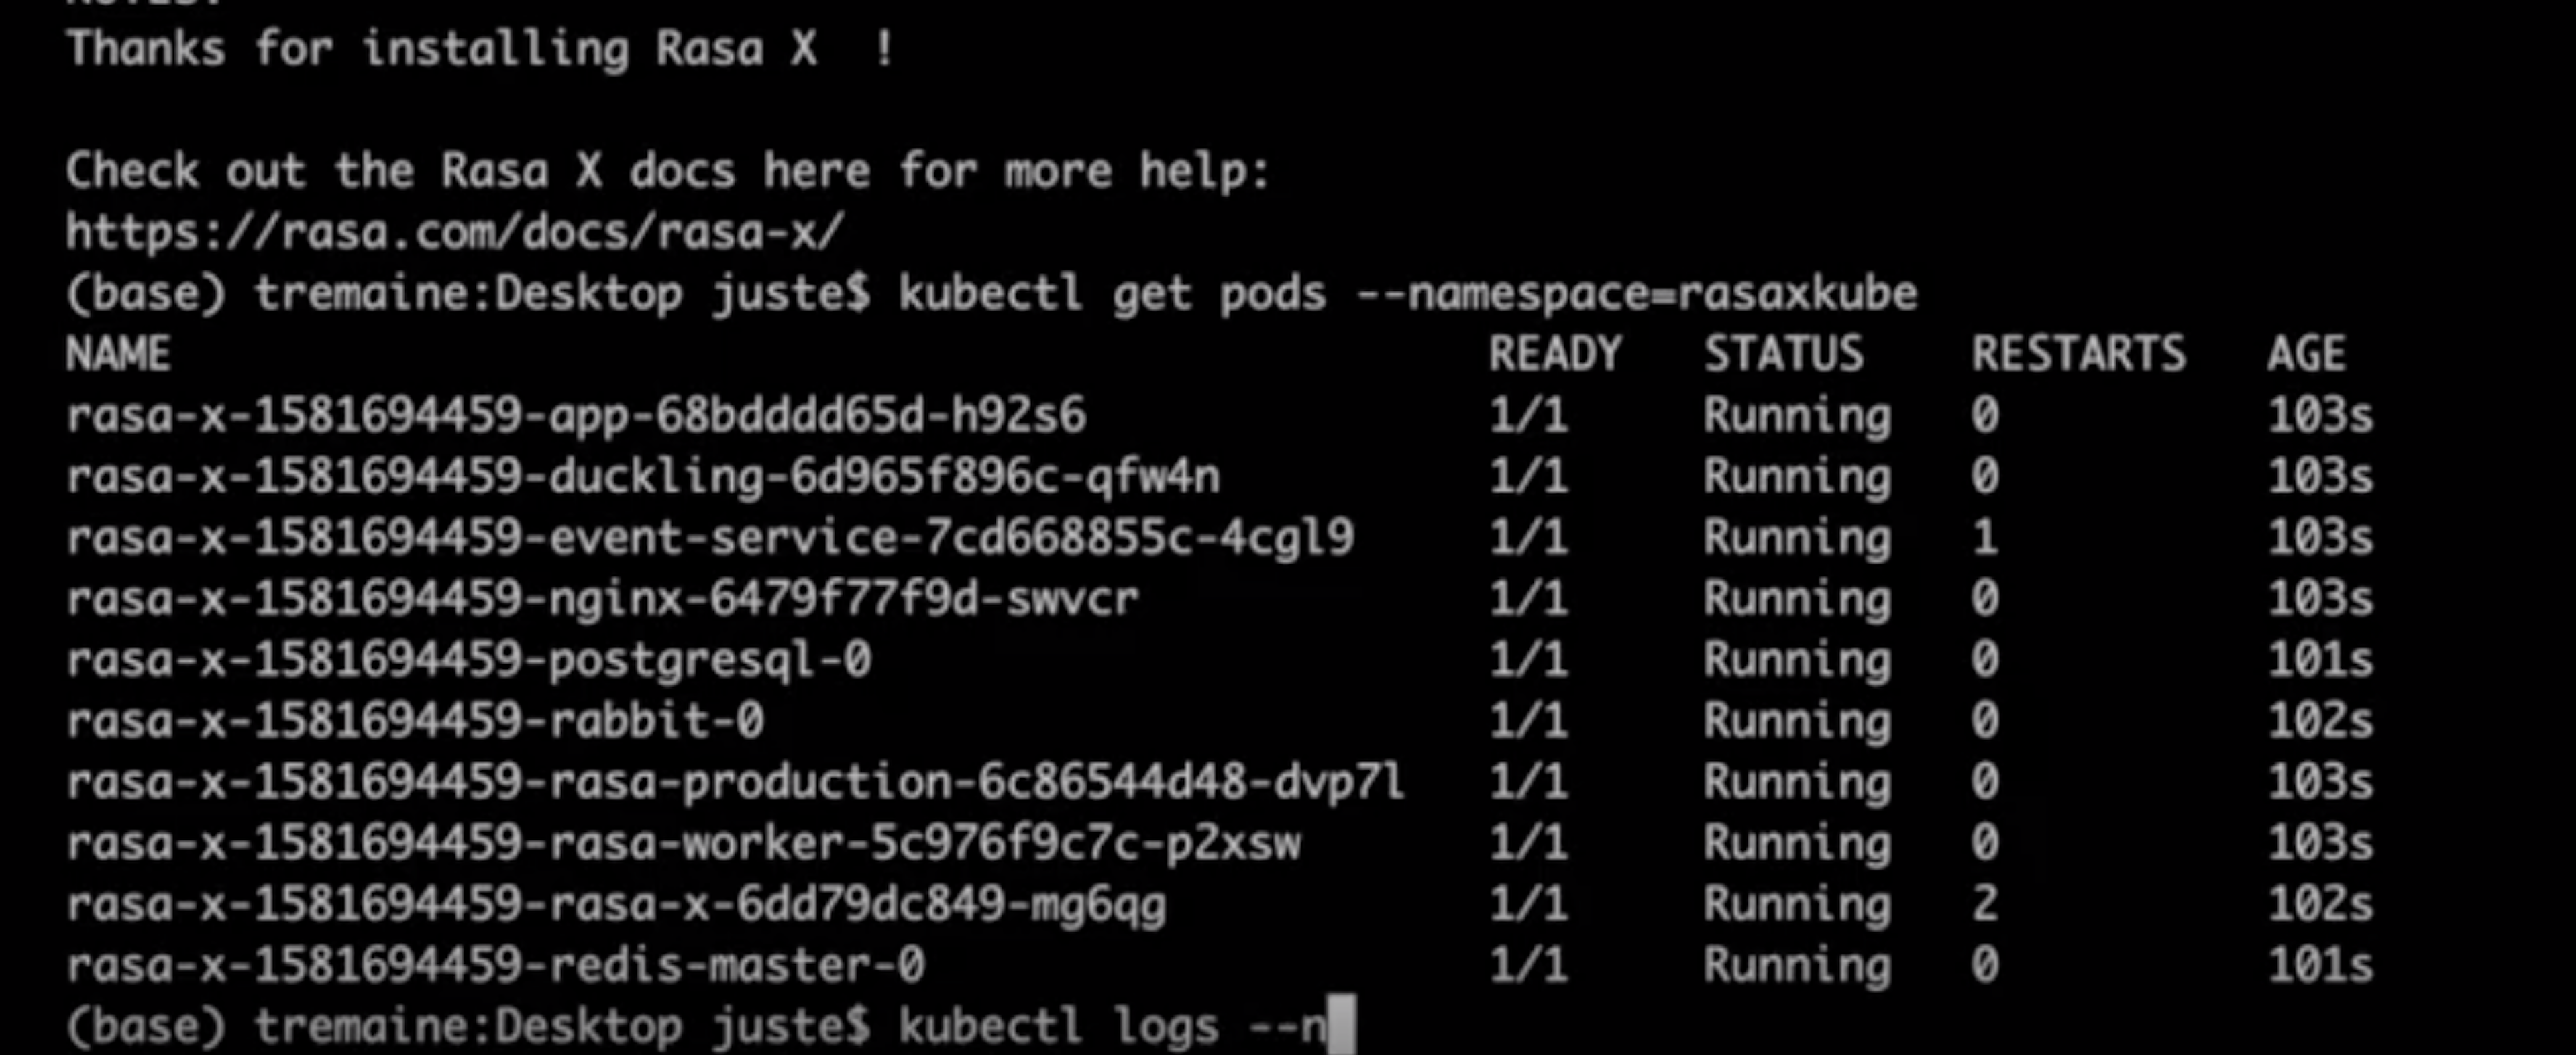
If you notice that some of the pods are restarting or pending, you can inspect it further by requesting the logs for that pod, for example:
kubectl logs rasa-x-1580751734-app-5d4c58c545-dswxn
Rasa is now up and running on the Kubernetes cluster! To access it in the browser, find the IP address by running:
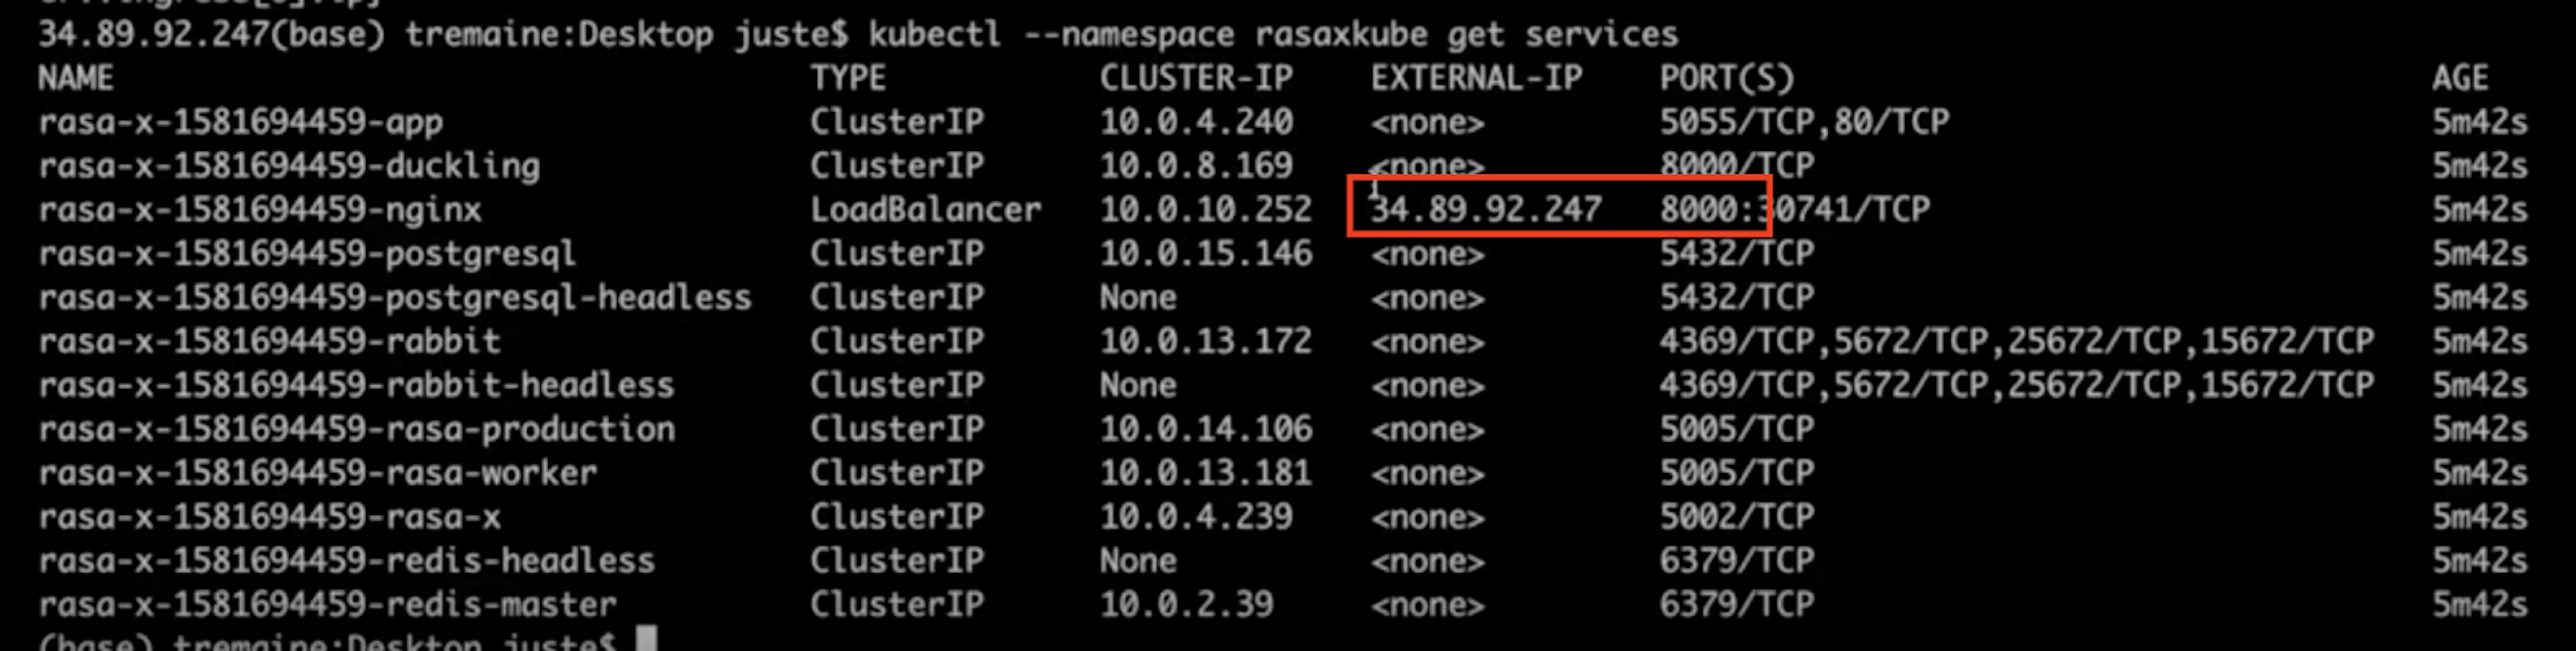
kubectl get services
Look for the Load Balancer service, which lists an external IP address, along with the port the service is running on. Here, it's 34.89.92.247:8000
Go to the IP address in your browser with the port number appended (remember to reset the protocol to http), and you should now be able to log in using the password you set in your values.yml file.

Next steps
Now that Rasa X has been deployed on Kubernetes, you can go through the process we outlined in earlier episodes to finish setting up your assistant. That includes:
- Connecting integrated version control
- Configuring DNS
- Installing an SSL certificate
- Connecting messaging channels.
Refer to the documentation for your cloud provider to point a domain name to your cluster. You can find the docs for Google Kubernetes Engine here.
We recommend enabling SSL on your cluster's ingress controller or the load balancer serving the ingress. Check the documentation for your cloud host for detailed instructions. You can find the docs for Google Kubernetes Engine here.
When running your assistant on Kubernetes, messaging channels are configured by adding credentials to the values.yml override file, in this format:
# rasa: Settings common for all Rasa containers
rasa:
  # additionalChannelCredentials which should be used by Rasa to connect to various
  # input channels
  additionalChannelCredentials: |
    socketio:
      user_message_evt: user_uttered
      bot_message_evt: bot_uttered
      session_persistence: true/false
Conclusion
In this episode, we learned how to deploy Rasa X on a scalable cluster environment, using Kubernetes. This setup provides the reliable infrastructure our assistant will need to handle increased traffic and usage in production.
And although the deployment is different, the process for improving the assistant is the same process we covered in episode 10: review conversations to identify places where the assistant performs well or not so well, and make updates based on your findings.
And with that, we conclude the Rasa Masterclass. You can watch our Rasa Masterclass Recap episode to review all of the topics we covered over the course of the series.
This is the end for the Rasa Masterclass, but it's just the beginning of our efforts to help developers build great contextual assistants. Let us know what topics you'd like to see covered in future tutorials by commenting on the Rasa Masterclass Recap video.
Additional Resources
- Google Kubernetes Engine documentation (Google Cloud Platform)
- What is Kubernetes (Kubernetes docs)
- Deploy in a Cluster Environment (Rasa docs)
- Build and Run Your Image (Docker docs)
- Helm Quick Start (Helm docs)